2 - Preview the Project in Data Lineage
This content is also available at learn.palantir.com ↗ and is presented here for accessibility purposes.
📖 Task Introduction
Your Foundry environment contains a reference implementation of the pipeline you’ll be building in this training track, and we’ll start by accessing it and previewing the steps in the Data Lineage application.
🔨 Task Instructions
- Open a new data lineage graph from the Apps section in the Foundry sidebar
- Click on the magnifying glass on the top right of the lineage graph and conduct a search for the folder
/All projects/Foundry Training and Resources/Example Projects - Click into the following three folders and add all datasets in subfolders (via the button at the bottom of the screen) to your lineage graph.
[Datasource] Passengers[Datasource] Flight Alerts[Transform] Flight Alerts by Country
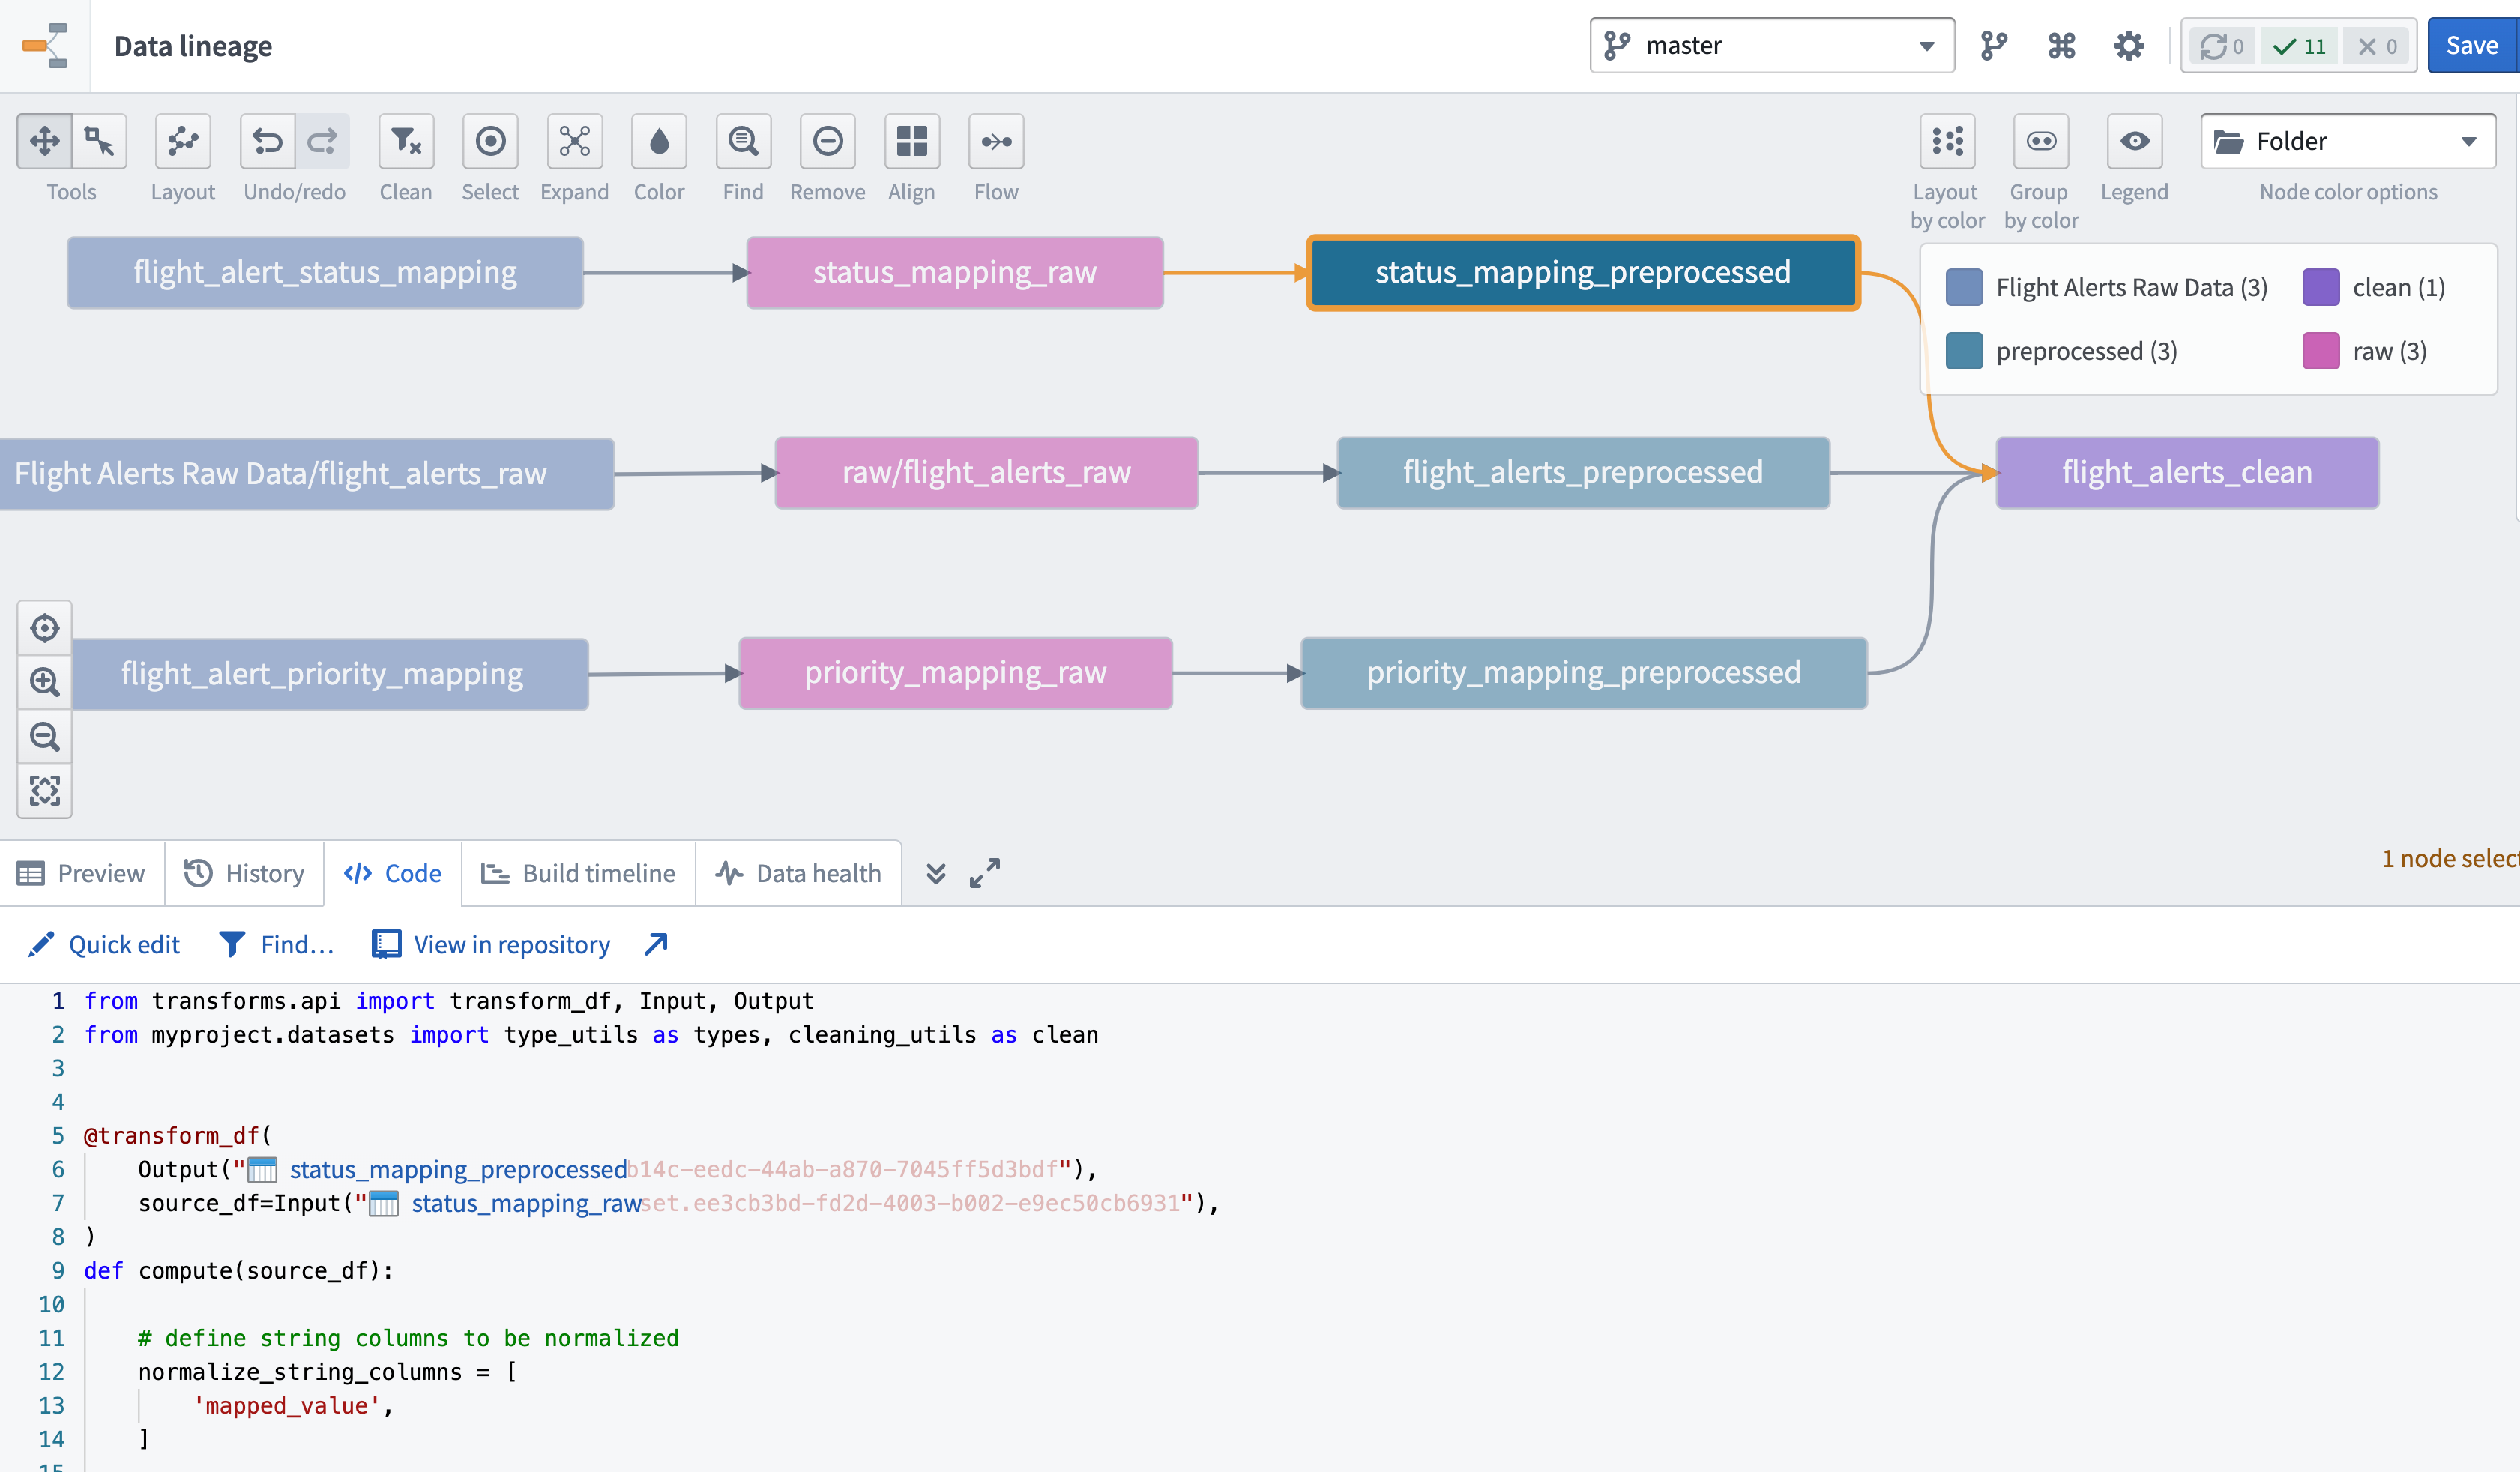
- In the top right of your newly created Data Lineage graph, click into the Node color options in the top right and choose Folder. Hover over the colors in the legend to see the entire path for each color. In this tutorial, you’ll be generating the outputs in the “raw” and “preprocessed” folders; you’ll create the “clean” outputs later.
- The five leftmost datasets named *_raw are the original datasets that you'll be copying into your project via a code repository.
- Preview some of the code you’ll be authoring by clicking on one of the *_preprocessed nodes and then on the
</> Codetab along the bottom left of the Data Lineage application. This will open a preview of the code used to generate the selected node.