3 - Simulate your Datasource
This content is also available at learn.palantir.com ↗ and is presented here for accessibility purposes.
📖 Task Introduction
Each stage in your project may need multiple batch pipelines built with Pipeline Builder where you develop and maintain the data transformations in a structured setting. Since this tutorial does not actually connect to an external source, you’re going to simulate one by creating copies of three raw files into your Datasource Project.
🔨 Task Instructions
-
Proceed to the Datasource project folder that you created in the previous tutorial ↗, e.g.,
.../Temporary Training Artifacts/${yourName}/Data Engineering Tutorials/Datasource Project: Flight Alerts/. -
If you don't yet have a
/dataor/datasets/folder in that location (either name will do), create one.- In your
/datasetsfolder, create the following sub-folders: /raw/clean/preprocessed
- In your
-
Click into the
/rawfolder. -
Create a new pipeline by clicking on the green
➕ New ▾button in the top right of your screen and choosing Pipeline from the dropdown list of artifacts. -
Create a batch pipeline and name it
flight_alerts_datasource. -
Add the following datasets using the Add datasets button, each of which is located in
/Foundry Training and Resources/Example Projects/[Datasource] Flight Alerts/datasets/raw/.flight_alerts_rawstatus_mapping_rawpriority_mapping_raw
-
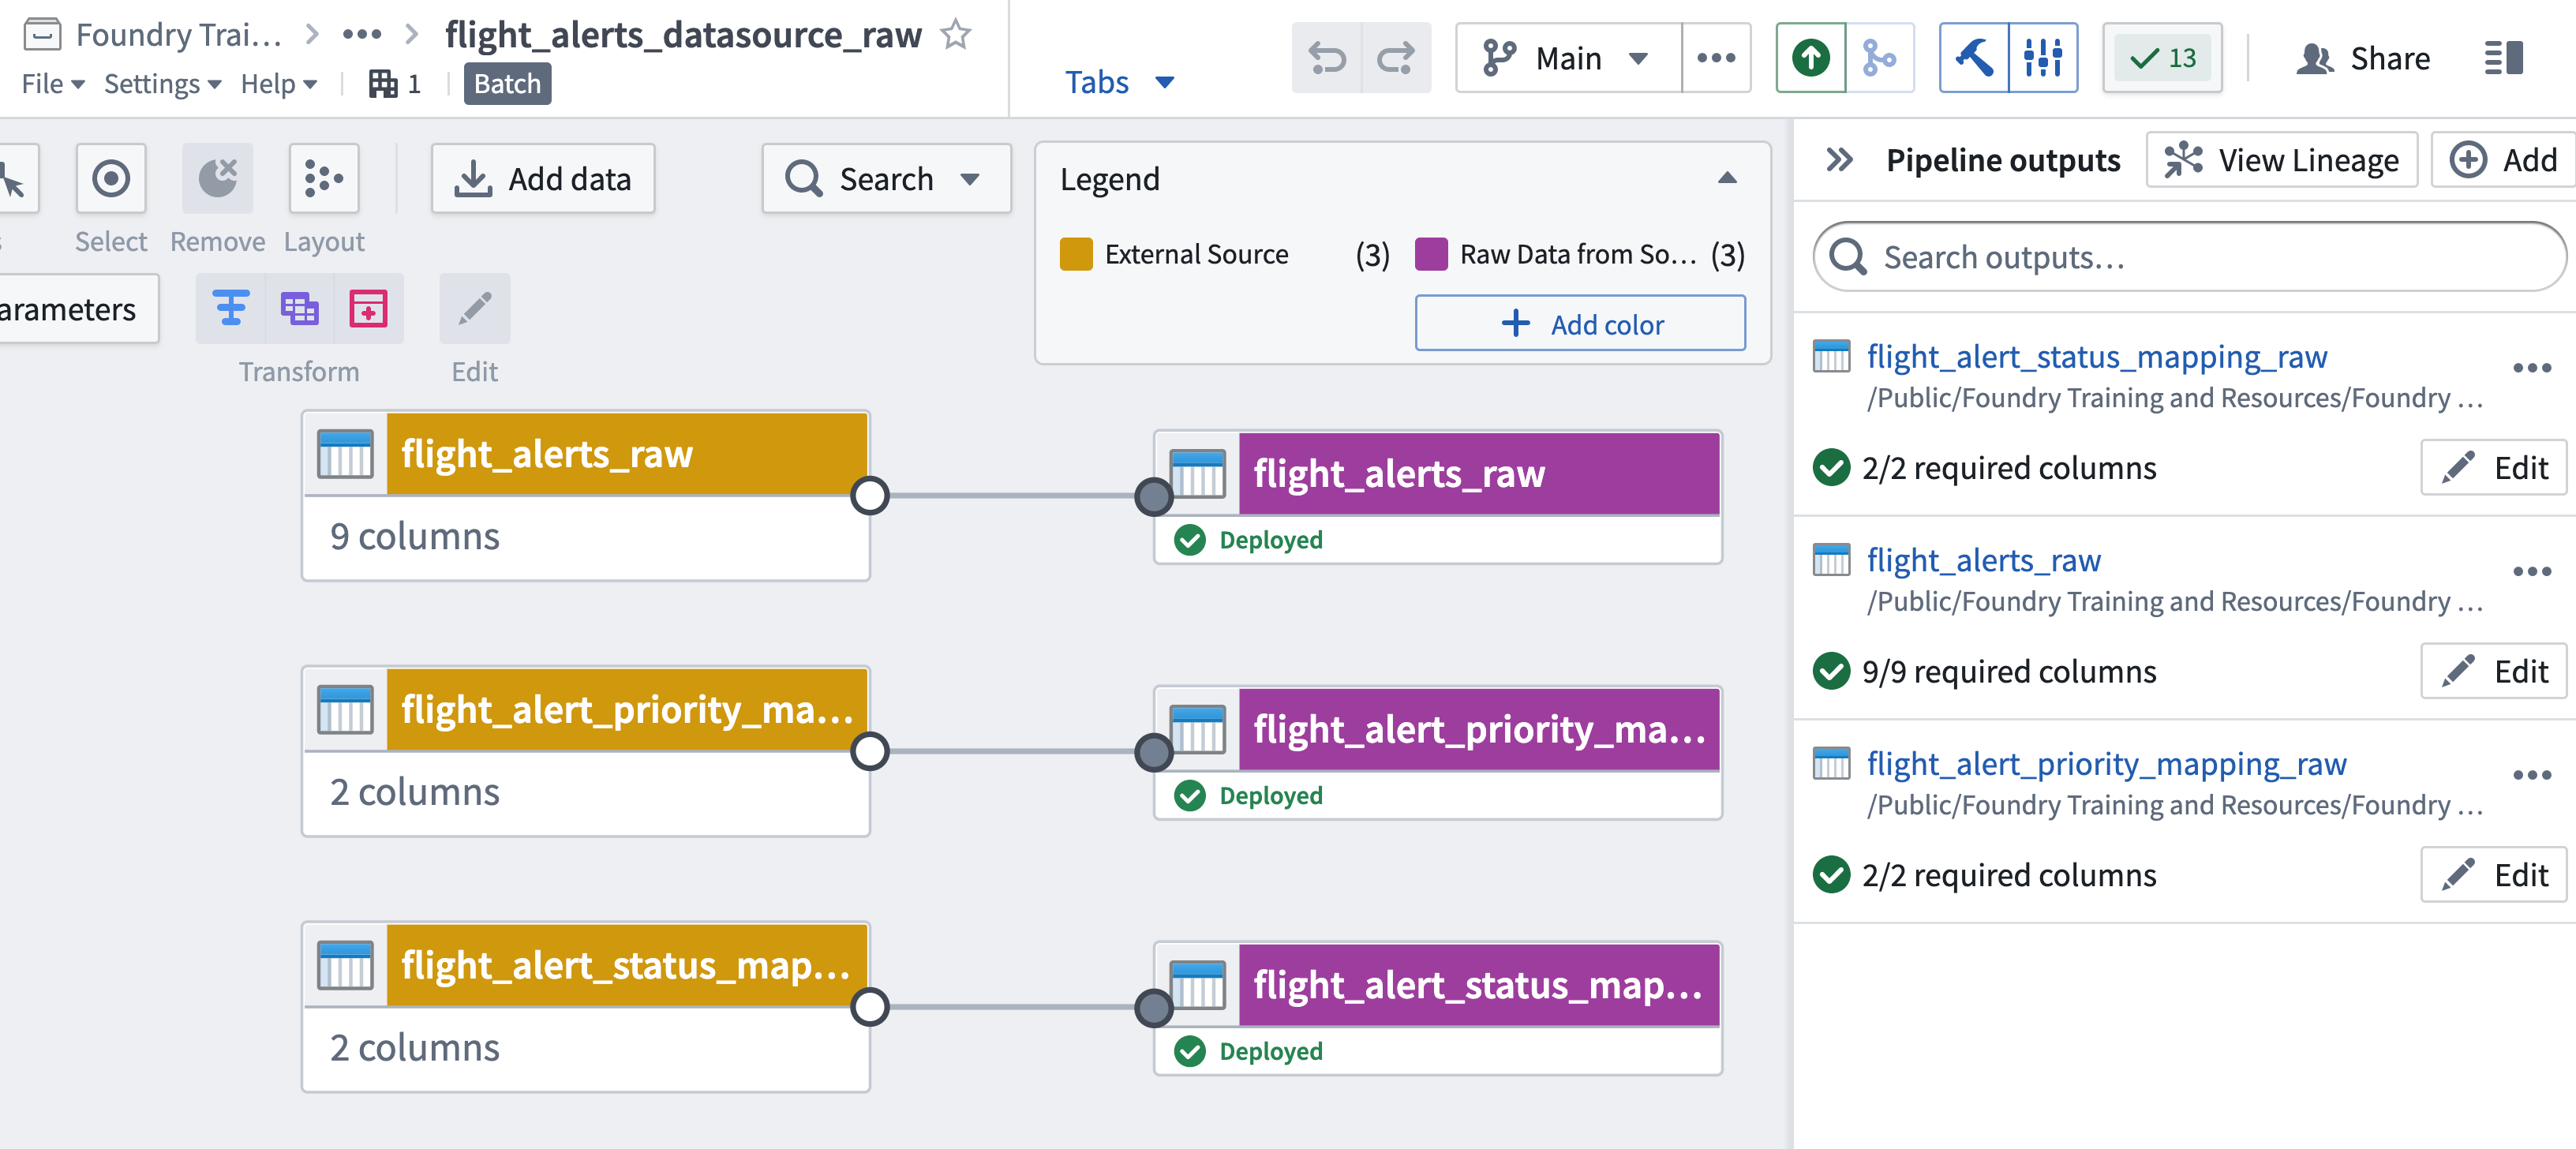
Create three outputs in your pipeline, one for each of the datasets you just imported in step 6 above. Be sure to simply use the input schemas for each.
-
Consider coloring the input and output datasets distinctly using the “color nodes” option from the legend and labeling them accordingly. Use the clickable image below as a reference.
-
Save and Deploy your pipeline to build the output datasets.
📖 Task Introduction
Each stage in your project may need multiple batch pipelines built with Pipeline Builder where you develop and maintain the data transformations in a structured setting. Since this tutorial does not actually connect to an external source, you’re going to simulate one by creating copies of three raw files into your Datasource Project.
🔨 Task Instructions
-
Proceed to the Datasource project folder that you created in the previous tutorial, e.g.,
.../**Temporary Training** Artifacts/${yourName}/Data Engineering Tutorials/Datasource Project: Flight Alerts/. -
If you don't yet have a
/dataor/datasets/folder in that location (either name will do), create one.- In your
/datasetsfolder, create the following sub-folders: /raw/clean/preprocessed
- In your
-
Select the
/rawfolder. -
Create a new pipeline by selecting ➕ New ▾ in the top right of your screen and choosing Pipeline from the dropdown menu of artifacts.
-
Create a batch pipeline and name it
flight_alerts_datasource. -
Add the following datasets using the Add datasets button, each of which is located in
/Foundry Training and Resources/Example Projects/[Datasource] Flight Alerts/datasets/raw/.flight_alerts_rawstatus_mapping_rawpriority_mapping_raw
-
Create three outputs in your pipeline, one for each of the datasets you just imported in step 6 above. Be sure to simply use the input schemas for each.
-
Consider coloring the input and output datasets distinctly using the “color nodes” option from the legend and labeling them accordingly. Use the clickable image below as a reference.
-
Save and Deploy your pipeline to build the output datasets.