11 - Merge changes into master
This content is also available at learn.palantir.com ↗ and is presented here for accessibility purposes.
📖 Task Introduction
After you have finished implementing this change to your time_by_carrier visualization, you'll now want to bring those new changes into the main, or "master", branch. This is called a merge. A merge of two branches will take a copy of the work on your branch and combine it with the current state of the master branch. You will be able to review the proposed changes before completing the merge into master.
The merge features of Code Workbooks do not provide pull request or approval workflows like the Code Repositories application. For this and other reasons, Code Workbooks should never be used to transform datasets as part of a production pipeline. It is intended as an analysis and prototyping tool only.
All production (i.e., operationally critical) datasets should be transformed in the Code Repositories application.
🔨 Task Instructions
-
Click on the Preview merge button located to the right of the Workbook name.

ℹ️ At certain screen resolutions, you may need to temporarily zoom out in your web browser to see this button. You will be able to see a preview of all the changes that have been made in the Contents bar on the left of the page.
-
Click on the green Merge Branch button near the top-right corner of your screen.
-
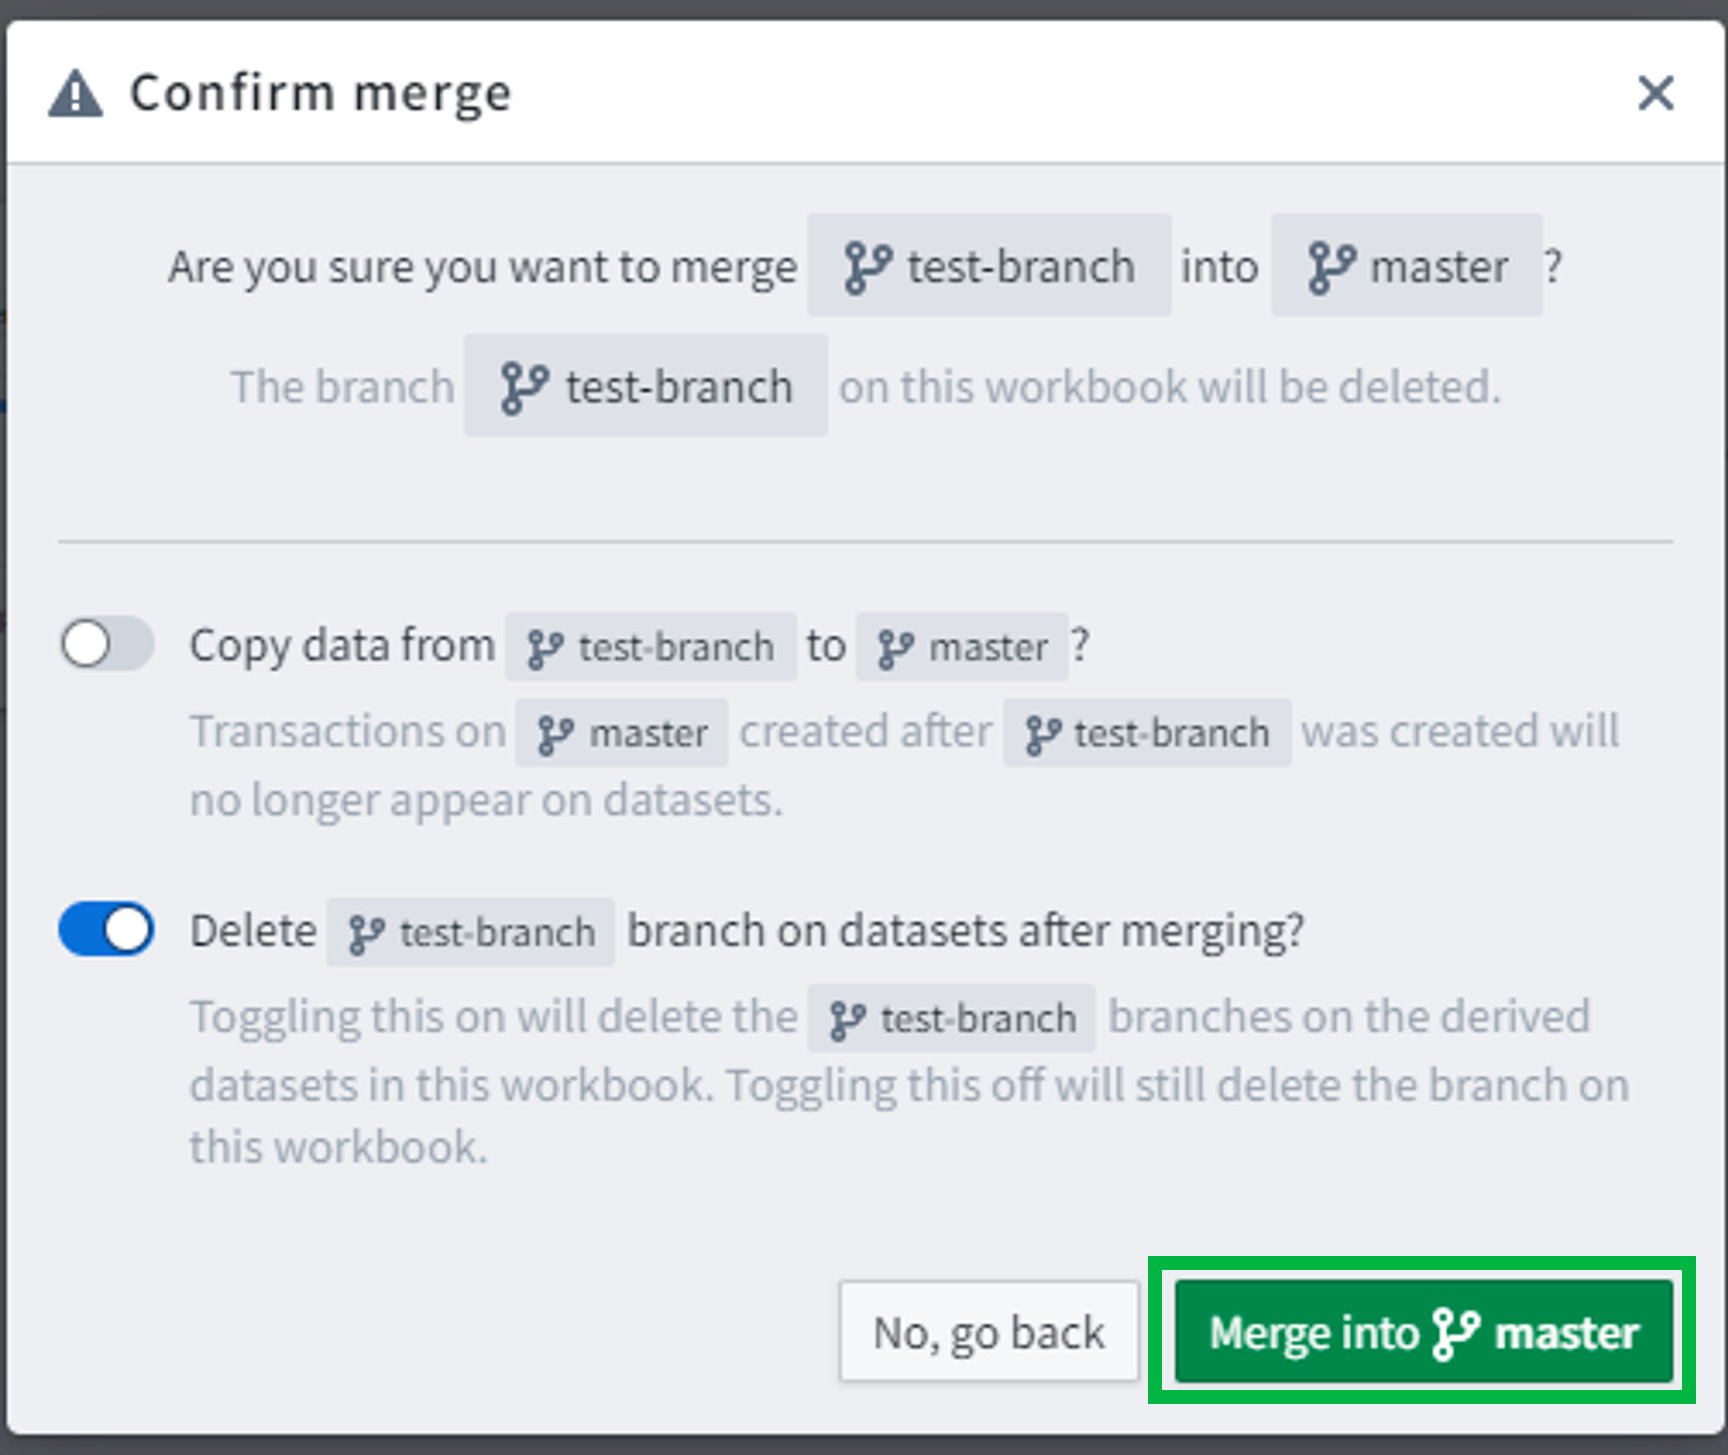
Leave the merge configuration options as they are by default and select Merge into master.
-
Click on the
time_by_carriernode to confirm that the changes from your test branch have been merged into the master branch (your code should group byrouteinstead of bycarrier).