3 - The Anatomy of a Function
This content is also available at learn.palantir.com ↗ and is presented here for accessibility purposes.
📖 Task Introduction
Your repository comes with sample Functions already written in the ../src/index.ts file. Let's explore these and use them as the basis for dissecting and testing a "Hello World" example.
🔨 Task Instructions
-
Open the
../src/index.tsfile by clicking on it in the Files panel on the left. Be sure not to select../src/__tests__/index.ts.- You’ll find several lines of “commented” code already written in the file. The most straightforward way to proceed in this training is to replace the entire code block to give us a clean starting point.
-
With the
index.tsfile open, highlight the entire code block withctrl+a(orcmd+aon a Mac) and hit the Delete key on your keyboard. -
Copy and paste the code block below and paste it into your blank editor.
import { Function, Integer } from "@foundry/functions-api";
import { } from "@foundry/ontology-api";

export class MyFunctions {
    @Function()
    public myFunction(n: Integer): Integer {
        return n + 1;
    }
}
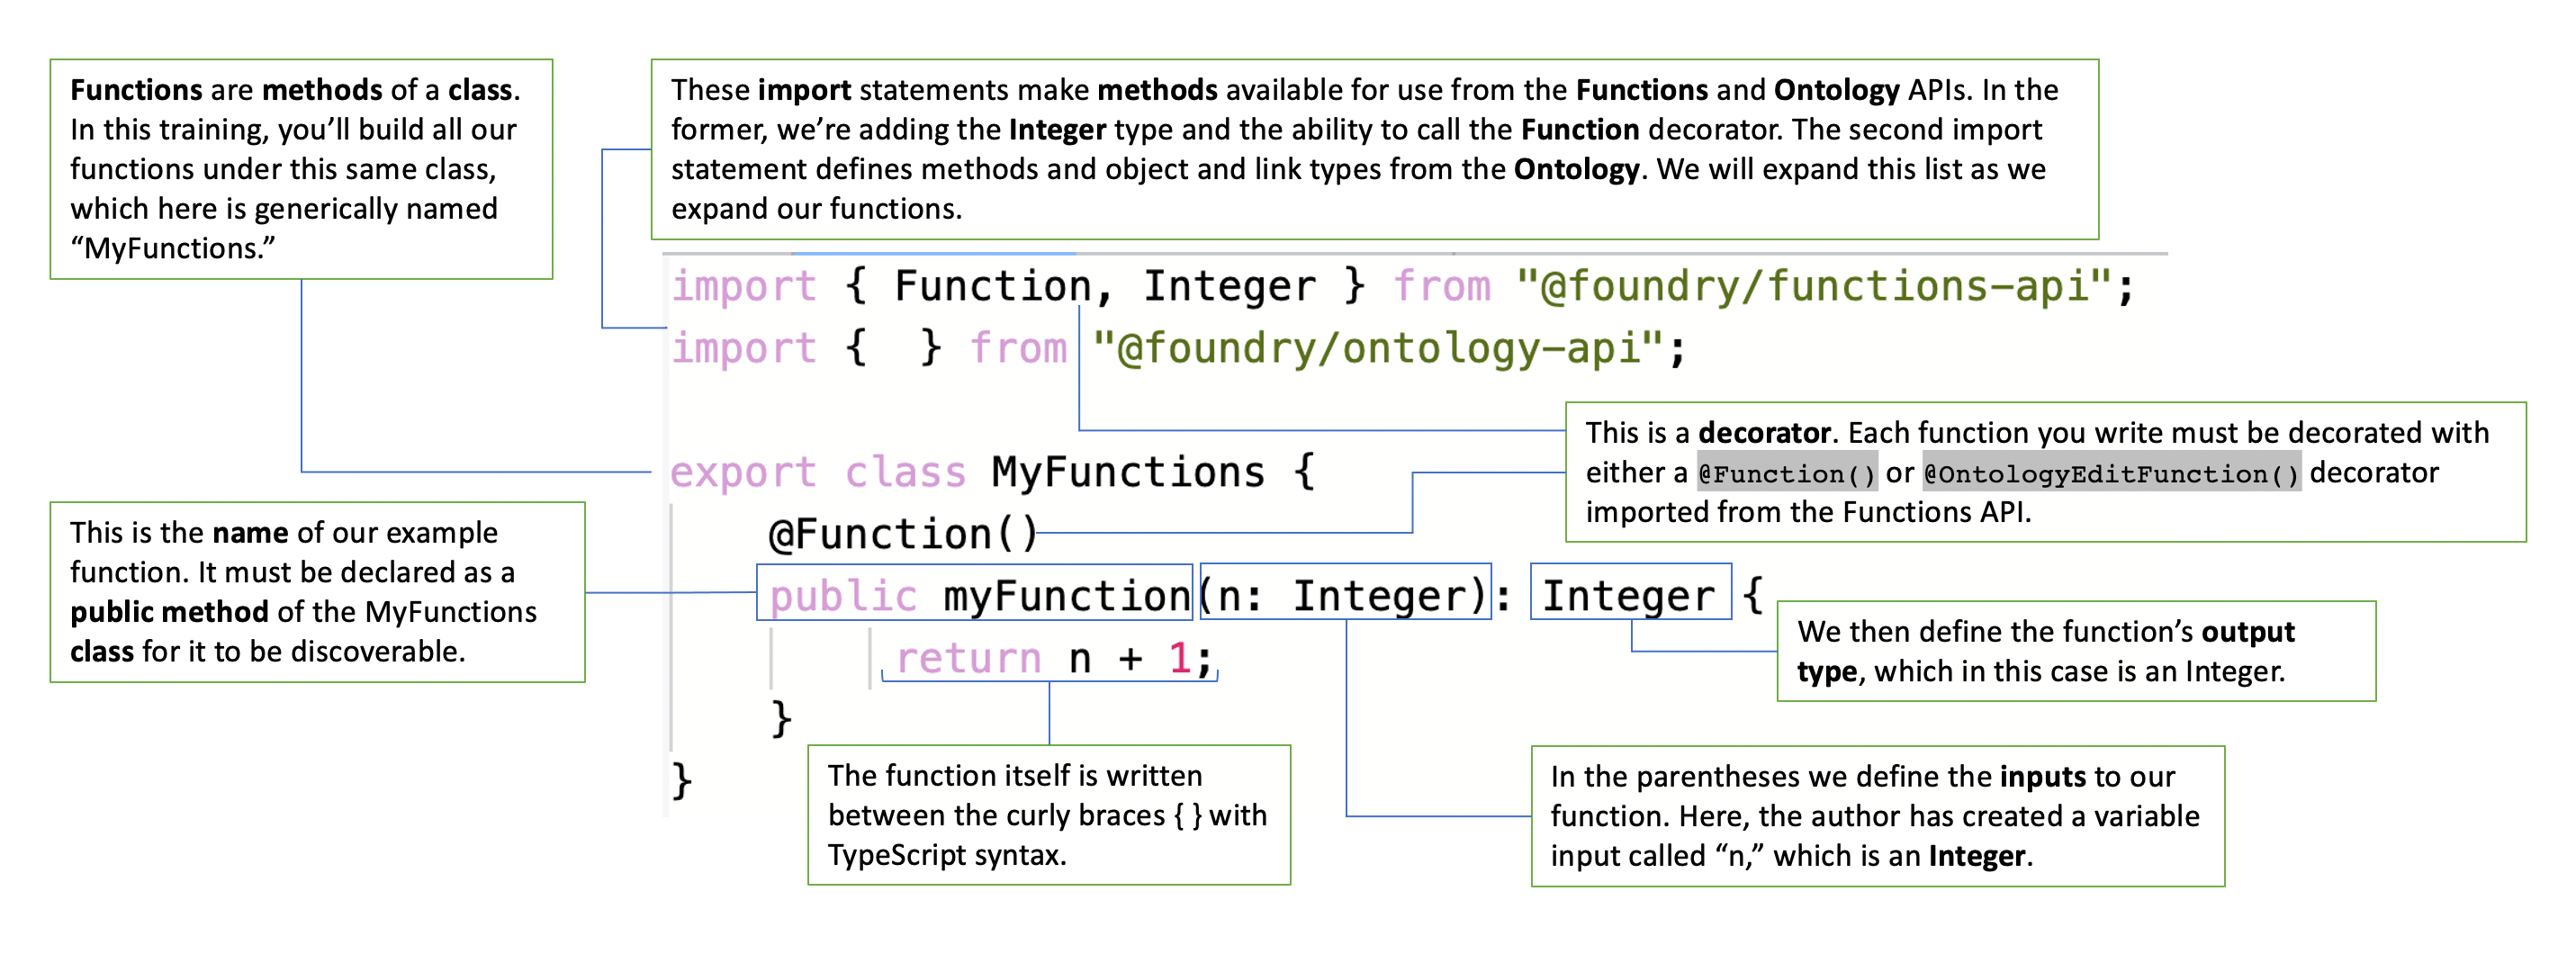
In these few lines of code, we can discern the basic structure of a Function:

-
Click the fx Functions tab in the helper toolbar along the bottom of your screen. In the Live preview tab of the functions helper, you can preview and test the functions in your repository. Before you test your functions, your repository’s Code Assist feature must be in a “running” state as indicated by the bar across the very bottom of your screen.
- ℹ️ Code Assist is essential for detecting problems in your code and running previews. You can write code without Code Assist, but will need it to be up and running to complete your work. Hover over the Code Assist status you can get details on the initialization progress. If Code Assist fails to initialize, raise a support request.
-
With Code Assist running and your functions helper open to the Live preview tab, click on the name of our sample function (“myFunction”).
- The righthand side of the helper window presents you with a form for entering the input values of your function. The input value is labeled
nin the form, because that's the variable name given in the function (i.e.,(n: Integer)).
- The righthand side of the helper window presents you with a form for entering the input values of your function. The input value is labeled
-
Replace the
0in thenfield with an arbitrary integer and click the blueRun ▶button to test the function. -
Scroll down in the functions helper window to view the output, which should equal your
nvalue plus 1 as described in the function (i.e.,{ n+1 }).
📚 Recommended Reading (~3 min read)
Typescript functions must have explicit type annotations on all input parameters and specify an explicit return type. It’s important therefore to be aware of the supported input and output types. Take a few moments to read the selections below from the Functions API documentation. You’ll have a chance to review the object types entries later. When reading, there’s no need to follow the links to ancillary documentation unless desired.