7 - Defining Action Parameters: Priority
This content is also available at learn.palantir.com ↗ and is presented here for accessibility purposes.
📖 Task Introduction
When your operations analyst monitoring your flight alert inbox elects to take this action, they will be confronted with a form asking for details. In the Form section of the Actions menu, you define the items in that form (its parameters).
🔨 Task Instructions
-
Click Form on the menu on the left. We can see there are three items the action taker will need to provide: the object to be updated, the new priority value, and the comment.
- The right side of the screen shows a preview of the form as it will appear to your user. Note: You may need to collapse the form preview to see the Form Content.
- ℹ️ The Form Preview panel can be expanded/collapsed using the icon at the top of the panel.
-
The middle panel is the Form Content section. In it, click the
Priorityparameter so that you can define it. Note: You may want to collapse the form preview (again).- As it stands, the user can enter any arbitrary text as the new
Priorityvalue, but we can configure the parameter to only accept (or provide) certain values.
- As it stands, the user can enter any arbitrary text as the new
-
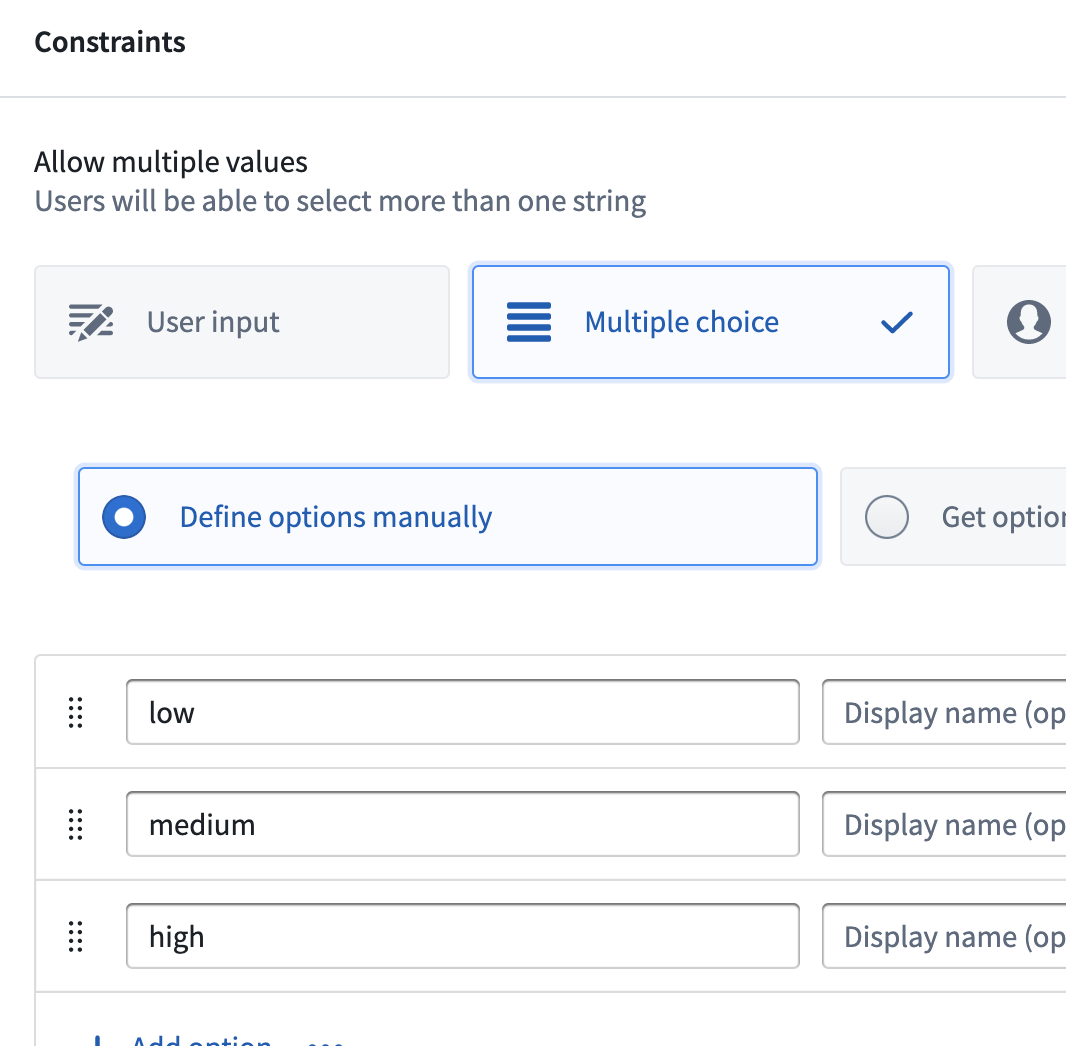
In the Constraints section, click the Multiple choice block. Let’s manually define the choices as “low,” “medium,” and “high.”
- ℹ️ Your current backing dataset lists all
Priorityvalues in lowercase, so it's important to be consistent here. If we wanted to capitalize these in the backing data, we'd need to adjust the transform generating the backing dataset and then check any case sensitive conditional formatting we may have set on the property in OMA.
- ℹ️ Your current backing dataset lists all
-
Click the ➕ Add option button once for all three options we want to enable: “low,” “medium,” and “high.” Enter these values on the left side of the configuration (see image below).
-
Test your entries in the sample Form Preview (possibly collapsed) on the right.