23 - Creating a Overlay Layer with an Object View Widget
This content is also available at learn.palantir.com ↗ and is presented here for accessibility purposes.
In the previous course, you created an overlay to hold your embedded Quiver template. This exercise follows a similar pattern but will display the configured Object View for an airport your users select on the map.
🔨 Task Instructions
-
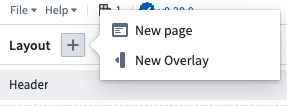
Click the ➕ at the top of your layouts panel and add a new Overlay layer.
-
Set the following attributes in your Overlay configuration panel:
- Layer Name:
Overlay: Airport Object View - Icon: Airplane
- Title: Airport Details
- Size: Large.
- Layer Name:
-
You’ll only need a single Section in this Overlay, so highlight the top empty section in the overlay and click the red “trash” icon in the top right of your module editor to delete it.
-
Click into the remaining Section to open its configuration panel. Change the name to
Section: Airport Object View. -
Click ➕ Add widget and add an Object view widget.
-
When the empty widget loads, proceed to its Metadata tab and change the name to
Object view: Airport. -
Click into the Select object set variable . . . field and then choose➕ New object set variable.
-
Rename your new variable to
[o][1] Selected Airport on Mapand choose[o] Filtered Airports for Mapas the starting object set. -
In the variable configuration fly-out window, click the (x) Filter using variable option and choose
[f] Selected Airport on Map, which is the output variable from your points data layer. -
Save and publish.