11 - Adding a tabbed container widget, part 2
This content is also available at learn.palantir.com ↗ and is presented here for accessibility purposes.
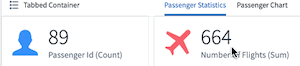
📖 Task Introduction
In this task, you’ll add a chart widget in a second tab of your tabbed container. Although these charts are available for visualizing data on linked object types, you’ll explore more expressive and rich ways of creating charts on your objects in future tutorials.
🔨 Task Instructions
-
Make sure you're in the tabbed container widget configuration panel, that is, that the right sidebar reflects editing the configuration of the Tabbed Container widget you added in the previous lesson.
-
Click ⊕ Add Tab to add a second tab.
-
In the block that appears, click the Select Section link.
-
Choose a Chart widget from the widget selector.
-
In the chart widget configuration window, click the Grid Chart option.
-
Set the following values in the configuration window:
- Linked Objects: your passenger object type.
- Group By (#1): Property =
Country. - Group By (#2): Property =
Flyer status. - Group By (#2): Explicit Result Ordering — type and hit enter after each:
Platinum,Gold,Silver,None. - Property:
Passenger Id. - Aggregation Function: Count.
- X-Axis Label:
Country. - Y-Axis Label:
Status. - Value Format String:
,
-
In the widget editor’s Format tab, change the tab name to Passenger Chart and click the blue
Add widgetbutton. -
In the tabbed container widget configuration on the right of your screen, change the order of the tabs by clicking the
˄and˅arrows in the tab blocks. -
Save your widget.
📚 Recommended Reading (~3 min read)
Learn more about the tabbed layout widget by reading this page in the product documentation.