15 - Style Object Layers: Changing Layer Names
This content is also available at learn.palantir.com ↗ and is presented here for accessibility purposes.
📖 Task Introduction
There are various styling options for maps that allow you to highlight key data attributes and create maps that visually identify patterns or outliers. Over the next two tasks, you will learn basic object layer styling.
🔨 Task Instructions
-
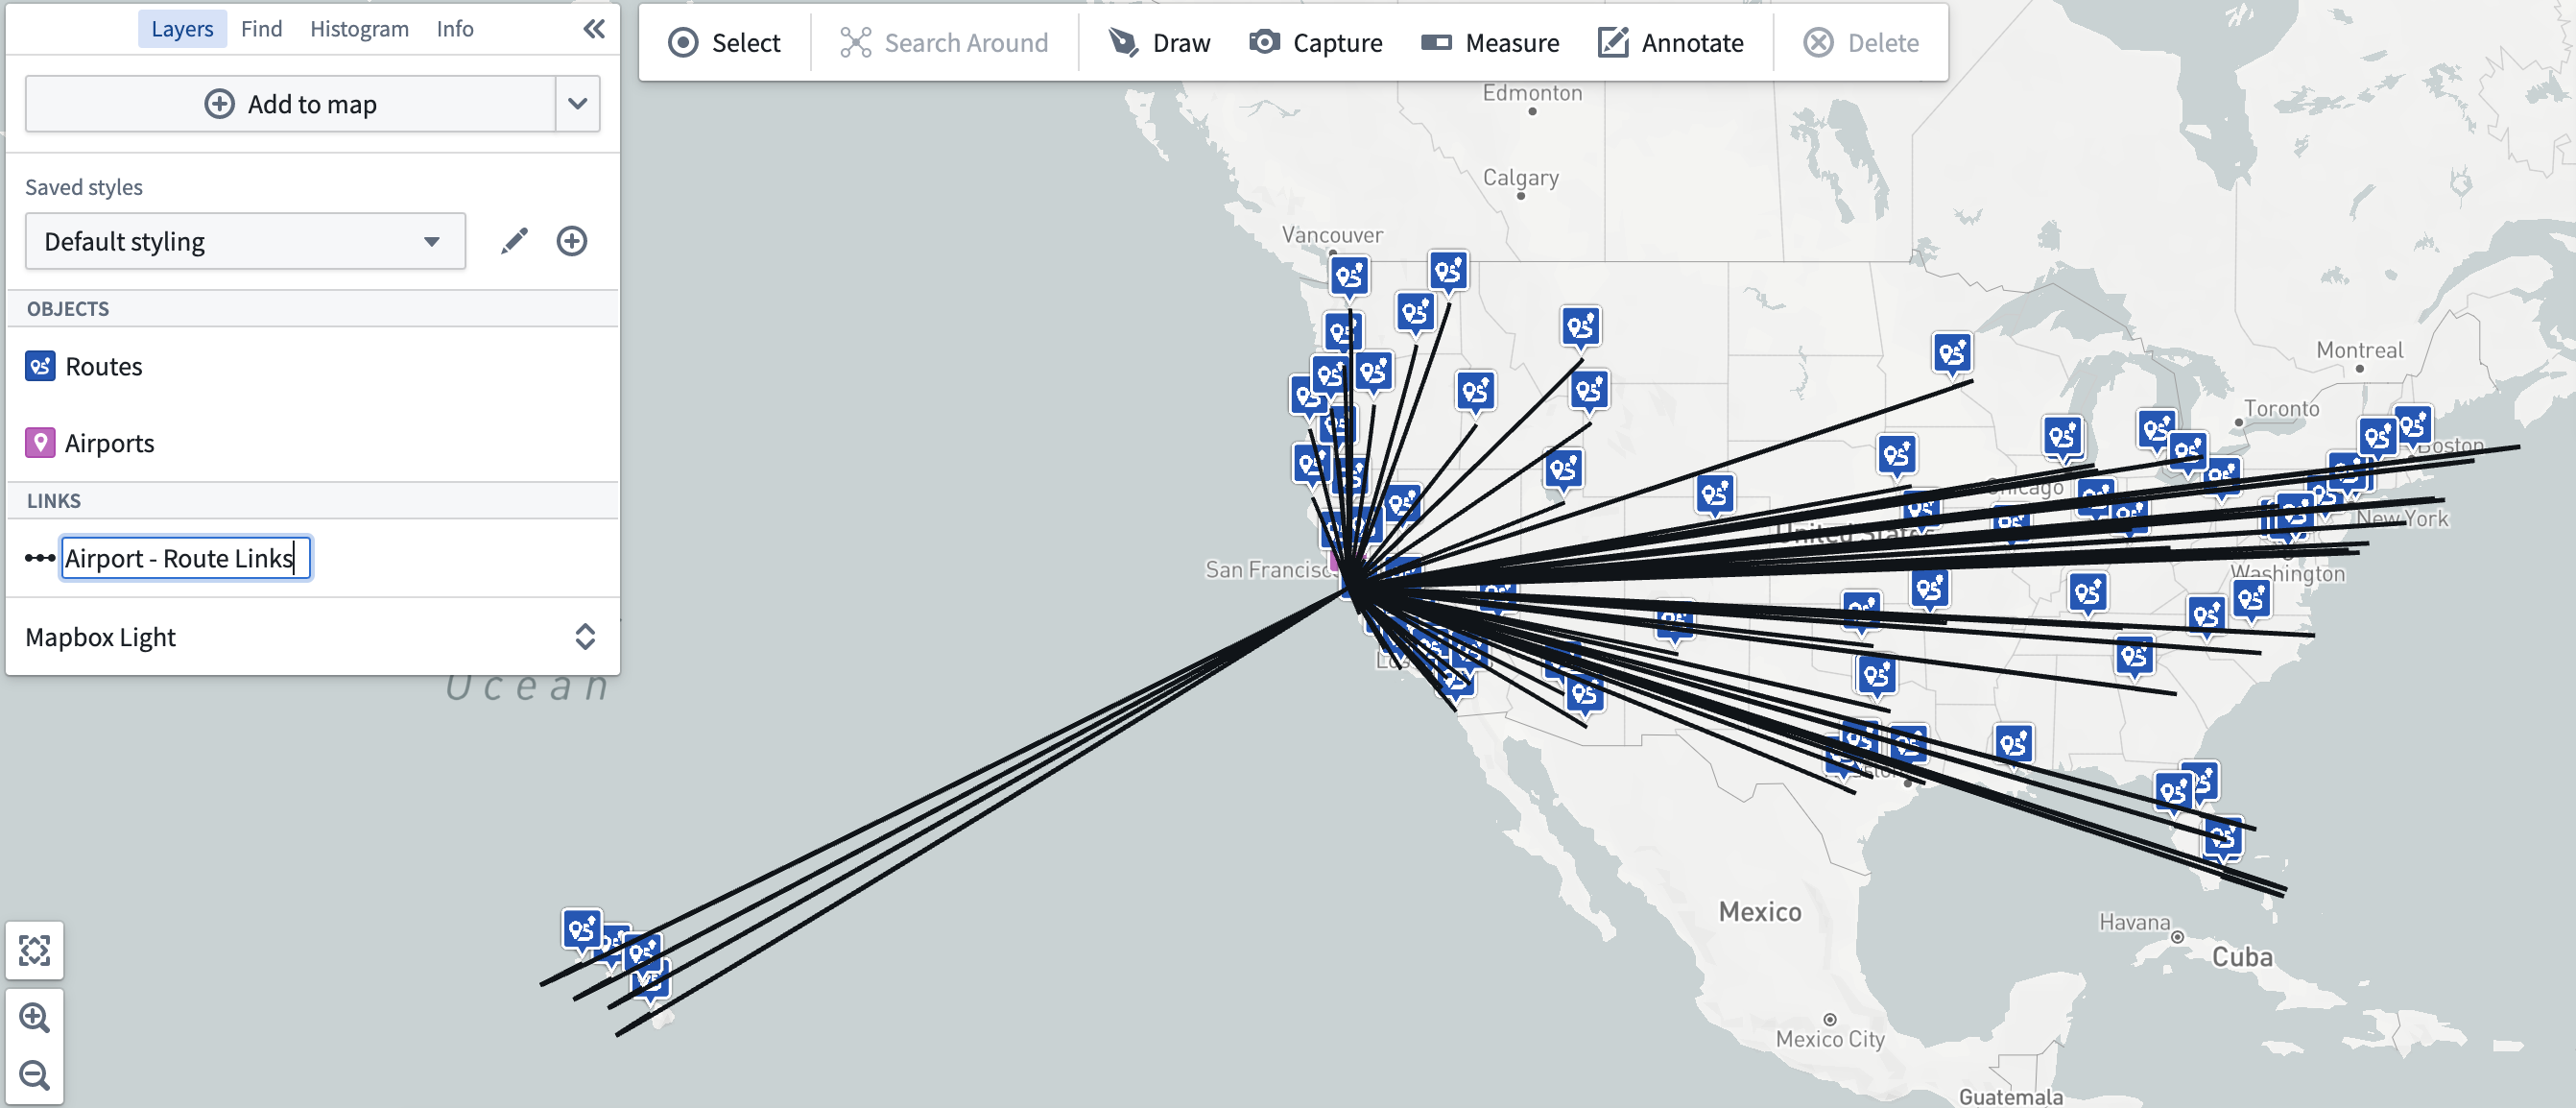
Delete all layers from the map.
-
Add the San Francisco airport (SFO) object to the map.
-
Search Around for linked
[Example Data] Departing Routeobjects (there should be 73).Hint: if routes are not displayed correctly (see screenshot below) - Mouse over Routes in the Layers helper, and click on the "paintbrush" (ie. Edit styling) button to the right and in Geometry, replace Origin Coordinates with Dest. Coordinates
-
To help us later, perform a Search Around on the route objects for all linked
[Example Data] Airportobjects. If the Search Around UI provides you with more than 1[Example Data] Airportlink, choose the one with a higher result number (for instance,73). -
In the Layers panel, click into the title of the routes layer (
[Example Data] Routes) and change the name simply toRoutes. -
Do the same for the airports layer (
Airport). -
In the Links section of the Layers helper, change the link name to something more concise, like
Airport - Route Links.