- Capabilities
- Getting started
- Architecture center
- Platform updates
Upload images with a container model
This page guides you through the process of uploading an image with a container-backed model. During this workflow, you will create a Model, push an image to the model resource, and configure a model version.
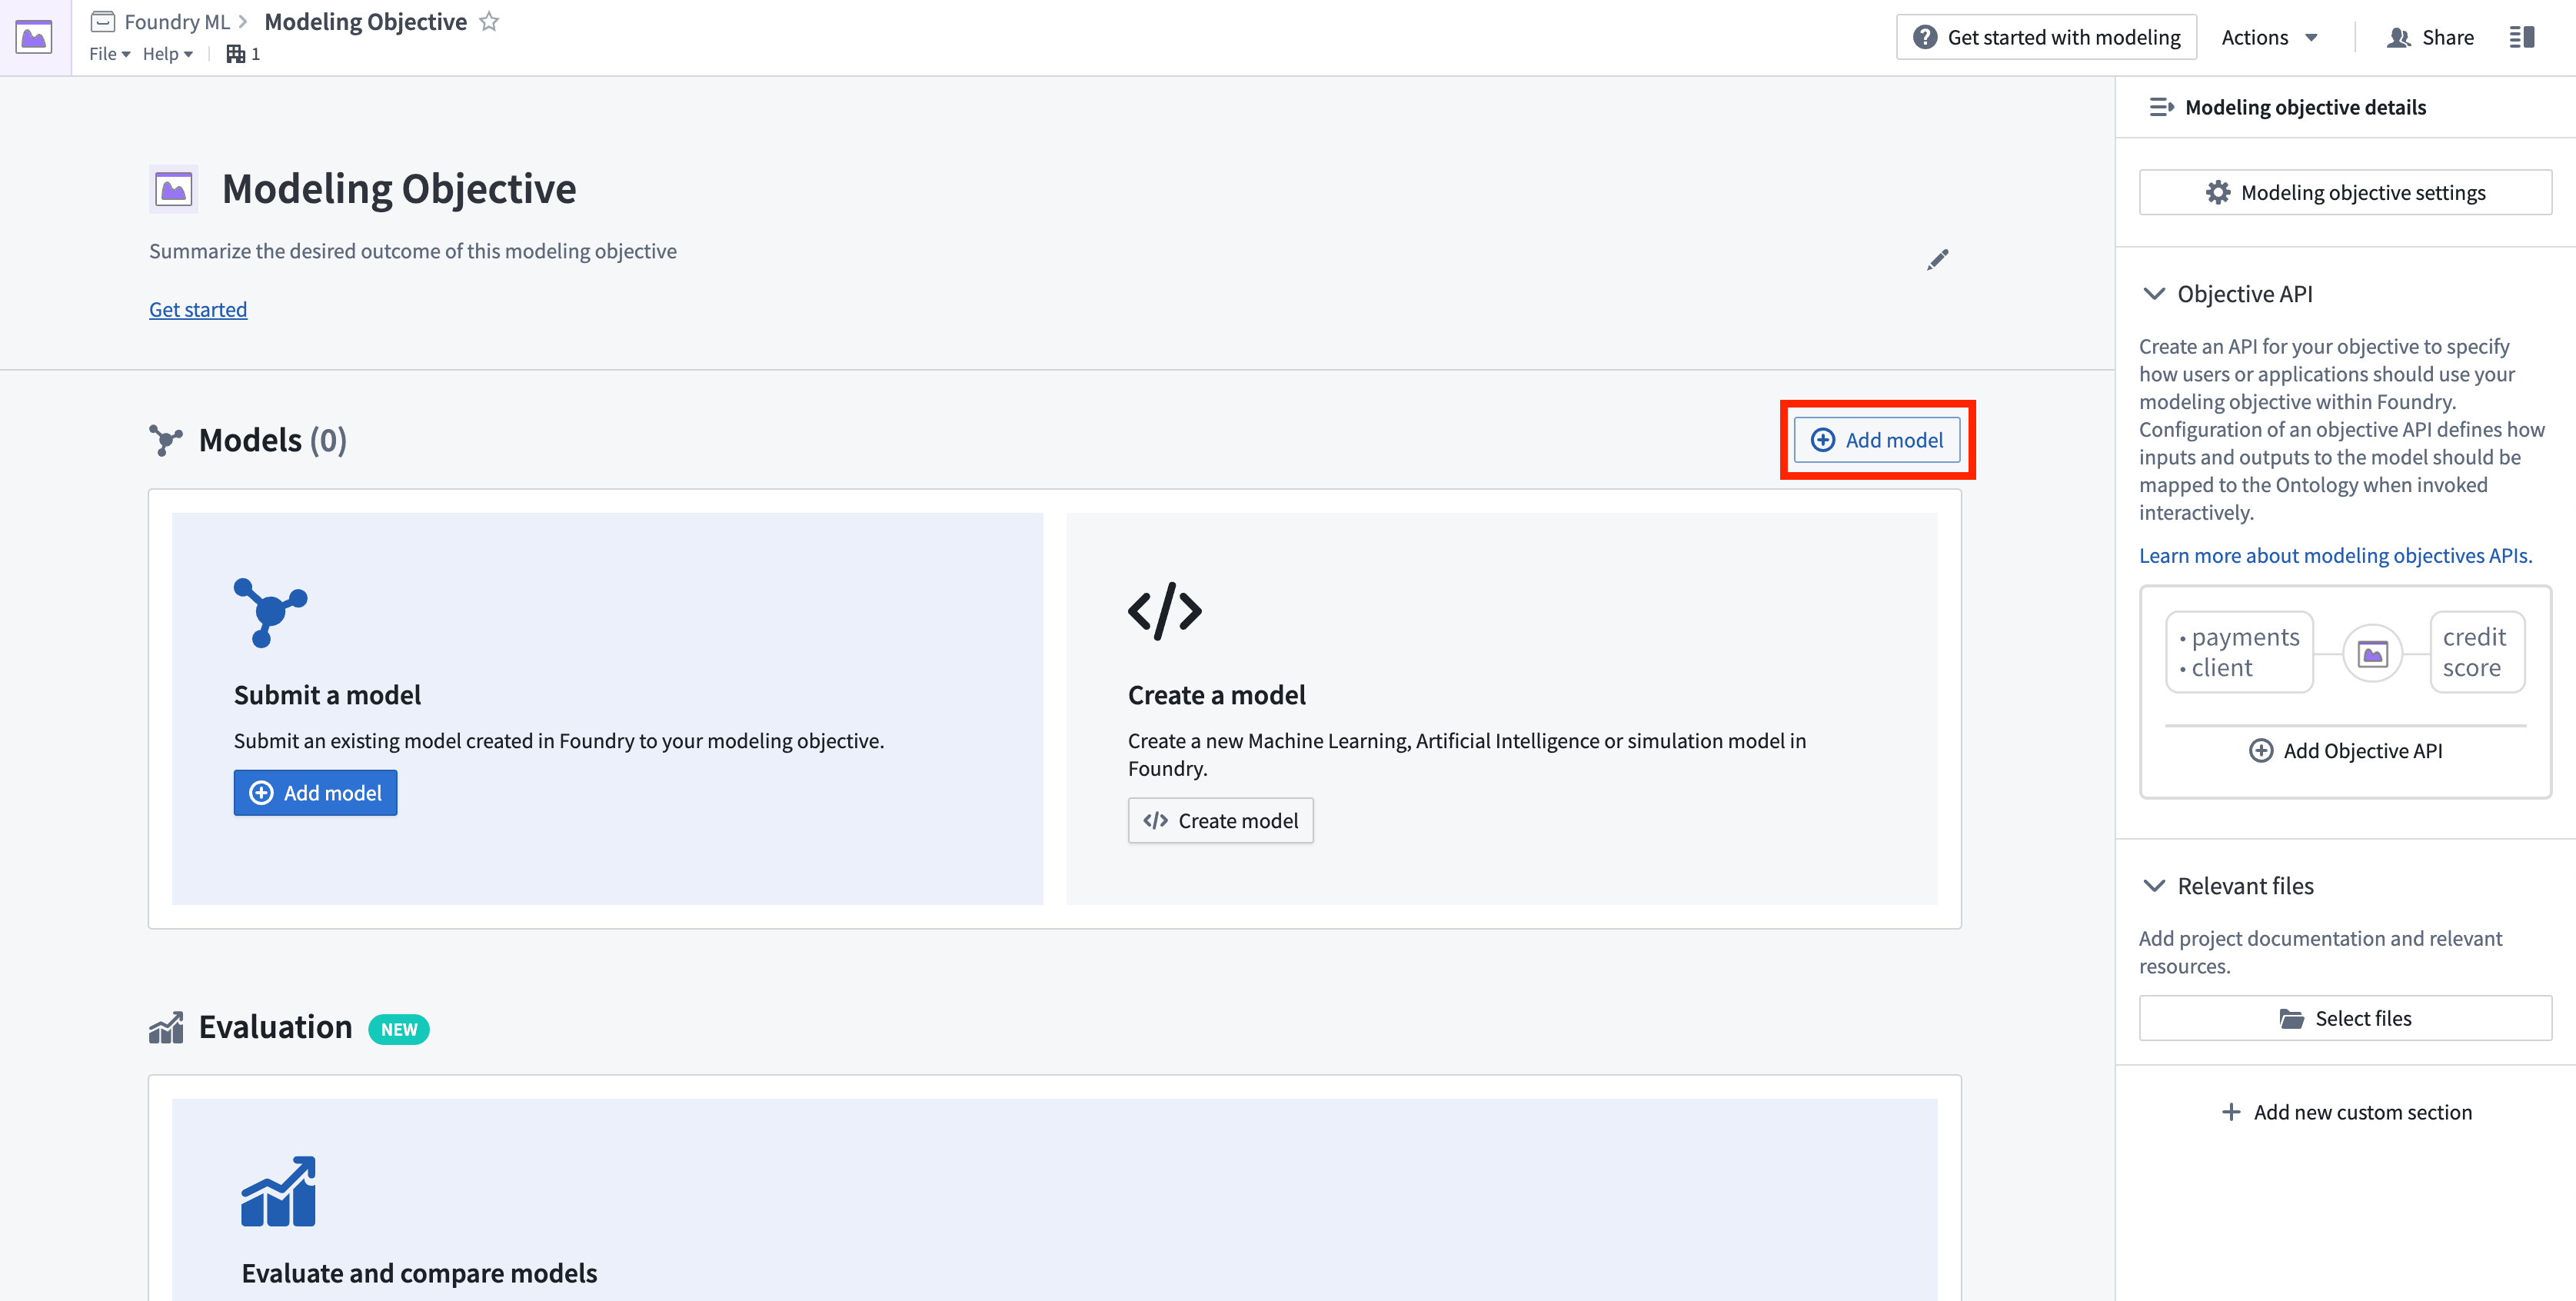
1. Create a model
To create a container-backed model, first create the resource to which the image will be pushed. This resource will control the model permissions; users with Viewer permission on this resource will be able to pull the image back out of Foundry.
Create a new model by navigating to any modeling objective and select +Add model, then Import containerized model.

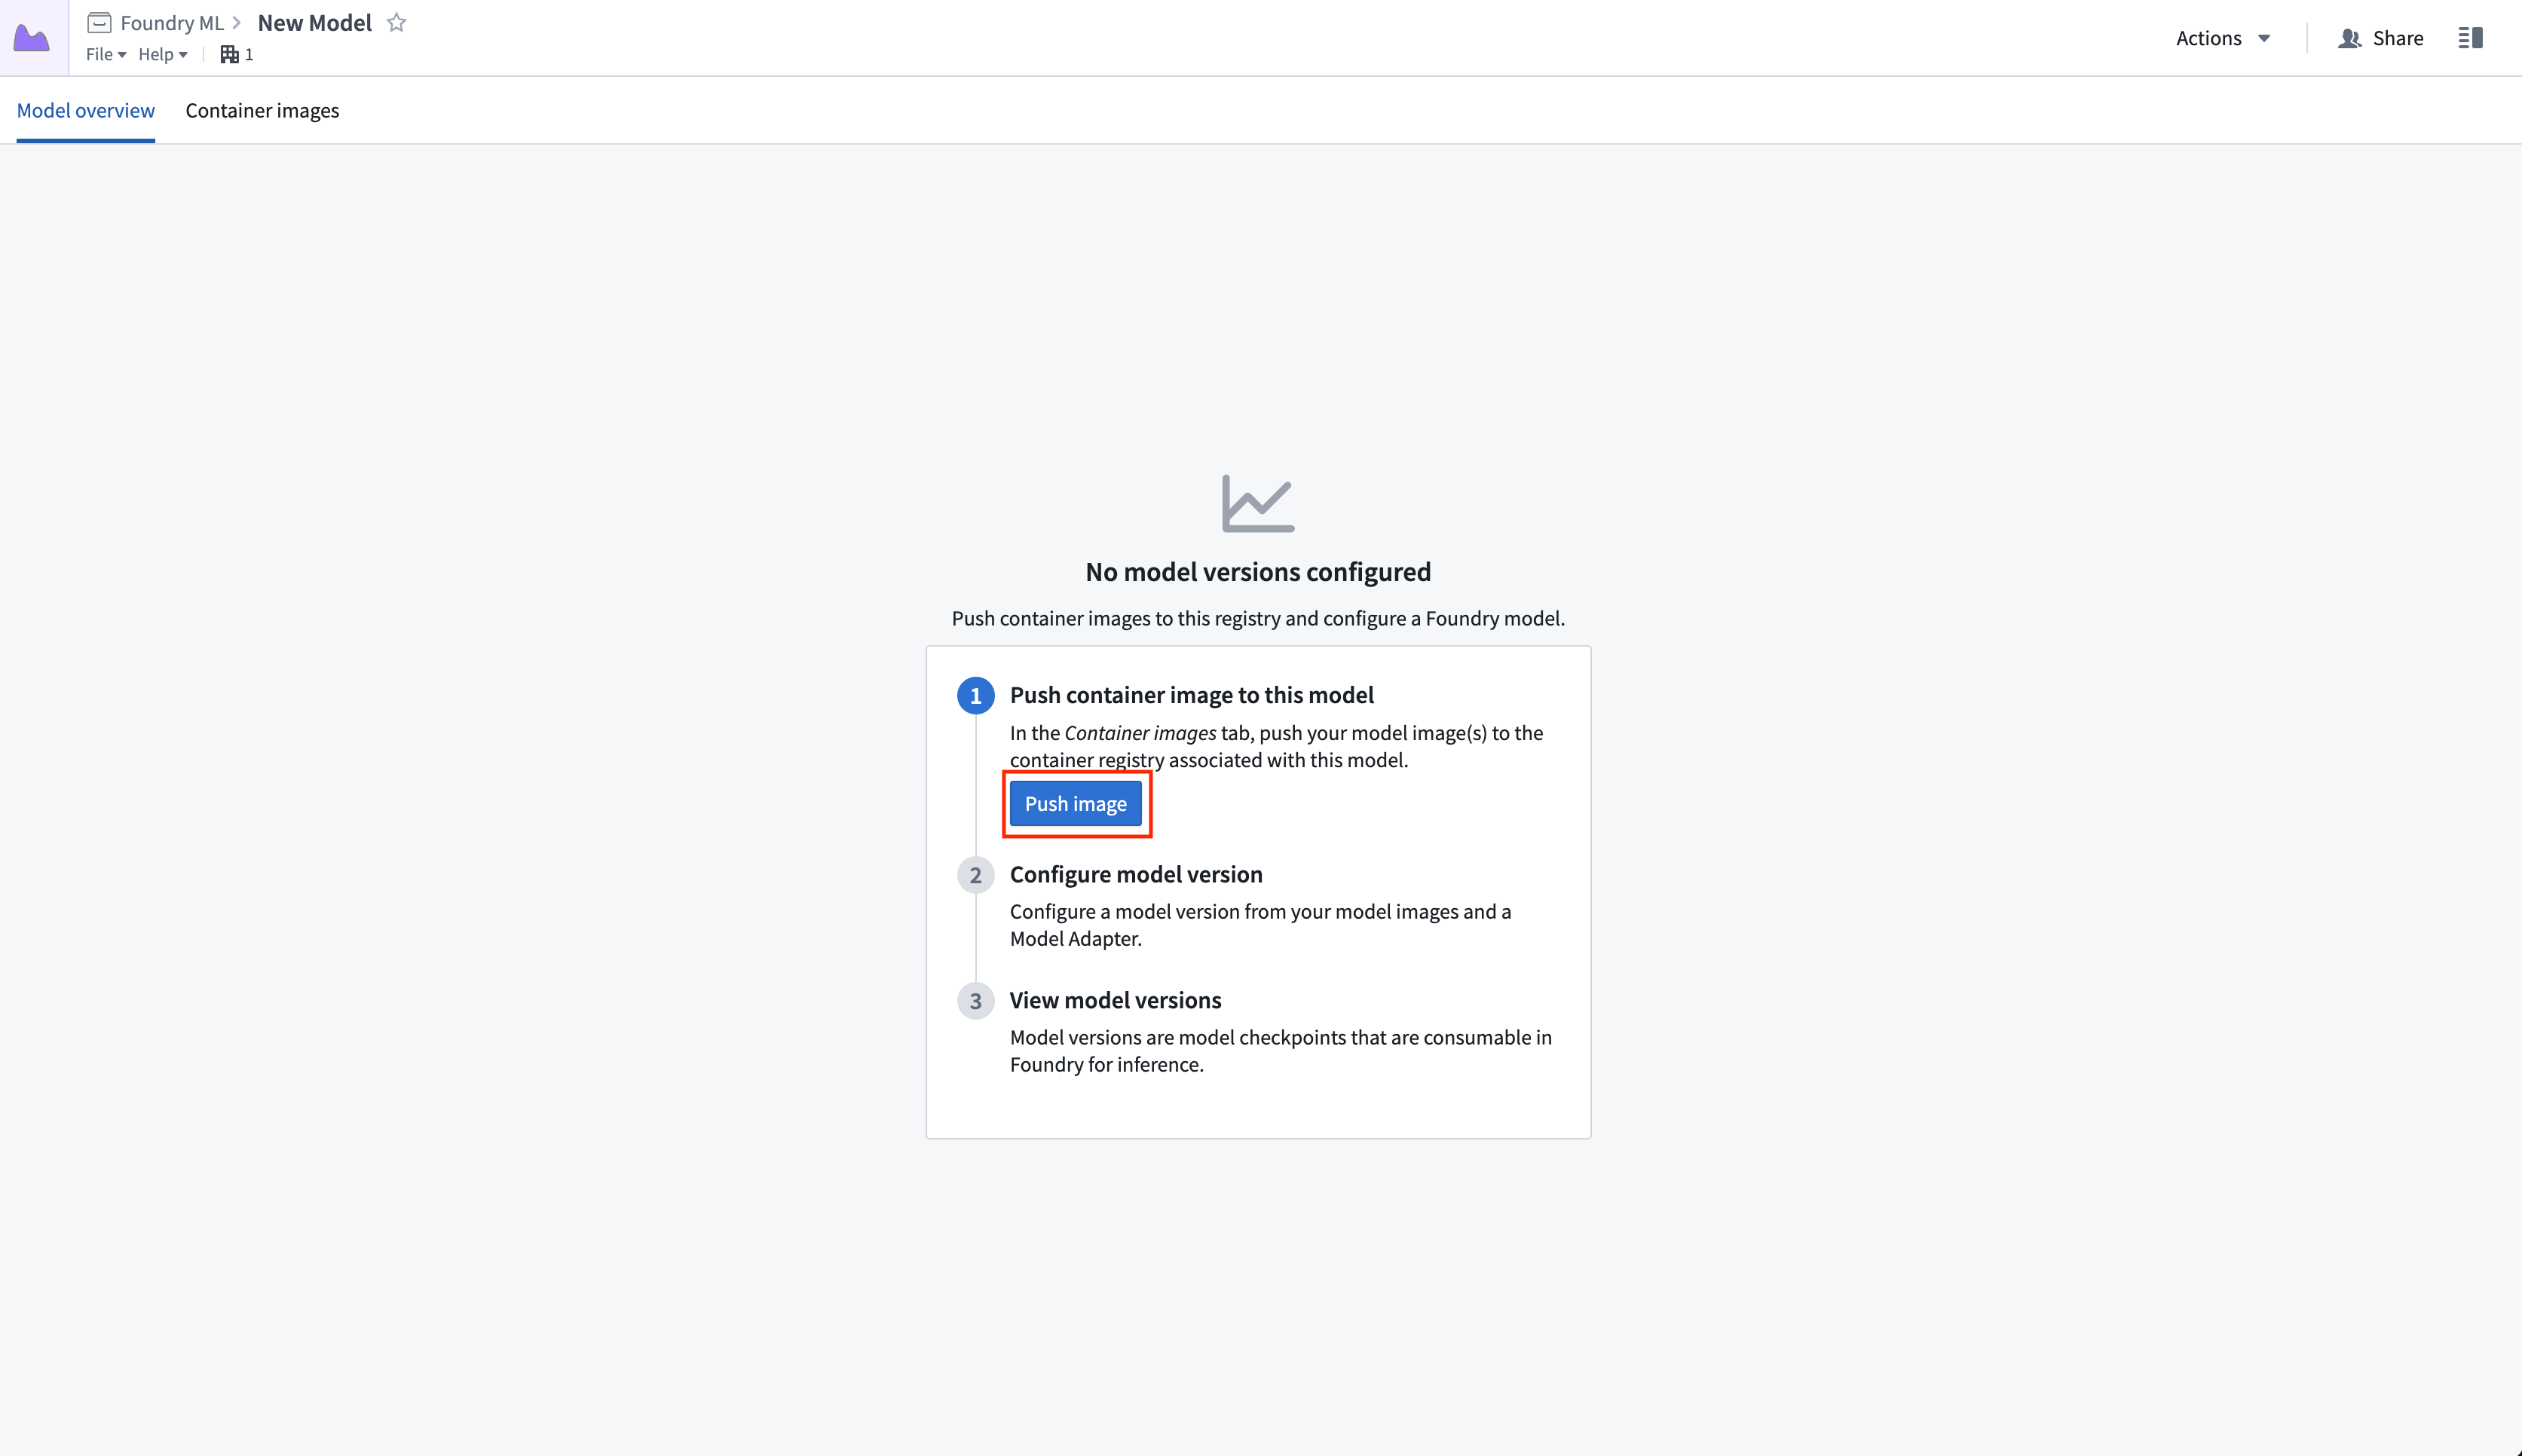
2. Push an image to the model
The image(s) you push must adhere to Foundry's image requirements.
After creating a model resource in Palantir, follow the instructions to push your images into the Asset.
Select Generate token, then copy the block of default commands and edit them to replace example-package:<TAG> with the image name and tag (or digest) present in your local Docker repository. Note that the tag is not allowed to be 'latest' per the image requirements. Executing these commands will push the relevant image into the model, where it can be accessed by anyone with Viewer permissions.
Once the images have been successfully pushed and are available in the container images list, select Create model version to start configuring your version. To do this, you must first author a container model adapter created with the model adapter library template.
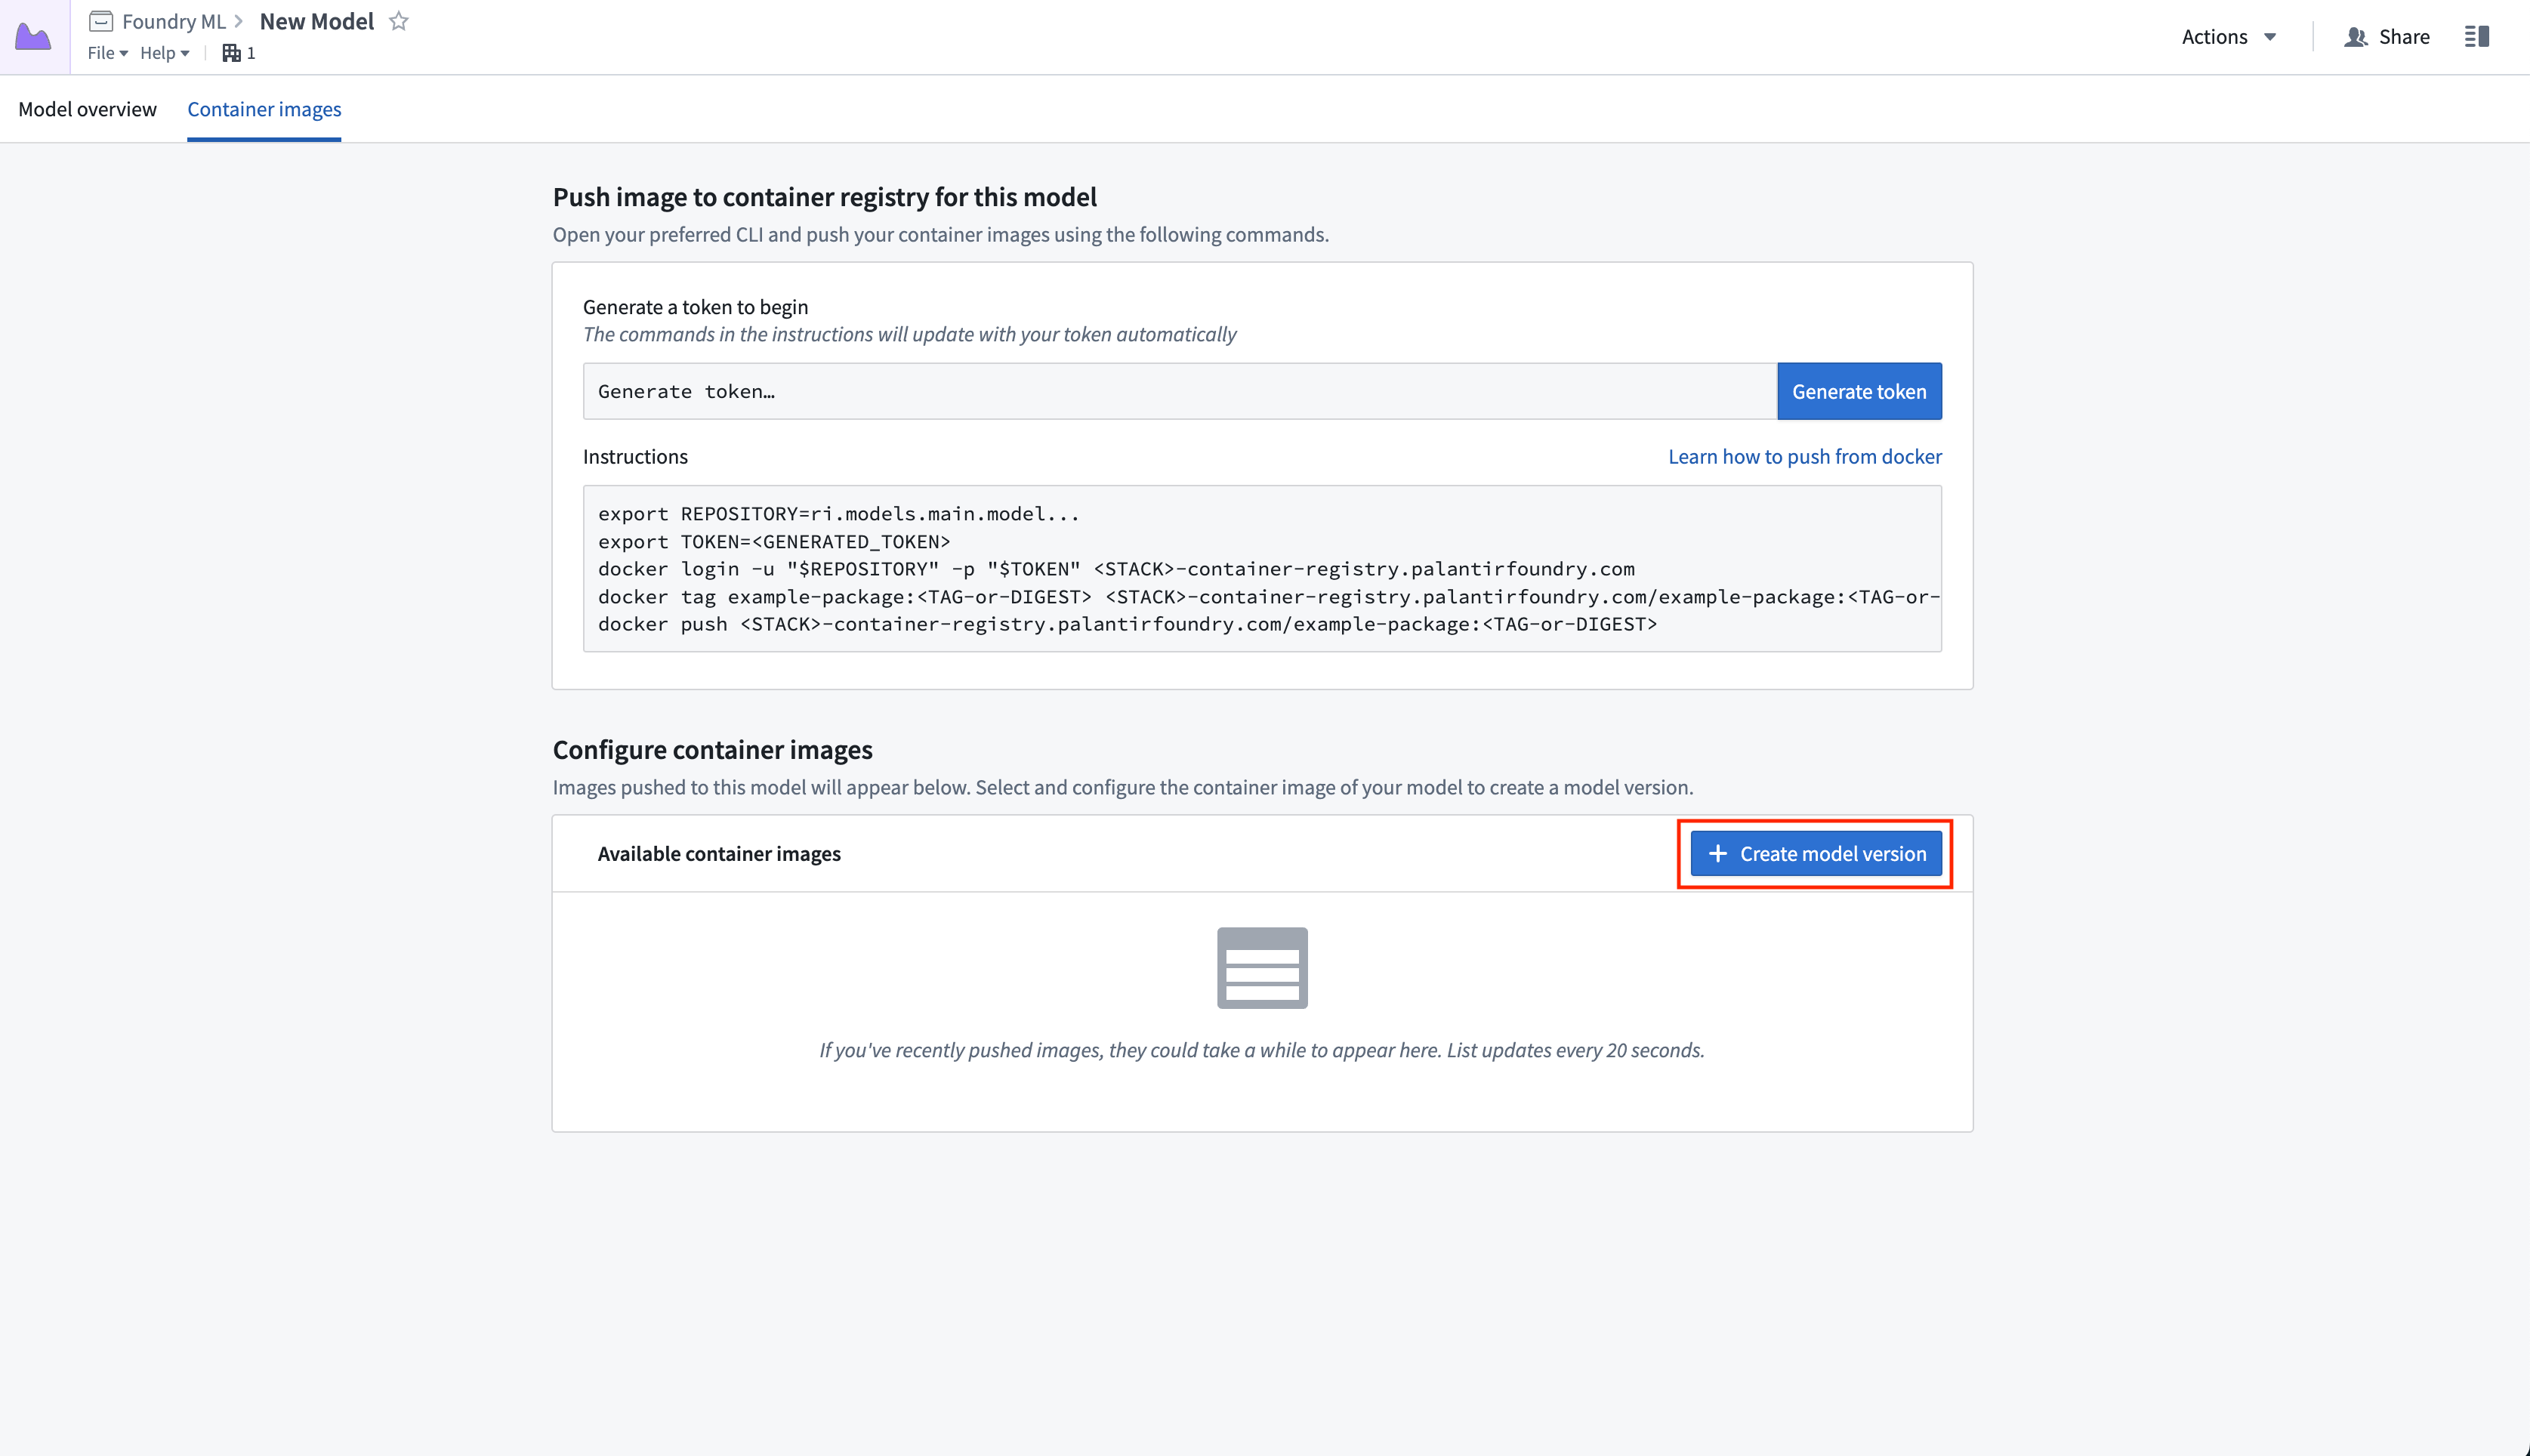
Depending on the size of the image(s), it may take several minutes for your container images to be available in the model.
To iterate on your model adapter implementation before publishing, use the sidecar decorator to test how the logic will work with the container already present in the Model. Follow the steps in the sidecar transforms decorator documentation to create a new transforms repository with the decorator enabled, using the model you just created as the backing Artifacts repository. Then, define a local Python file within the transforms repository that implements the adapter and manually instantiate it as shown below:
Copied!1 2 3 4 5 6 7 8 9 10 11 12 13 14 15 16 17 18from transforms.api import transform, Input, Output from transforms.sidecar import sidecar, Volume # This assumes you created a Python class testAdapter.py under a `myproject` folder and defined a class TestModelAdapter that implements palantir_models' ModelAdapter class. from myproject.testAdapter import TestModelAdapter import palantir_models.transforms @sidecar(image='image-name', tag='1.0.0', volumes=[Volume("shared")]) @transform( output=Output("ri.foundry.main.dataset.<RID>"), source_df=Input("ri.foundry.main.dataset.<RID>"), ) def compute(source_df, output): testingEntrypoint = TestModelAdapter( "/opt/palantir/sidecars/shared-volumes/shared", # Note that the port here should reflect the port on which your specific image is listening. "localhost:PORT") testingEntrypoint.transform_write(source_df, output)
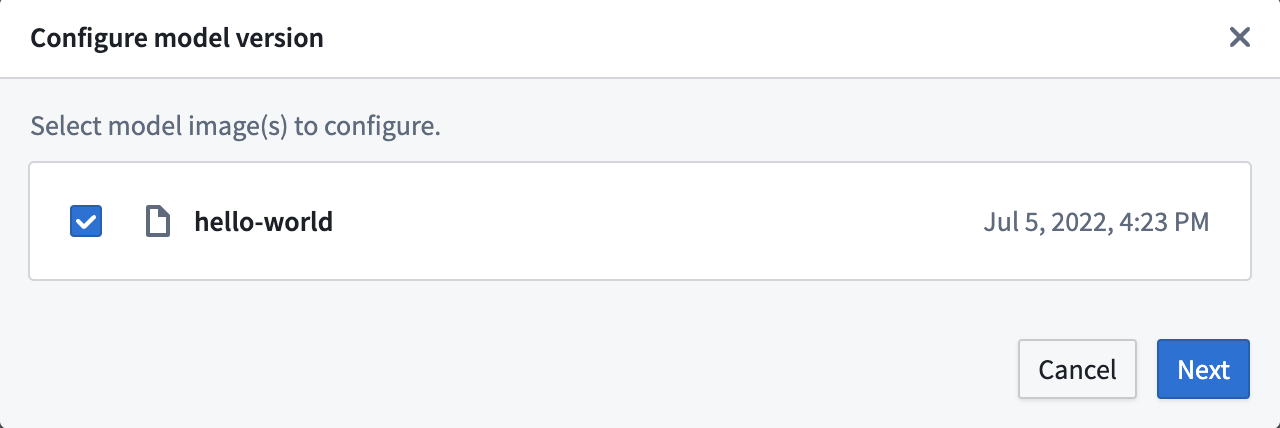
3. Configure the model version
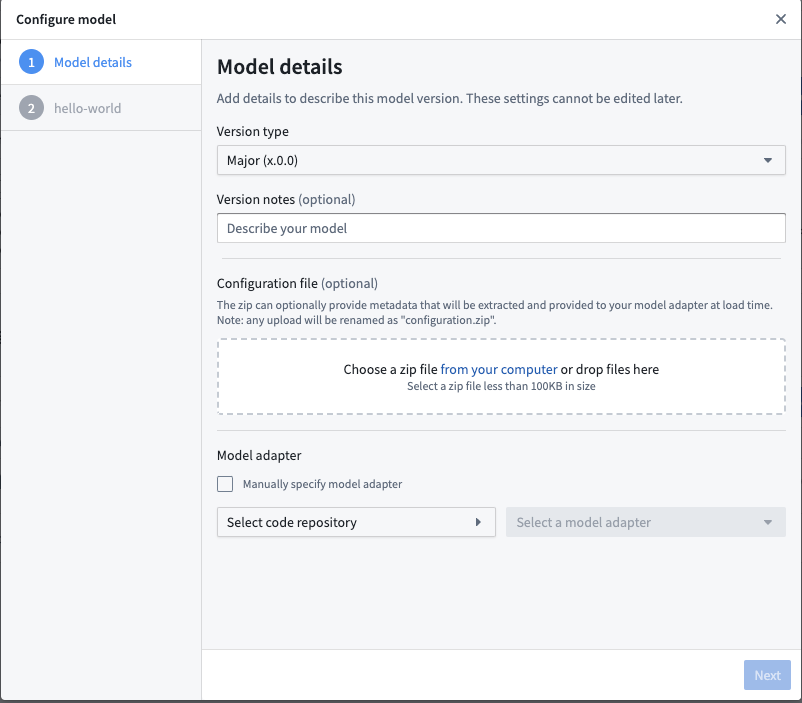
On the Configure model Version page, select one or more container images to be included in the specific model version. Select Next to proceed to the model version configuration.
On the Model details page of the Configure model dialog, configure the type of semantic version change to make. Then, add an optional description and configuration file and select the adapter you created. Choose your model adapter repository in the Model adapter configuration section, and the Select a model adapter dropdown will populate with the latest versions of any valid adapters defined in the repository.
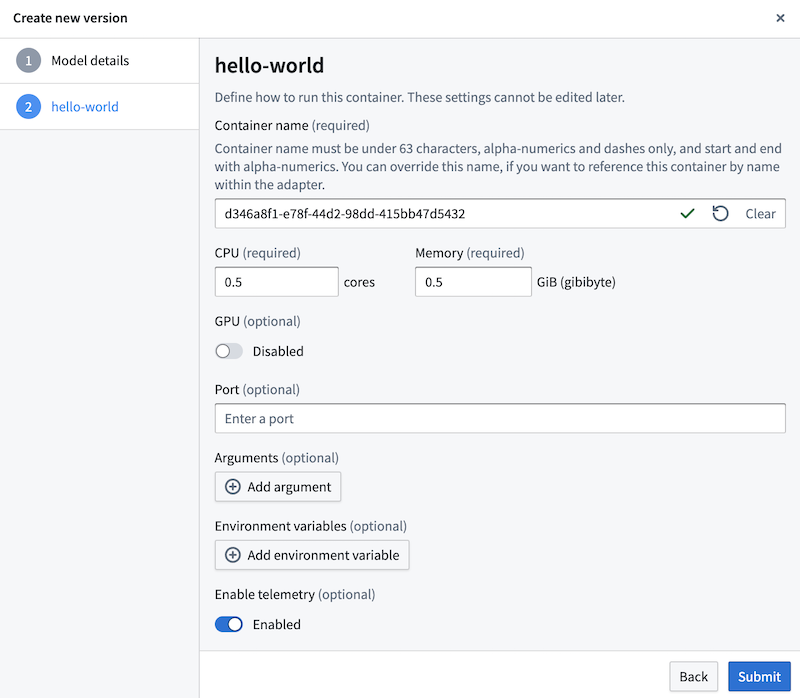
Finally, configure any optional runtime information for each image, including memory constraints, arguments, any environment variables, or a new exec command. Note that specifying the port on which the image is listening is critical if your adapter uses the requests library. You can configure the runtime information for each image selected for the model version.
Models can be configured to produce telemetry logs. If your container supports telemetry, you can enable it to the model version on the step shown in the screenshot below.
4. View model versions
Once the model version is created, its metadata will appear in the Model overview tab of the model page. There, use the left side panel to view and navigate to past versions.
From this page, you can submit to a Modeling Objective using the + icon on the top right or the Actions dropdown. You can also use the model as an input to a Python transform. Note that if the model is backed by a container, you are required to specify the second optional argument in the ModelInput class, selecting a version RID to use in the transform. You must also add a dependency on the model adapter in your transforms repository. Examples of this could look as follows:
Copied!1 2 3 4 5 6 7 8 9 10 11 12 13from transforms.api import transform, Input, Output from palantir_models.transforms import ModelInput @transform( output=Output("/path/to/output/output_dataset"), model=ModelInput( "ri.models.main.model.<RID>", "ri.models.main.model-version.<RID>"), source_df=Input("/path/to/input/input_dataset"), ) def compute(model, source_df, output): model.transform_write(source_df, output)