- Capabilities
- Getting started
- Architecture center
- Platform updates
Create a Project
If you have the appropriate permissions, you can create new Projects by navigating to the Projects landing page and selecting + New project located in the upper right.

Select Project to open a Create new project pane.
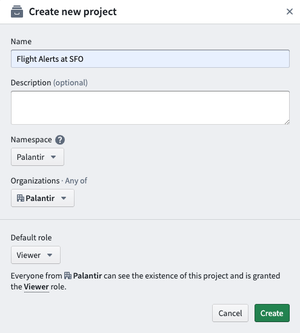
Name your Project, add an optional description, and select a location (space) where your Project will live. You can also change the default role for users within your Organization.
To set the default role that is initially selected for a particular space, go to the corresponding space settings and change the Project default roles.
Select Create to enter your new Project dashboard.
Add documentation
You can add documentation to any folder by dragging and dropping a Markdown file named README.md into the folder, or selecting Add description from the folder’s Actions menu. Standard Markdown ↗ is supported, with some security-related restrictions:
- Inline HTML is disabled.
- Unless otherwise configured, only image files uploaded to Foundry will be rendered. Markdown for Foundry-hosted images is as follows:
.
Links to Foundry resources are also supported. Use the following syntax to have the description automatically add links with icon and file name inferred: [optional link text](rid).
Existing .md files in a Project will not automatically convert to be rendered in place, even if they are correctly named README.md. Downloading the existing README.md, deleting it from the folder, and re-uploading it will make it display.