Create, edit, and delete a Module
This page outlines how to:
Create a Module
Prerequisites
You should download and configure the Apollo CLI before creating a Module.
To use this feature, you may need to update the Apollo CLI by re-downloading it.
This guide will walk through creating a new Module that contains Products related to an application control plane.
Create the Module YAML file
To create a new Module, create a YAML file that contains configuration for the Module. The name of the file should be the same as the value in the name field. In this example, the file name would be control-plane-module.yaml.
Name and description
Copied!1 2 3name: "control-plane-module" displayName: "Control Plane Module" description: "Entities required for the application control plane."
Variables
You can define any variables for the Module in the variables block of Module YAML file. For each variable, you should define the following configuration items:
- Name: The name of the variable, for example
myNamespace. type: The type of the variable. Currently, Apollo supports two main types of variables:- Standard string variables with
type: string. - Preset variables, using
type: optionsandtype: stringPresettogether.
- Standard string variables with
You can only reference a variable using the curly brace syntax ({{ moduleVariable.myNamespace }}) if it is defined in the variables block of the Module YAML file. You cannot delete a variable from the variables block of an existing Module if it is still referenced elsewhere in the Module definition.
String variables
String variables allow you to input text values when installing a Module. String variables have the following specific configuration options:
description: A description for the variable that provides guidance to users when installing the Module.defaultValue(optional): Default value for the variable when installing a Module. If no default value is present, then you must enter a value when installing the Module.constraint(optional): Restriction on the acceptable values for a variable. If a default value is specified, it must satisfy the constraint. Supported constraint types are:regex: Value must match the specified regular expression. Note that validation is performed assuming anchoring on both sides.oneOf: Value must match one of the predefined values.
Here is an example of string variables:
Copied!1 2 3 4 5 6 7 8 9 10 11 12 13 14 15 16 17 18 19 20 21variables: myNamespace: type: string string: defaultValue: "default" description: "Default Namespace for all Entities" constraint: type: oneOf oneOf: - "default" - "namespace1" - "namespace2" heapSize: type: string string: defaultValue: "3g" description: "Heap size for my service - can be specified in kilobytes (k), megabytes (m), or gigabytes (g)." constraint: type: regex regex: '\d+[kmg]'
Preset variables
Often, related variables need to be configured together as a group. With preset variables, you can define known variable configurations and expose them through a single intuitive control. A common use case is resource profiles, where you can create "small", "medium", and "large" presets that automatically configure resources for the target environment appropriately. For example, selecting the "small" option would automatically set CPU and memory values to smaller amounts across all relevant services.
Preset variables consist of two variable types that work together:
options: Defines the available options, for example,[small, medium, large].stringPreset: Maps each option to specific string values. Apollo will resolve the value of the variable based on the selected option.
When a Module with preset variables is installed, you will select a single option, and all related preset variables are automatically configured based on the selected option.
Here is an example of preset variables:
Copied!1 2 3 4 5 6 7 8 9 10 11 12 13 14 15 16 17 18 19 20 21 22 23 24 25 26 27variables: resourceProfile: type: options options: values: [small, medium, large] defaultValue: medium description: "Resource profile for deployment environment" fooServiceMemory: type: stringPreset stringPreset: description: "Memory for foo service" options: resourceProfile mapping: small: "1Gi" medium: "2Gi" large: "4Gi" fooServiceCpu: type: stringPreset stringPreset: description: "CPU for foo service" options: resourceProfile mapping: small: "500m" medium: "1000m" large: "2000m"
Important considerations for preset variables:
- Every
stringPresetvariable must reference anoptionsvariable via itsoptionsfield. - Each
stringPresetmapping must include all options defined in the referencedoptionsvariable. - At installation time, users select an option from the
optionsvariable, not individual values for eachstringPresetvariable. You cannot directly override individualstringPresetvariables during installation. - When you update the mapping of a
stringPresetvariable in a new Module version, the new values are propagated to existing installations automatically. For example, if you update the "small" mapping for a memory variable from "1Gi" to "1.5Gi", all installations using the "small" preset automatically get updated to use "1.5Gi" when updating to the new Module version.
Entities
You can define specific configuration for each Entity of the Module in the entities block in the Module YAML file.
Note that when you refer to a variable, the value should be surrounded by double curly brackets and should include the moduleVariable prefix before the variable name. For example, you can refer to the myNamespace variable by writing {{ moduleVariable.myNamespace }}. For each Entity, you should define the following configuration items:
type: The Product type of the Entity. Currently, only Helm charts are supported.productId: The Product ID of the Entity, which is thegroupId:artifactIdof the Product's Maven coordinate.entityName(optional): An identifier for the Entity. Defaults to theartifactIdfrom the Entity'sProductId.k8sNamespace: The Kubernetes namespace that the Entity should be installed in.ignoredDependencies: Apollo will ignore any Product dependency constraints for the Products you list in the ignored dependencies. If there are none, you should enter an empty list like the below example.configOverrides(optional): You can define Entity config overrides in the Module YAML file.syncConfigOverrides(optional): Determines how Apollo handles existing config overrides for an Entity when installing a Module or updating an existing Module installation. Defaults toENABLED. See Managing config overrides with Modules for options.markedForUninstallation(optional): If this field is present, Apollo will mark the Entity for uninstallation when the Module is installed. If the Entity does not exist in the Environment, Apollo will ignore this Entity during Module installation.minVersion(optional): The minimum version of the Entity that should be uninstalled. If not present, Apollo will uninstall all versions of the Entity.unmanageAfterUninstall(optional): If set toAUTOMATIC, Apollo will unmanage the Entity after uninstalling it. If set toMANUAL, Apollo will leave the Entity managed after uninstalling it. Defaults toAUTOMATIC.
secretRequirements(optional): You can specify a list of secret names and list of associated secret keys that must exist before the Module is installed or upgraded. The Module installation interface will guide users through setting up the correct secrets for the Entities that have this field set. See the full example below for the syntax of secret requirements.dependencyGroups(optional): You can assign the Entity to one or more dependency groups. Entities will only consider dependencies satisfied if they share at least one group with the dependent Entity. If not specified, the Entity defaults to thedefaultgroup.dependencyGroupOverrides(optional): You can override the default dependency group behavior for specific dependencies. This allows you to specify which groups to search when resolving dependencies for particular Products. Use the wildcard"*"to allow the Entity to satisfy dependencies from any group.
All non-optional fields must be present for each Entity in the Module YAML file. If you do not know a particular value when creating a Module, you can use a variable to define the value at Module installation.
Below is an example Entity definition:
Copied!1 2 3 4 5 6 7 8 9 10entities: - type: helmChart helmChart: productId: com.palantir.example:backend-service k8sNamespace: "{{ moduleVariable.myNamespace }}" syncConfigOverrides: MERGE configOverrides: | 2.0.0: overrides: num-threads: 100
If an Entity with the same name already exists, Apollo will overwrite the existing Entity's settings to match that in the Module definition.
Entity installation order
You can control the installation order of Entities in a Module by declaring Product dependencies in the Product Release manifest.
When a Module is installed on an Environment and consequently Entities are declared, Apollo will compute the Product dependency relationships between every Entity as part of constraint evaluation. This will determine the installation order of Entities.
For example, suppose you have a Module with a database Entity and an application Entity. To ensure the database is installed before the application, the manifest for the application Product Releases must specify a dependency on the database using the product-dependencies extension:
Copied!1 2 3 4 5 6 7# Example manifest for a 'com.example:app-service' Product Release extensions: product-dependencies: - product-group: com.example product-name: database-service minimum-version: 1.0.0 maximum-version: 1.x.x
Learn more about publishing Product Releases with dependencies and the detailed rules for install ordering.
Submodules
You can create a Composite Module by referencing other existing Modules under the submodules list. This enables you to manage complex configurations by breaking them down into smaller, reusable components.
Below is the structure for including a basic submodule in the Module YAML file:
Copied!1 2 3submodules: - name: "submodule-name" version: 0.3.0
For each submodule, you should define the following configuration items:
name: The name of the Module to be used as a submodule. This must be a Module that already exists in Apollo.version: The version of the Module to be used as a submodule. The provided version is immutable for a given version of the parent Module; a new version of the parent Module has to be created in order to update the included submodule.key(optional): When the same Module is used as a submodule multiple times, a unique key is required to differentiate between them.variableOverrides(optional): Allows for overriding any variables defined in the submodule. An override can either hardcode a value, or re-map the submodule's variable to a variable defined in the parent Module.entityOverrides(optional): Allows for overriding configurations and secrets of Entities defined in the submodule. This can be used to customize the behavior of the submodule within the parent Module.
Below is an example definition of a composite Module:
Copied!1 2 3 4 5 6 7 8 9 10 11 12 13 14 15 16 17 18name: control-plane-module displayName: Control Plane Module description: A module that includes 2 submodules. variables: parentNamespace: type: string string: defaultValue: "default" description: "Default Namespace for all Entities" submodules: - name: "backend-module" version: 0.3.0 variableOverrides: myNamespace: "{{ moduleVariable.parentNamespace }}" - name: "frontend-module" version: 0.2.0 variableOverrides: enableExperimentalFeature: "true"
In this example, control-plane-module includes two submodules: backend-module and frontend-module. The myNamespace variable defined in backend-module is overridden to instead use the value provided for the parentNamespace variable defined in the parent Module. The enableExperimentalFeature variable defined in frontend-module is hardcoded to true. A value for it will not be required to be provided at install time.
For more in depth information on submodules, see Module composition.
Restrictions
You can apply restrictions on how the Module can be used.
Installation restrictions
You can disallow new installations of a Module by including the following in your Module definition:
Copied!1 2 3restrictions: newInstallations: allowed: false
Consider applying this restriction to Modules that will only be used as submodules in other composite Modules.
Submodule usage restrictions
To prevent parent composite Modules from applying Entity overrides to your submodule, add the following to your Module definition:
Copied!1 2 3restrictions: submoduleUsage: allowEntityOverrides: false
When allowEntityOverrides is set to false:
- Parent Modules cannot use
entityOverridesto modify the configuration for Entities in your Module (for exampleconfigOverrides,secretRequirements,ignoredDependencies). Attempts to create a composite Module withentityOverrideswill fail validation. - Parent Modules can still use
variableOverridesto customize your Module's behavior.
For example, a database Module might have configOverrides that are not intended for parent Modules to customize. When this database-module is used as a submodule in a composite Module, the composite Module cannot modify any configOverrides.
Copied!1 2 3 4 5 6 7 8 9 10 11 12 13 14 15 16 17 18 19 20 21 22 23 24 25 26 27 28 29 30 31 32 33 34 35 36 37 38 39 40 41name: database-module displayName: Database Module description: A database module with strict configuration requirements restrictions: submoduleUsage: allowEntityOverrides: false # Prevents parent modules from using entityOverrides to override anything variables: postgresReplicated: type: string string: defaultValue: 'false' description: ... backupTuningParameter: type: string string: defaultValue: '3' description: ... postgresMaxConnections: type: string string: description: ... entities: - type: helmChart helmChart: productId: com.example:database k8sNamespace: databases configOverrides: | 1.0.0: overrides: postgresql: name: postgres-shared-cluster feature-flag-1: true feature-flag-2: true postgresql-version: '17' data-storage: 400Gi replicated: "{{moduleVariable.postgresReplicated}}" env: BACKUP_TUNING_PARAMETER: "{{moduleVariable.backupTuningParameter}}" postgresql-conf: max_connections: {{moduleVariable.postgresMaxConnections}} wal_keep_size: 800
Composite Modules are not allowed to specify entityOverrides when using database-module as a submodule, for example:
Copied!1 2 3 4 5 6 7 8 9 10 11 12 13 14 15 16 17 18 19 20 21 22 23name: example-composite-module displayName: Example Composite Module description: Example Composite Module submodules: - name: "application-module" version: 0.1.0 - name: "database-module" version: 0.1.0 # variableOverrides are still allowed variableOverrides: postgresReplicated: "true" backupTuningParameter: "10" # entityOverrides are not allowed because database-module sets `allowEntityOverrides: false` # entityOverrides: # - type: helmChart # helmChart: # productId: com.example:database # override: # configOverrides: | # 1.0.0: # overrides: # postgresql: # postgresql-version: '16'
Full example
Below is an example of a complete Module YAML file. You can add more variables and Entities using a comma separated list of entries.
Copied!1 2 3 4 5 6 7 8 9 10 11 12 13 14 15 16 17 18 19 20 21 22 23 24 25 26 27 28 29 30 31 32 33 34 35 36 37 38 39 40 41 42 43 44 45 46 47 48 49 50 51 52 53 54 55 56 57 58 59 60 61 62 63 64 65 66 67 68 69 70 71 72 73 74 75 76 77 78 79 80 81 82 83 84 85 86 87 88 89 90 91 92 93name: control-plane-module displayName: Control Plane Module description: Entities required for the application control plane. variables: myNamespace: type: string string: defaultValue: "default" description: Default Namespace for all Entities resourceProfile: type: options options: values: [small, medium, large] defaultValue: medium description: "Resource profile for deployment environment" backendCpu: type: stringPreset stringPreset: description: "CPU allocation for backend service" options: resourceProfile mapping: small: "500m" medium: "1000m" large: "2000m" databaseCpu: type: stringPreset stringPreset: description: "CPU allocation for database service" options: resourceProfile mapping: small: "250m" medium: "500m" large: "1000m" backendMemory: type: stringPreset stringPreset: description: "Memory allocation for backend service" options: resourceProfile mapping: small: "1Gi" medium: "2Gi" large: "4Gi" databaseMemory: type: stringPreset stringPreset: description: "Memory allocation for database service" options: resourceProfile mapping: small: "512Mi" medium: "1Gi" large: "2Gi" entities: - type: helmChart helmChart: productId: com.palantir.example:backend-service k8sNamespace: "{{ moduleVariable.myNamespace }}" configOverrides: | 2.0.0: overrides: resources: requests: cpu: "{{ moduleVariable.backendCpu }}" memory: "{{ moduleVariable.backendMemory }}" limits: memory: "{{ moduleVariable.backendMemory }}" num-threads: 100 - type: helmChart helmChart: productId: com.palantir.example:database-service k8sNamespace: "{{ moduleVariable.myNamespace }}" configOverrides: | 2.0.0: overrides: resources: requests: cpu: "{{ moduleVariable.databaseCpu }}" memory: "{{ moduleVariable.databaseMemory }}" limits: memory: "{{ moduleVariable.databaseMemory }}" secretRequirements: my-secret: type: multikey multikey: description: API key for communicating between services keys: - api-key - type: helmChart helmChart: productId: com.palantir.example:deprecated-application k8sNamespace: app-namespace markedForUninstallation: minVersion: 1.0.0 unmanageAfterUninstall: MANUAL
Publish the Module to Apollo
Run the following command in your terminal to publish your Module to Apollo.
Copied!1apollo-cli module create --module-definition-file /path/to/yaml/file.yml
Learn more about the apollo-cli module create command.
Module versions
Once created, each Module will be automatically assigned a version. Versions starts at 0.1.0 and the minor version is incremented each time you update your Module. Versions are immutable, and once created cannot be edited or deleted.
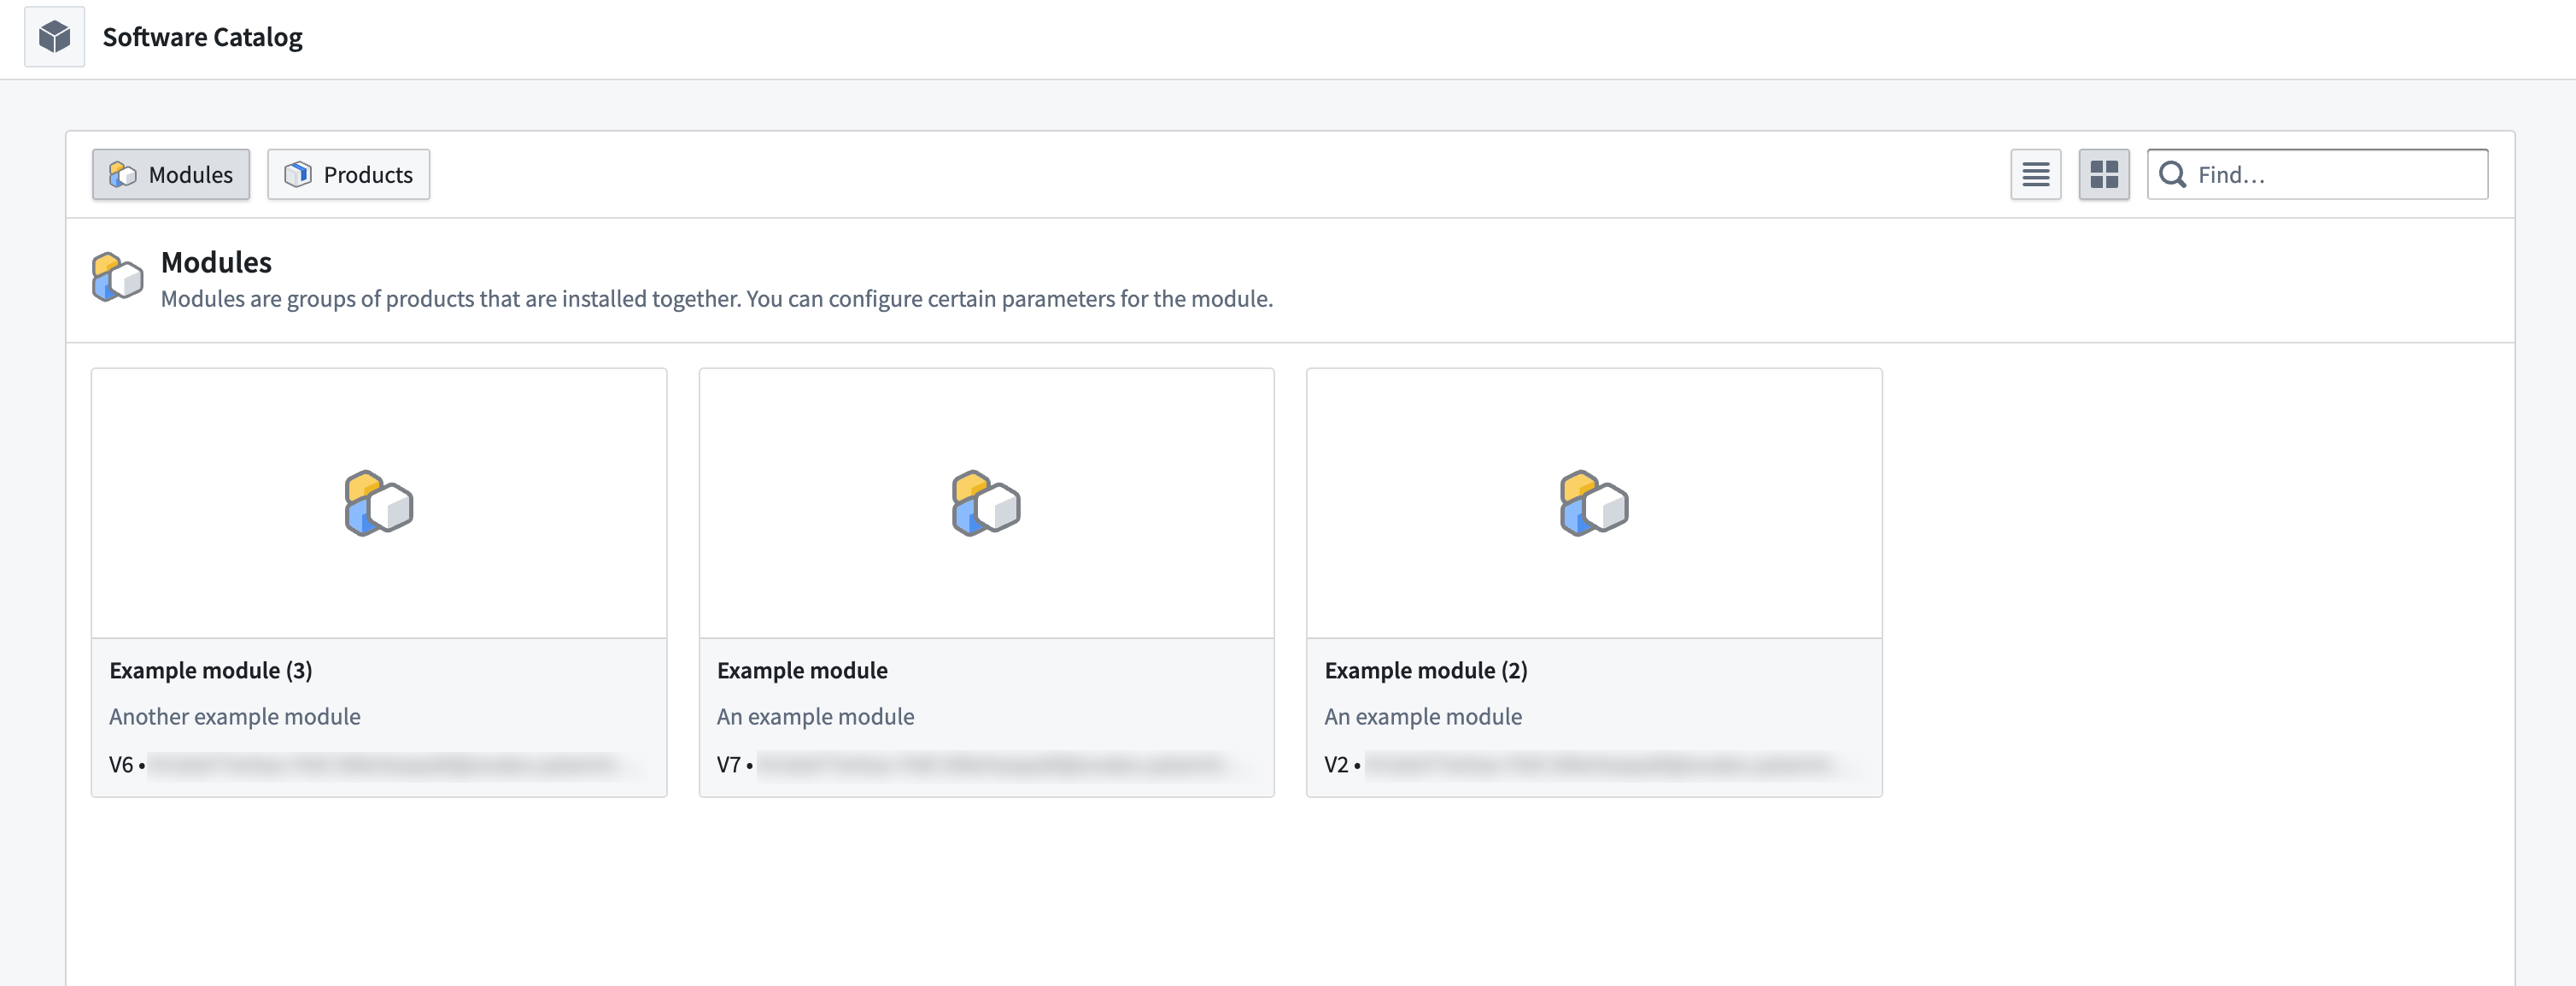
View your Module
You can confirm that your Module was published in the Modules tab of the Software Catalog.
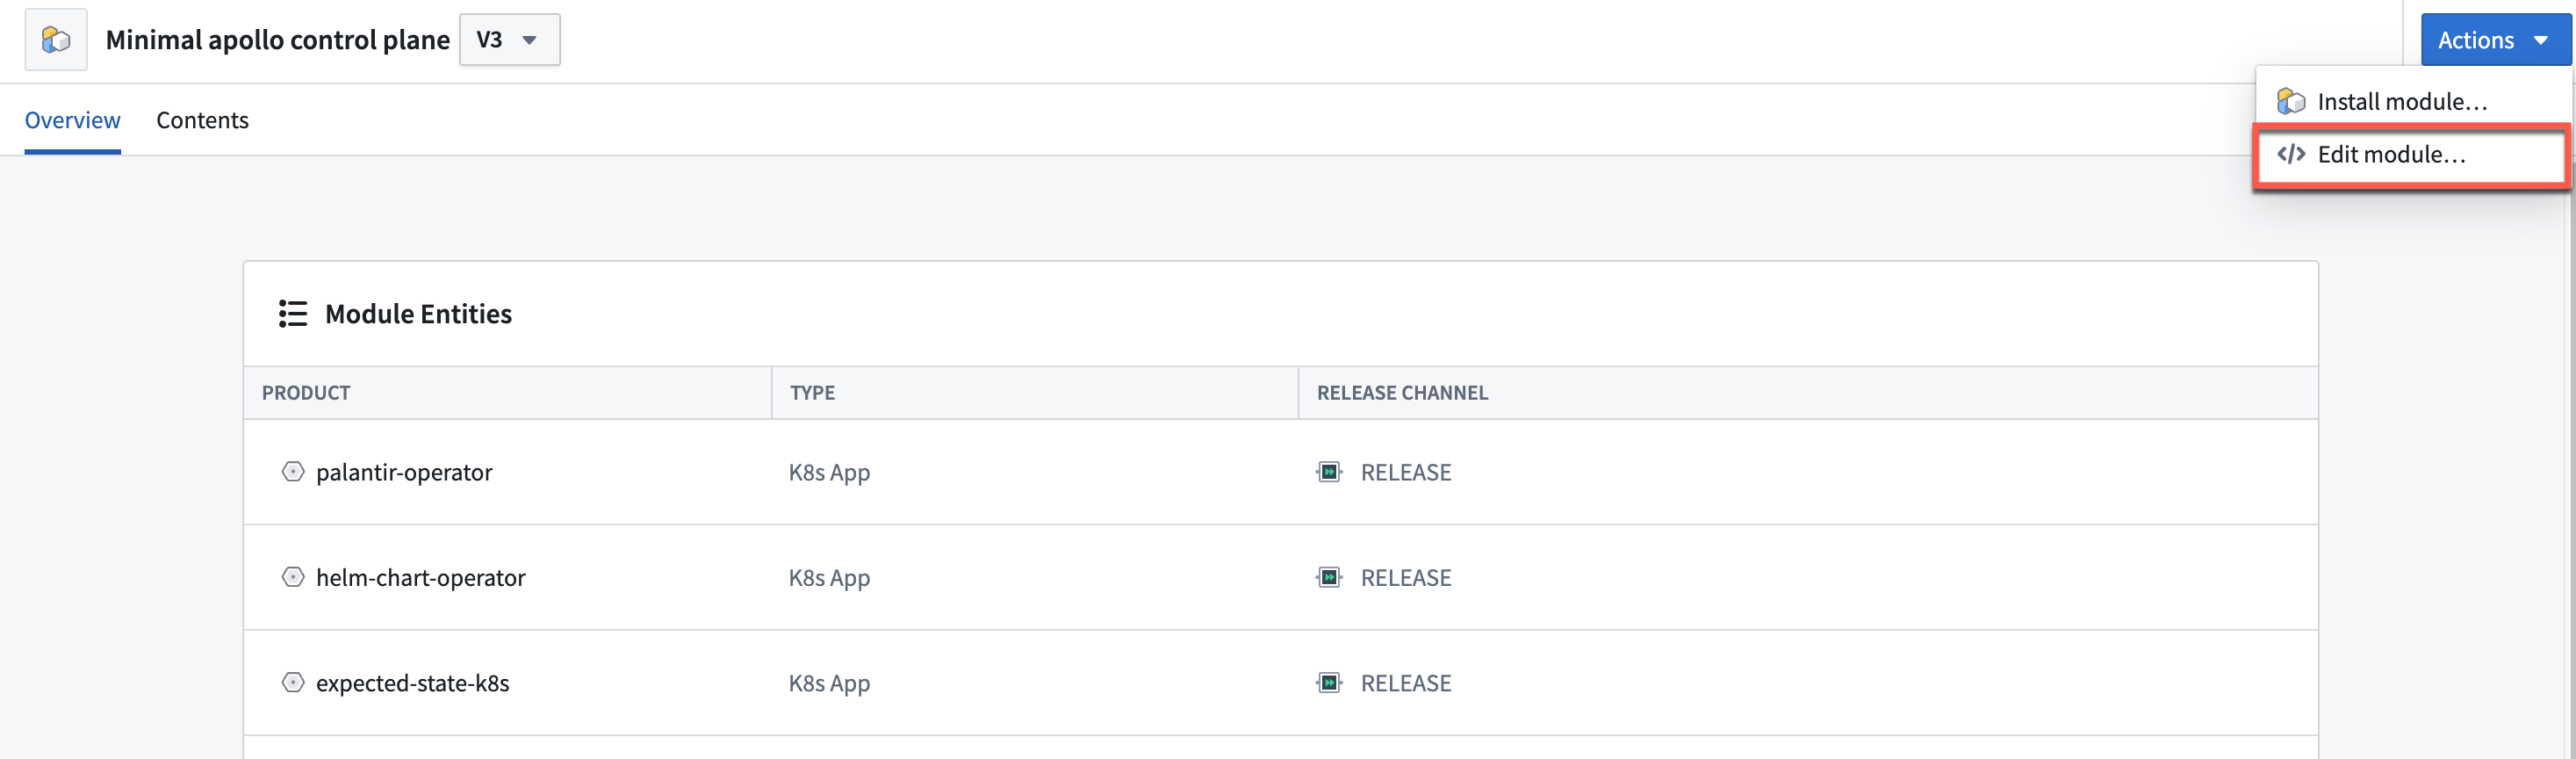
Edit a Module
You can edit a Module by publishing a new version of the Module YAML file. To download the Module YAML file, navigate to the Module overview page and select Edit module from the Actions dropdown.
This will open a dialog where you can select Download module definition.
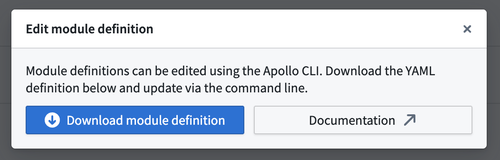
You can edit the Module YAML file and publish it to Apollo using the Apollo CLI.
Once the new version of the Module is published you can view it in the version selector next to the Module name.
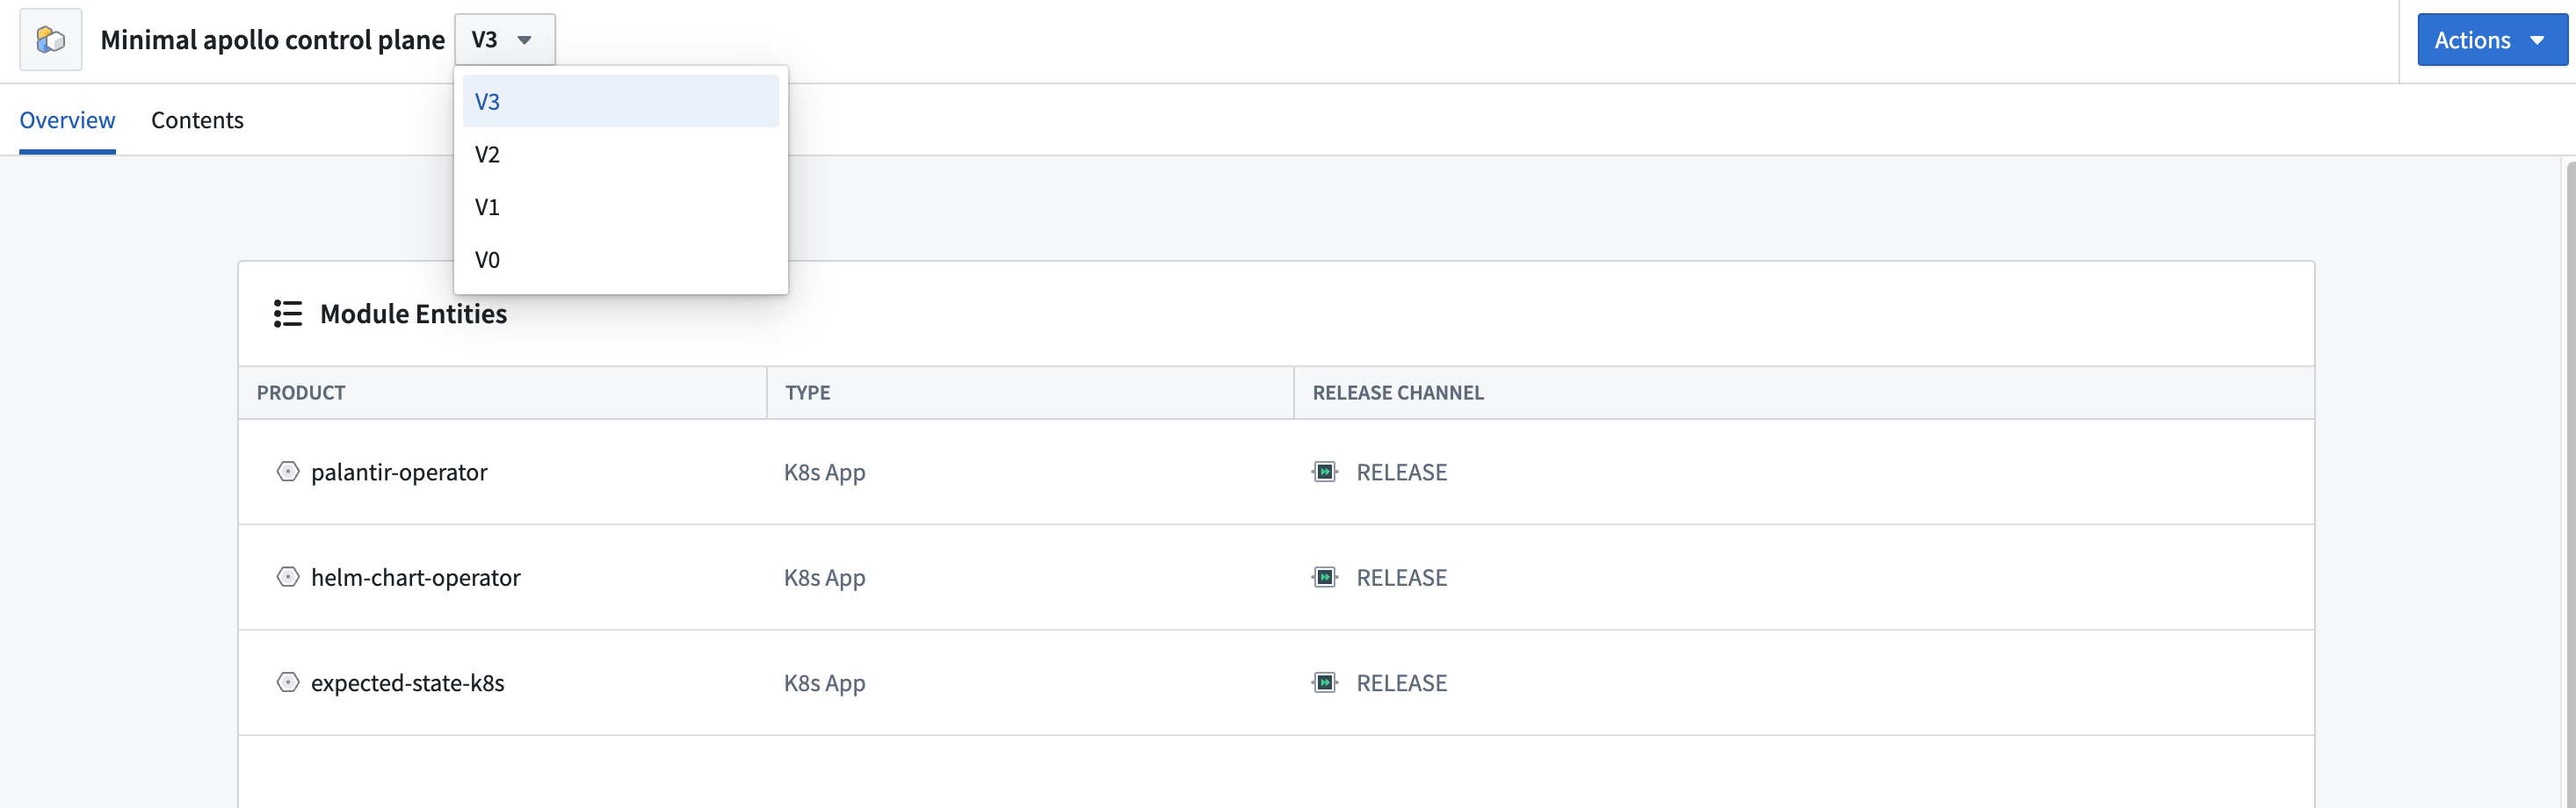
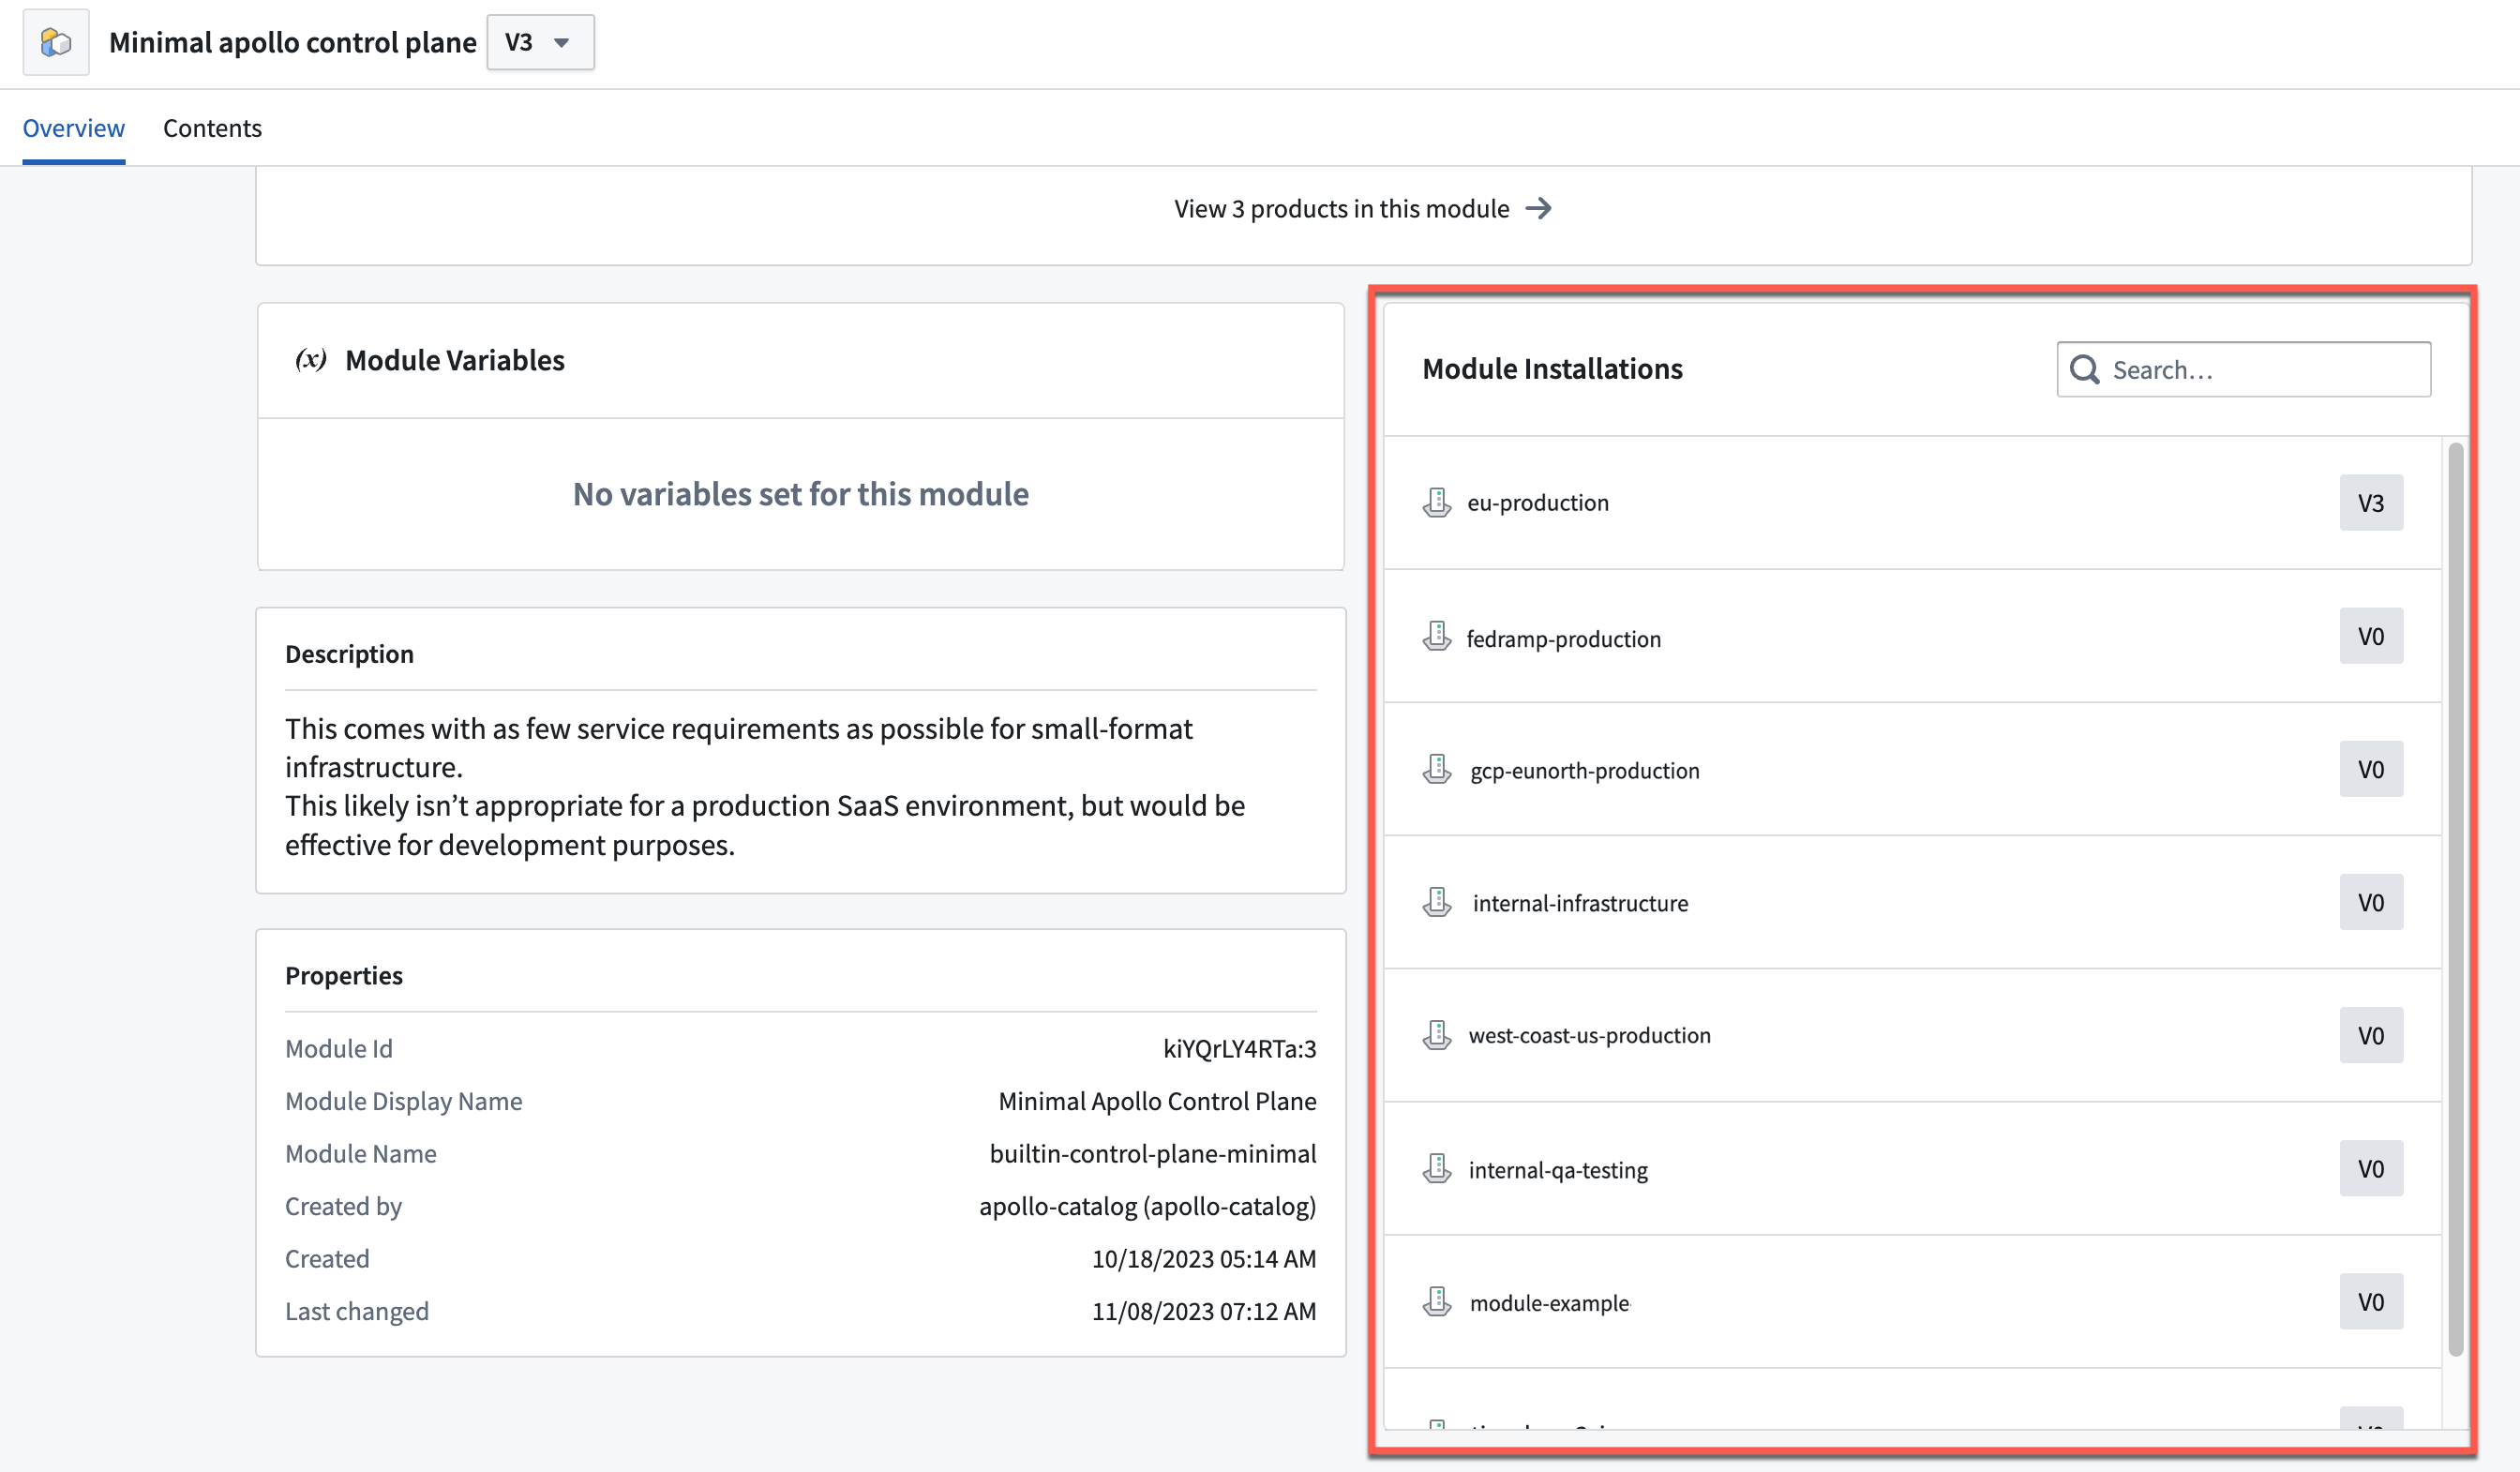
You can also view the version of each Module installation in the Module installations table.
Note that Module versions are immutable. In addition, when a new version of a Module is published, Apollo will attempt to update existing Module installations to the latest version of the Module by proposing a change request.
When creating a new version of a Module, you should consider how the changes will impact existing installations of the Module. The following sections outline best practices for evolving Modules.
Evolving a Module: adding a new variable
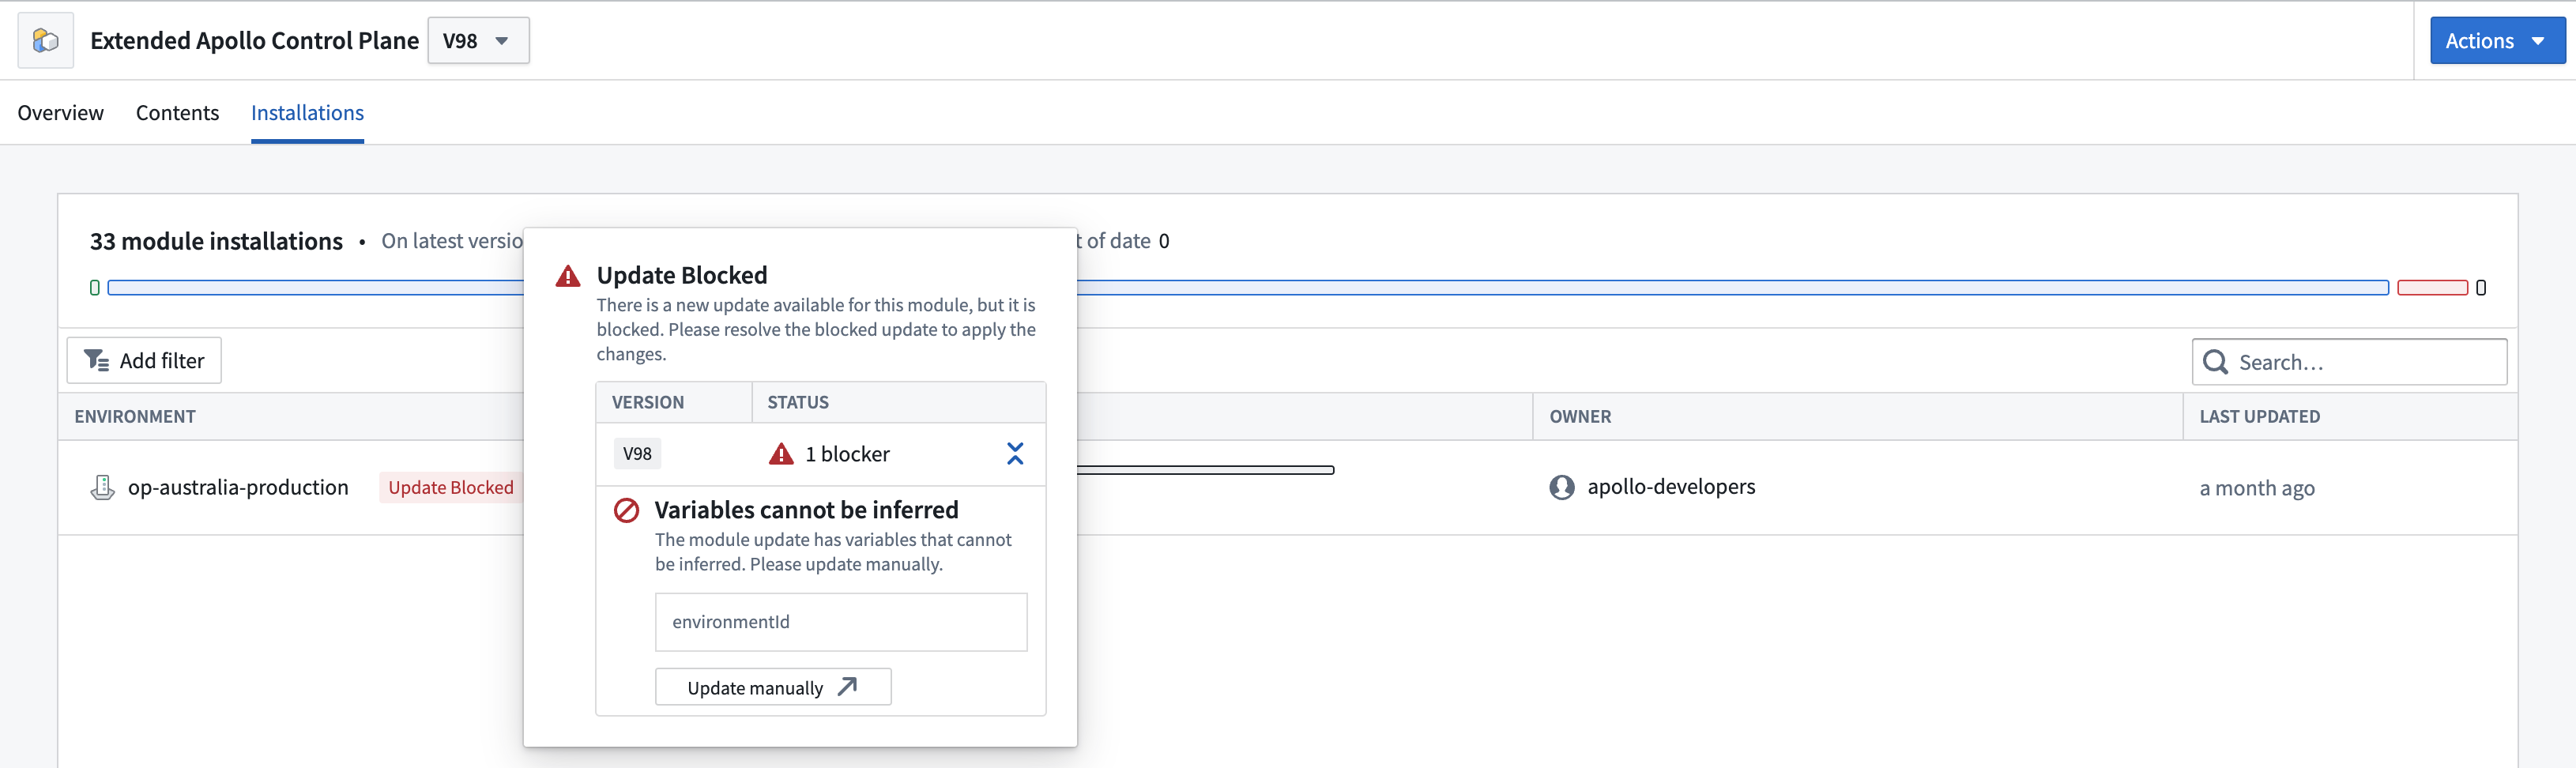
If you introduce a new Module variable, you should provide a defaultValue so that all existing installations of your Module can be seamlessly updated to the new version.
If you do not supply a defaultValue, the Module update will be blocked until users enter a value for this variable.
Evolving a Module: deleting a variable
To delete a variable, you must ensure it is not used anywhere in the definition of the Module. In the example below, the enableFeatureFlag variable cannot be deleted because it is still referenced in config overrides.
Copied!1 2 32.0.0: overrides: my-feature-flag: {{ moduleVariable.enableFeatureFlag }}
One way you can eliminate the reference is by replacing it with a hard-coded value, such as true. When existing installations are updated to the new version of your Module, whatever value had previously been chosen for the enableFeatureFlag variable will be overwritten to true.
Copied!1 2 32.0.0: overrides: my-feature-flag: true
Another way to eliminate this reference is to delete the reference entirely:
Copied!1 22.0.0: overrides: {}
Finally, you can replace it by referencing a different variable - as long as this other variable is defined in the Module definition.
Copied!1 2 32.0.0: overrides: my-feature-flag: {{ moduleVariable.enableNewFeatures }}
After you remove all references to the variable, you can delete the variable itself from the Module definition.
Evolving a Module: renaming a variable
There is no way to rename a variable while preserving all the values that were chosen by existing Module installations. This is because Apollo cannot differentiate between a change intended to rename one variable in a Module definition from a change intended to delete one variable and create a new one.
Evolving a Module: uninstalling an Entity
If you want Apollo to uninstall a specific Entity from every installation of your Module, you must explicitly signal this to Apollo using the markedForUninstallation field (see example below).
Copied!1 2 3 4 5 6 7 8 9name: control-plane-module displayName: Control Plane Module description: Entities required for the application control plane. entities: - type: helmChart helmChart: productId: com.palantir.example:deprecated-application k8sNamespace: app-namespace markedForUninstallation: {}
Once Module installations are updated to this version of your Module, Apollo will uninstall the Entity (subject to dependency constraints).
You can choose to uninstall a Product only after it has upgraded to some version, for example, when it has finished a migration or offloaded some responsibility to another service. To do this, you can specify a minVersion at which the Entity will become eligible for uninstallation.
Copied!1 2 3 4 5 6 7 8 9 10name: control-plane-module displayName: Control Plane Module description: Entities required for the application control plane. entities: - type: helmChart helmChart: productId: com.palantir.example:deprecated-application k8sNamespace: app-namespace markedForUninstallation: minVersion: 1.45.0
If you remove an Entity from a Module definition without specifying the markedForUninstallation field then existing installations of the Entity will remain installed but will no longer be managed by this Module. This can be useful if you want to seamlessly transfer the responsibility for managing a particular Entity from one Module to another. The original Module can stop managing the Entity, allowing the new Module to take over and start managing the Entity.
Evolving a Module: Moving an Entity from one Module to another Module
You can move an Entity from an old Module definition to a new Module definition without disrupting installations of that Entity. Entities can only be managed by one Module at a time. In the example below, we will move the monitoring-service Helm chart from the core-services Module to a new observability Module.
To move an Entity between Modules:
- Delete the Entity from the old Module definition: Do not mark it for uninstallation, just delete the Entity from the Module definition. When installations of this old Module are updated, the Entity will remain installed, but no longer managed by this Module.
Copied!1 2 3 4 5 6 7 8 9 10 11 12name: core-services displayName: Core Services description: Essential services for the platform entities: - - type: helmChart - helmChart: - productId: com.palantir.example:monitoring-service - k8sNamespace: monitoring - type: helmChart helmChart: productId: com.palantir.example:auth-service k8sNamespace: auth
- Add the Entity to the new Module: Update the new Module definition to include the Entity. You may need to carry over any variables that were referenced by this Entity.
Copied!1 2 3 4 5 6 7 8 9 10 11 12 13name: observability displayName: Observability Module description: Monitoring and observability tools variables: k8sNamespace: type: string string: description: "k8s namespace to deploy observability helm-charts into" entities: - type: helmChart helmChart: productId: com.palantir.example:monitoring-service k8sNamespace: "{{ moduleVariable.k8sNamespace }}"
-
Update old Module installation: Update installations of the old Module so that it relinquishes control over the Entity.
-
Update new Module installation: Once the Entity is no longer managed by any Module, your new Module can now take it over. Update the installations of the new Module, which will start managing the Entity. You will need to provide values for any newly added variables, such as
k8sNamespacein the example above. There should be zero diff.
The result is that zero Plans are issued for the Entity, it remains installed throughout the entire process.
Managing config overrides with Modules
Modules provide a way to manage config overrides for Entities in Apollo across multiple Environments. When you define an Entity in a Module, you can specify config overrides for the Entity in the configOverrides field. You can use variables to add flexibility to the config overrides of an Entity. The example below shows the config overrides for an Entity in a Module that defines a variable enableFeatureFlag:
Copied!1 2 32.0.0: overrides: my-feature-flag: {{ moduleVariable.enableFeatureFlag }}
When installing the Module, you will be prompted to provide a value for the variable. You can also decide to use the default if specified in the Module definition.
The syncConfigOverrides field on an Entity (see Entity configuration options) controls how Apollo handles existing Entity config overrides when installing a Module onto an existing Environment or updating an existing Module installation. With all options, when adding a new Entity, Apollo will add the config overrides specified in the Module definition regardless. The field supports the following values:
ENABLED(default): Updates to existing Entities will use the config overrides specified in the Module definition, overwriting any existing config overrides on the Entity. This allows you to reduce config overrides divergence across Environments where the Module is installed. You should use variables to handle cases where specific values in the config overrides are expected to be different across Environments.MERGE: Config keys in the Module definition will always overwrite matching config keys in Entity config overrides. All other config keys in Entity config overrides will be left untouched. Users cannot override any config keys in config overrides that are controlled by a module. You can use the magic value{{ unset }}in a Module definition to remove a config point from Entity config overrides and prevent users from being able to set it in Entity config overrides.DISABLED: Updates to existing Entities will always keep the Entity's config overrides instead of using the config overrides specified in the Module definition. New Module installations that start managing an existing Entity will also leave the Entity's config overrides untouched.
The following example illustrates the behavior of each option. Given this existing Entity config:
Copied!1 2 3 4 5 63.0.0: rolling-restart-config: conf: key1: a key2: b key3: c
And this config in the Module definition:
Copied!1 2 3 4 5 63.0.0: rolling-restart-config: conf: key1: x key3: {{ unset }} key4: d
The resulting config with the MERGE strategy would be:
Copied!1 2 3 4 5 6 73.0.0: rolling-restart-config: conf: key1: x # Value overridden by the Module key2: b # Untouched from the Entity # key3 removed entirely key4: d # Added by the Module
With the ENABLED strategy, the Entity config is replaced entirely by the Module definition (minus any {{ unset }} keys):
Copied!1 2 3 4 53.0.0: rolling-restart-config: conf: key1: x key4: d
With the DISABLED strategy, the Entity config is left entirely unchanged:
Copied!1 2 3 4 5 63.0.0: rolling-restart-config: conf: key1: a key2: b key3: c
Suppressing Module updates
You can temporarily suppress a Module installation to pause all Module updates and freely edit module-owned Entity config overrides. This is intended as a temporary break-glass mechanism for situations where you need to make urgent configuration changes without waiting for a Module update.
When you suppress a Module installation:
- Apollo cancels any open Module update change request.
- Apollo prevents new Module update change requests from being created.
- You can edit config override keys that are normally controlled by the Module.
To resume normal Module updates, unsuppress the Module installation. Apollo will open a change request to update the Module to the latest version, allowing any configuration divergence introduced during suppression to be reconciled. Until this change request merges, the Module installation will show as Resuming Updates.
Delete a Module
You can only delete a Module if there are no remaining installations of the Module. You must unlink the Module from all installations before you can delete it.
To delete a Module, you can navigate to the Module page and select Delete module from the Actions dropdown.

This will remove the Module from the Software Catalog.