Create and delete a Kubernetes namespace
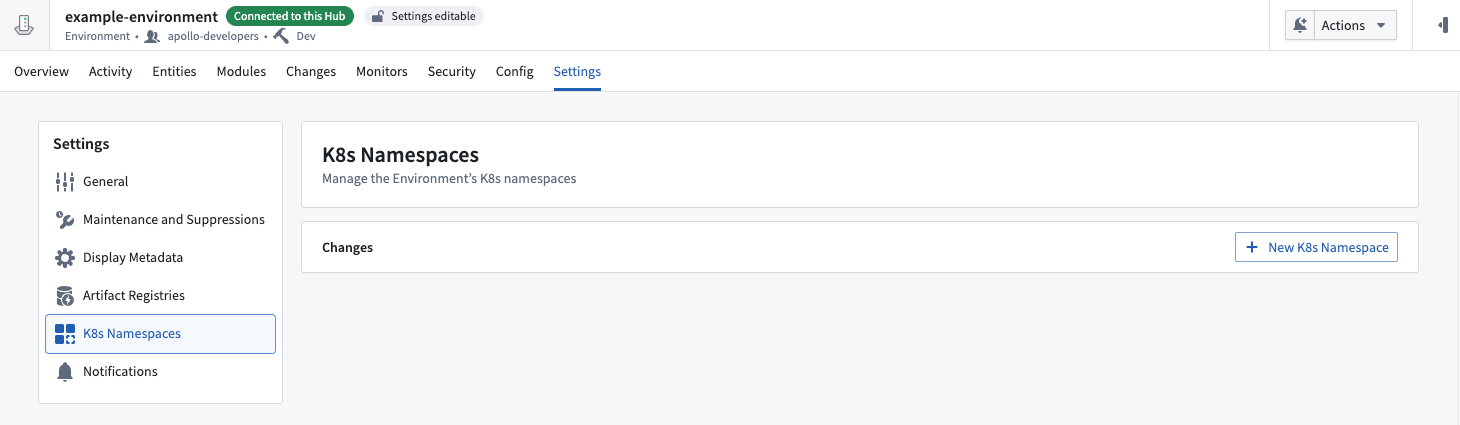
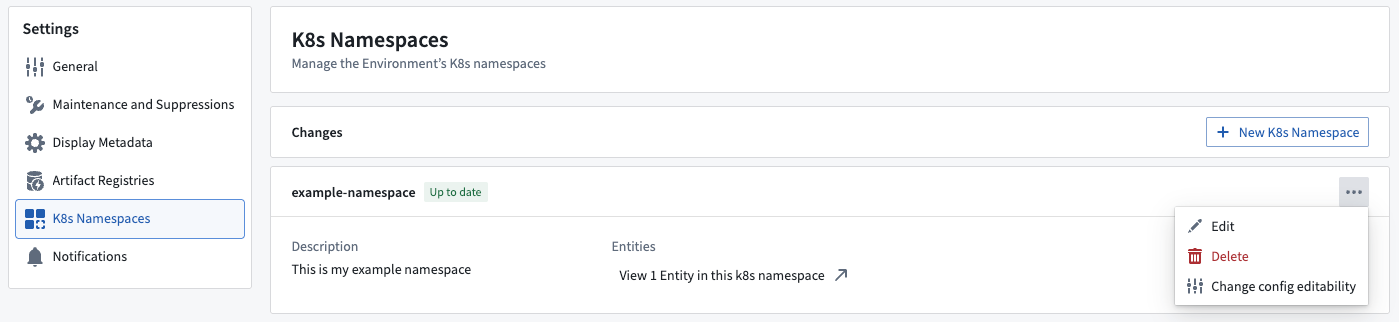
To manage Kubernetes namespaces for an Environment, navigate to the K8s Namespaces section of the Settings tab.
The K8s Namespaces section will only be visible once the k8s-namespace-agent agent for the Environment has successfully reported to Apollo.
This requires both helm-chart-operator agent and apollo-auth-broker agent to report to Apollo first.
Create a Kubernetes namespace
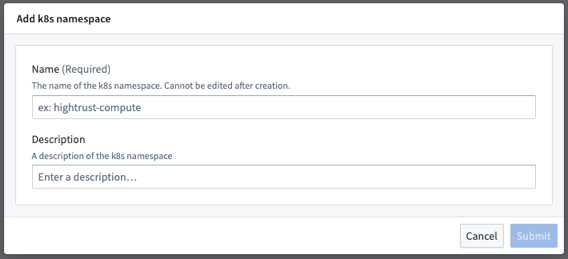
To create a new Kubernetes namespace, select the New K8s Namespace button. This will open a dialog where you can provide the name and an optional description for the new namespace. All namespace names must be valid RFC 1123 DNS labels (for example example-namespace is valid, but ExampleNamespace is not).
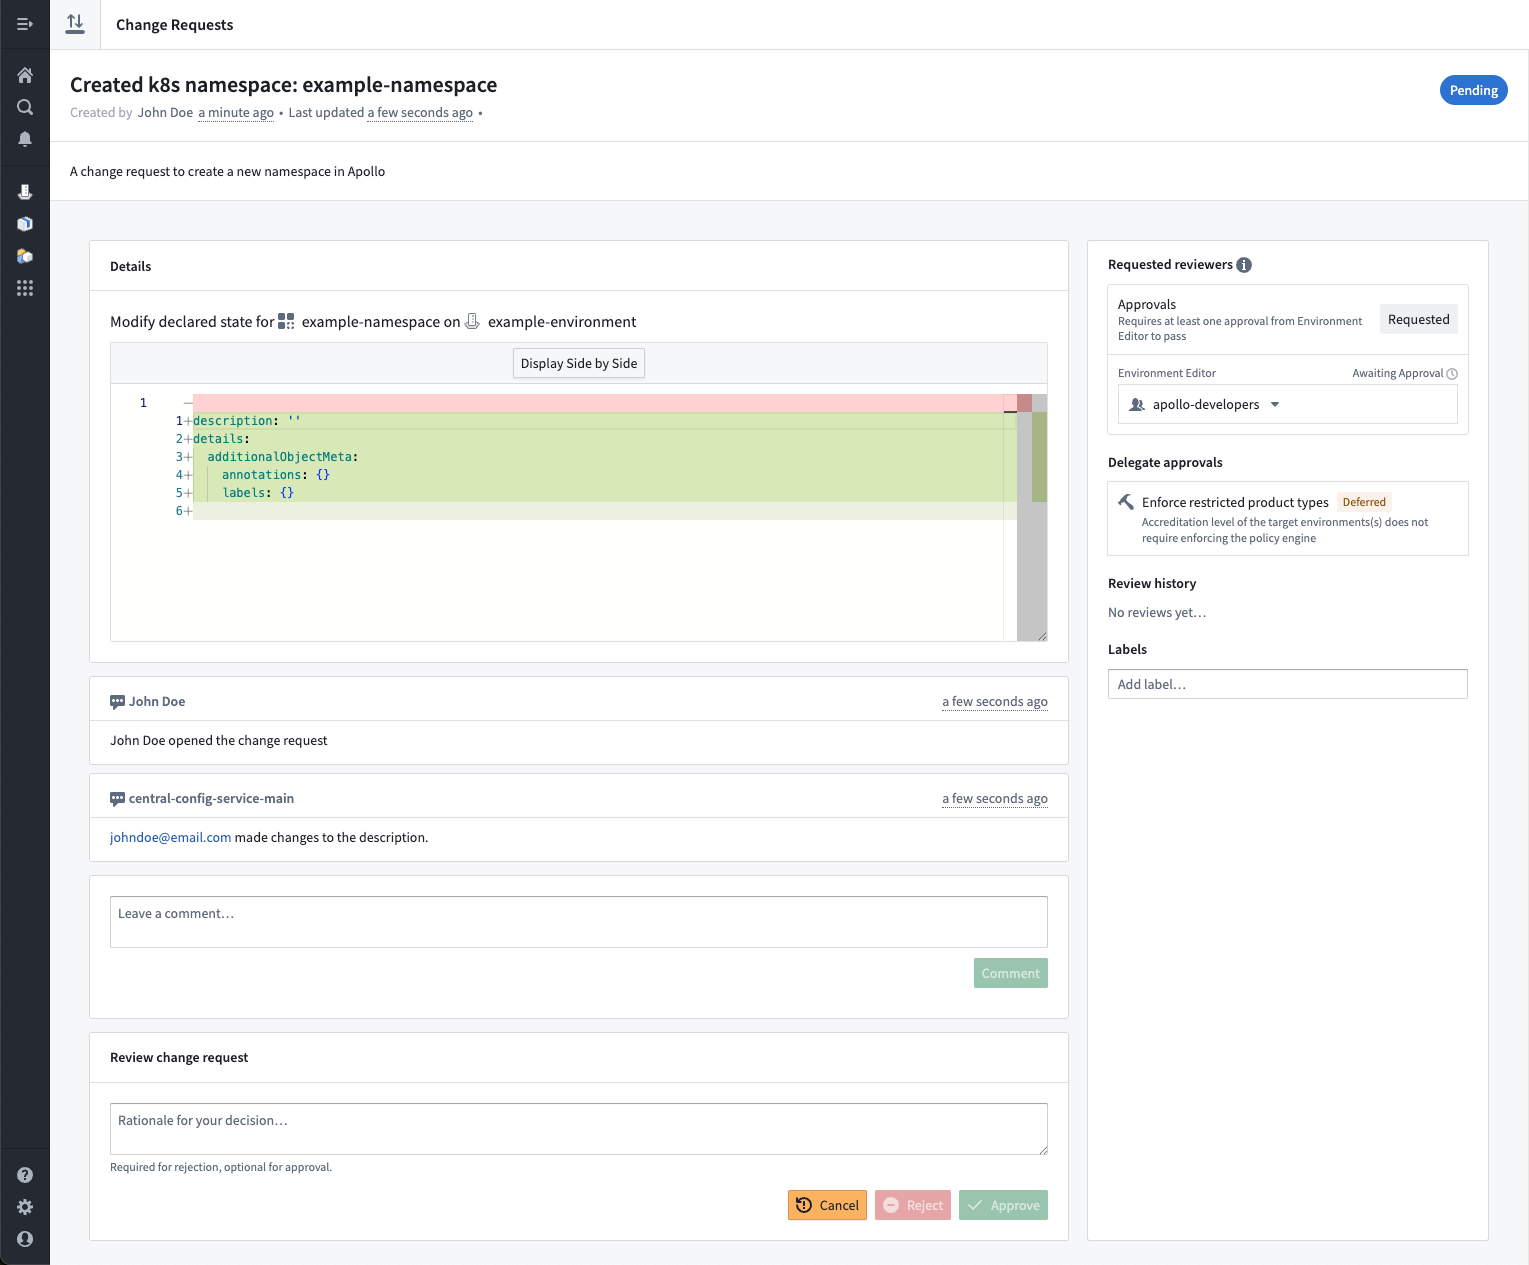
Upon submission, a change request will be created. Once approved by a user with the Environment editor role, Apollo will issue a Plan that creates the namespace in your Environment.
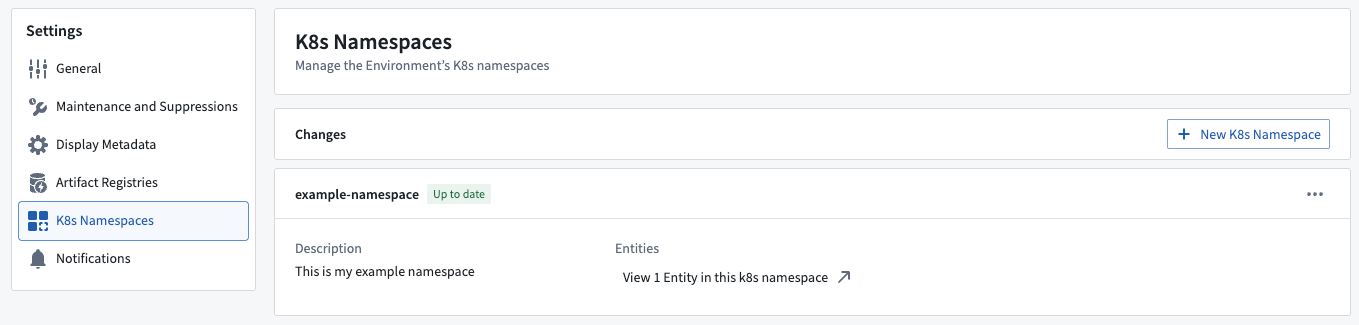
You can then install Entities into the newly created namespace.
Delete a Kubernetes namespace
Apollo will only delete a Kubernetes namespace if there are no installed Entities in the namespace. If there are installed Entities, you must first uninstall those Entities before Apollo can delete the namespace.
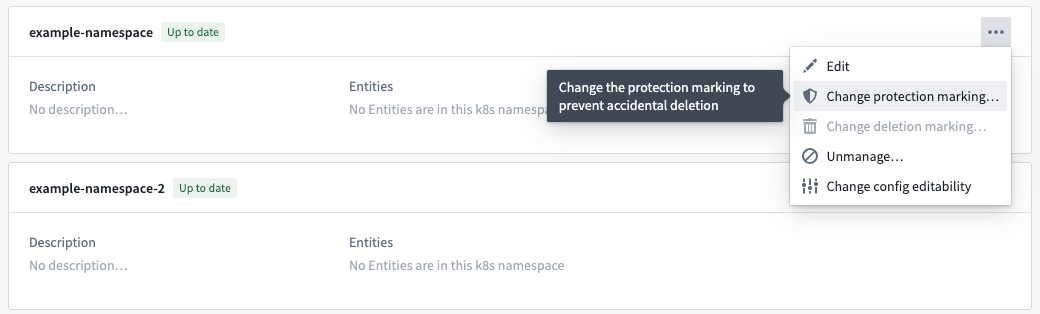
To delete an existing Kubernetes namespace, you must first mark it as unprotected. The protection marking is an extra layer of safety to prevent accidental deletion, which is enabled by default. You can select the three-dot menu next to the namespace you want to delete and select Change protection marking. You can toggle the protection marking back on later if you change your mind.
This will open a dialog where you can confirm the change to the protection marking.
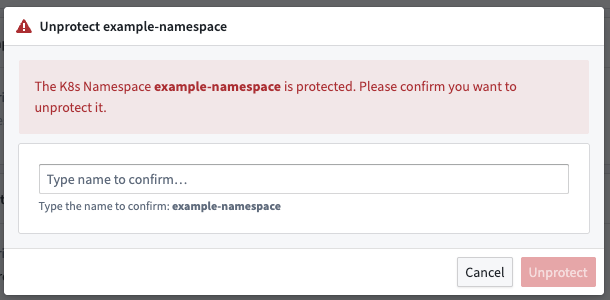
This will create a change request, which must be approved by a user with the Environment editor role. Once approved, the namespace will show as Pending protection status change until Apollo has issued a Plan to unprotect it.
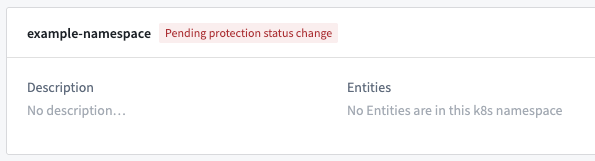
Once the namespace no longer shows as Pending protection status change, you can delete it using the Change deletion marking action.
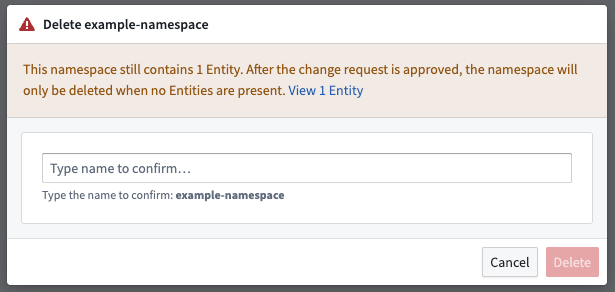
This will open a dialog where you can confirm the deletion. If you have any installed Entities in the namespace, Apollo will warn you that the namespace cannot be deleted until those Entities are uninstalled.
Upon submission, a change request will be created. Once approved by a user with the Environment editor role, Apollo will issue a Plan that deletes the namespace, which you can view in the Environment's Activity tab.