Getting started
This guide will introduce you to the important workflows and processes in Apollo in FedStart.
Overview
The Environments tab lists the default FedStart Environments where you can install and deploy your Helm charts. These are FedRAMP/IL5-accredited Kubernetes clusters managed in Apollo.
The Products tab lists the Helm charts you published to your FedStart Apollo Hub.
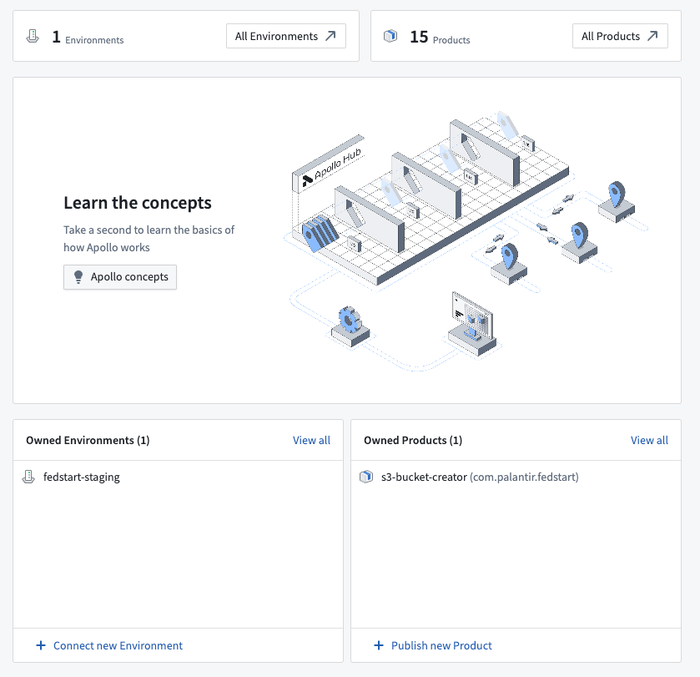
Learn more about key Apollo concepts..
As you work through the steps in this guide, contact your Palantir representatives if you run into any issues or have any questions.
This guide will outline how to:
Prerequisites
- For this guide, you will need a Helm chart you want to install in a FedStart Environment using Apollo.
- Your Helm chart and container image must meet the requirements outlined below.
- Your container images must run as a non-root, numeric user.
- Your Helm chart must be able to apply custom annotations and labels to your Pods and services.
- Your Pods must be able to communicate over TLSv1.2+, and use one of the FIPS-compatible cipher suites. Your Pods should be able to use Fedstart-provided cluster certificate material that is mounted to a directory within the Pod.
- Your application does not have dependencies on managed services outside of the FedStart-managed list (Amazon RDS, S3, EFS/EBS). Otherwise, you should have a self-hosted Helm chart or template as a replacement.
1. Set up registry authentication
Before you can publish and install Helm charts to your Apollo Hub and Environment, you need to configure your Helm registry and container registry credentials within Apollo. Once this setup is completed, you will not need to include image pull secrets in your charts. There are two Palantir provided charts that help generate secrets with a specific annotation in the cluster, and Apollo will inject the appropriate image pull secrets onto any Pods that pull from those registries.
If you are using Amazon Elastic Container Registry (ECR), you will need to add configuration to the aws-ecr-secret-connector chart, which will come preinstalled in your Environment. Otherwise, you will edit the configuration of the fedstart-artifact-stores chart.
Navigate to the relevant chart for your configuration under the Entities tab in the fedstart-staging Environment. From here, select the Config tab.
Non-ECR registry setup
Edit and add the config overrides provided below to the config for this chart. Add a new registryURL entry for each registry you will need to access. Replace <secret> in the preprocess block with the name of the secret you created above.
Skip this section if you are only using ECR.
To deploy your application using Apollo, you will need to create artifact store secrets for each Helm registry and container registry that your charts require. Apollo will create the resulting secrets in each namespace where you will deploy your application. This will provide you with the automation to manage your secrets centrally and create artifact store secrets across your namespaces.
Ensure that the namespaces you want to deploy into have been created by the Palantir team and included in the Environment Config for this Environment. You can find the Environment Config by navigating to the Environment page and selecting the Config tab.
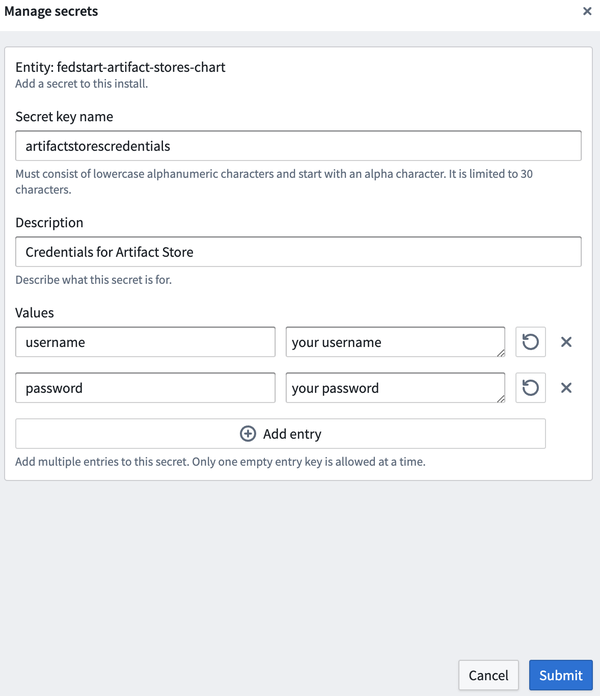
Navigate to the Config tab within the fedstart-artifact-stores chart overview page.
Create a secret within the fedstart-artifact-stores chart by selecting Manage secrets from the Actions dropdown. Register the Apollo secret with your registry’s credentials.
Copied!1 2 3artifactStores: - registryURL: <your registry URL> k8sSecretName: "{{ preprocess .Values.apollo.secrets.<secret>.k8sSecretName }}"
After making the relevant changes to the config, select Review and then Submit once you have verified your edits to save the changes.


ECR artifact stores connector
The aws-ecr-secret-connector Helm chart deploys a service that generates temporary, 12 hour credentials for authentication to your ECR registry. This chart comes included with Apollo by default, you can refer to the below documentation to set it up in your environment:
2. Prepare a Helm chart for use in Apollo
You will now need a Helm chart and image to use as you work through this guide. Before continuing, you should confirm you have reviewed the requirements in the prerequisites.
Before deploying your Helm chart, you will need to make some additions. Pods, Deployments, and StatefulSets in the FedStart environment require the following two annotations.
Copied!1 2# Mounts Palantir managed TLS certs to enable pod to pod communication com.palantir.rubix.pod/pod-key-pair-v2: "{}"
Additionally, you will need to add the following annotation to your service if you want to mount it to the frontdoor domain and allow external traffic to reach your service.
Copied!1 2 3 4 5 6 7 8 9 10 11# Mounts your K8s service to the front door domain, # enabling external traffic to reach your services. com.palantir.rubix.service.spp/v3: > { "endpoints":[{ "name":"<port name from k8s service>", "prefix":"/<your prefix>", "prefix-rewrite":"/", # (Optional) "domain-aliases":["DEFAULT"] }] }
domain-aliasesis a map with keywords associated with different subdomains allocated to your Kubernetes cluster. Your randomly-generated stack name is associated with theDEFAULTdomain alias.prefix-rewriteallows you to change the path prefix that your service expects.- Contact the FedStart team if you need any additional subdomains. The format of the subdomains will be
<subdomain>.palantirfedstart.com, and we will provide you with a domain alias that you can use in this annotation.
3. Publish a Product
Before you can publish your Product to Apollo, you should push the Helm chart you chose and edited in the previous step along with the container image to your registry. Be sure to use one of the registries that have already been allowlisted in your FedStart environment.
Navigate to the Product catalog and select Publish new product.
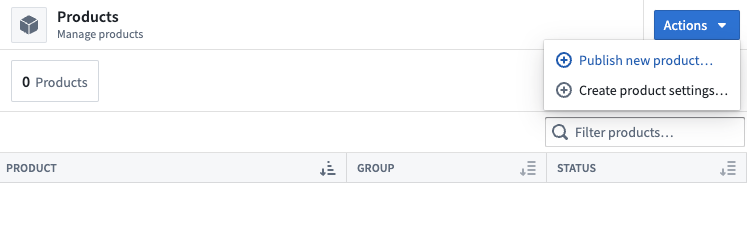
This will bring you to the Product publishing workflow, which begins with downloading the Apollo CLI.
After setting up the Apollo CLI, you will enter information about your Product that will be used to generate the apollo-cli publish command.
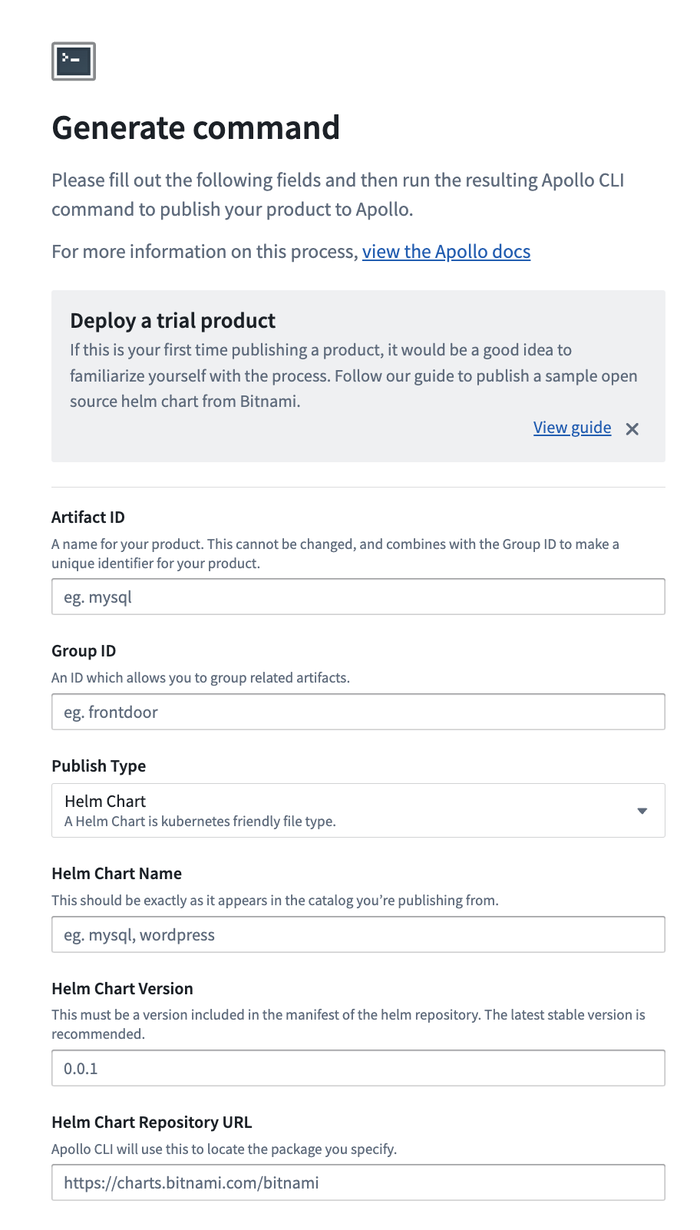
- Alternate Publish Options: If you are publishing to an OCI repository or publishing an
.sls.tgzartifact, be sure to select the corresponding publish type option from the Publish Type dropdown. You can expect the form to change to match your selection.- OCI Repository: If your Helm chart registry is an OCI repository you should select the OCI option in the dropdown under Publish Type. Your entry for the OCI Repository URL field should follow the format:
oci://<repo-url>/<prefix>/<chart name>. - Artifact: You will need to provide the file path to the artifact you are publishing.
- OCI Repository: If your Helm chart registry is an OCI repository you should select the OCI option in the dropdown under Publish Type. Your entry for the OCI Repository URL field should follow the format:

- Private Repositories: If the registry containing your Helm chart is a private registry, be sure to provide your registry credentials as a part of the publish command.
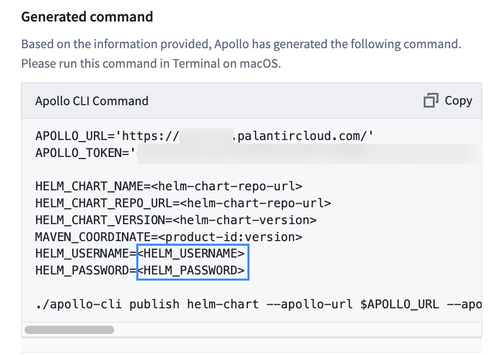
- Non-OCI Repositories: The Publishing from a private repository toggle will only appear if you select the OCI Repository option. If you need to publish to a private non-OCI repository, you will need to edit the generated command to include the flags:
--helm-username <HELM_USERNAME>and--helm-password <HELM_PASSWORD>with your credentials filled in. - OCI Repositories: For OCI repositories, be sure to turn on the Publishing from a private repository toggle shown below. After doing so, you will need to replace the
<HELM_USERNAME>and<HELM_PASSWORD>placeholders in the generated command with your registry’s credentials before running it.
- Non-OCI Repositories: The Publishing from a private repository toggle will only appear if you select the OCI Repository option. If you need to publish to a private non-OCI repository, you will need to edit the generated command to include the flags:

Paste the generated command into your terminal and run it, filling in your credentials as needed. Once your Product has been published, navigate to the Product’s page to view the details.
Selecting your newly published Product will show you an overview of the versions you have published to Apollo, called “Releases”, along with other resources that allow you to manage it.

The Entities tab will display a list of the Environments that this Product is installed on. In the next section, you will install a Product in an Environment.
The Changes tab displays a list of the changes and actions performed on this given chart, such as publishing a new Release.
The Actions dropdown is where you can both delete and publish new Releases.
4. Install a Product Release into an Environment
An installation of a Product in an Environment is called an “Entity” in Apollo. To create an Entity, navigate to your FedStart environment from the Environment list. Then select Install helm charts from the Actions dropdown.

Select the Product you published earlier for installation in the form that appears, fill out the remaining fields, and add the Product to your Environment.
- For the K8s namespace, choose one of the namespaces that have been provisioned for you in the dropdown.
- If you need additional namespaces, reach out to your Palantir representative.
- For the Release channel subscription, choose the Release Channel that aligns with your Environment’s risk tolerance and new feature appetite.
If your application has a frontend service, navigate to the front door domain you set for this Entity to ensure that the chart has been set up properly and successfully deployed.
The Activity tab shows all of the past and ongoing work being done on the selected Entity.
The Plans tab mirrors the updates listed in the Changes tab as the commands passed from the Apollo Hub to the agents in your managed Environments.
Similar to the Products page, you can select an installed Entity to view more details.

5. Publish a new Release
Now that you have published and installed a chart on Apollo and have a service running in your FedStart Environment, you can publish a new Release of that chart.
Edit the name of the deployment template in the example Helm chart you pulled and update the chart version. Re-package this updated chart and publish a new Release.
To publish a new Release of a chart, navigate to the Products page and select the example chart you published in Part 3.
After running the publish command, you can view the newly published version in the Releases tab of the Product’s page. You may have to reload the page.
Back in the FedStart Environment where you have installed this chart, navigate to the Plans section of the Activity tab. Here you can view an upgrade Plan that Apollo has proposed to update the chart to the latest Release. Learn more about Plans in Apollo.
Select Publish new release from the Actions dropdown.

The process will be similar to when you initially published this chart. However, if you are using a private repository, be sure to enable the Private Repository toggle.
6. Delete an Entity and Product
In some cases, you may want to delete an installation of a Product or delete the Product from Apollo. You can refer to the documentation linked below for more information on how to do so: