scikit-learn을 사용한 이진 분류 모델 훈련하기 (Code Repositories)
이 문서에서는 오픈 소스 UCI ML 유방암 위스콘신(진단) (외부) 데이터셋을 사용하여 Code Repositories 애플리케이션에서 scikit-learn 이진 분류 모델을 훈련하는 방법에 대한 예를 제공합니다. 이 과정에서 Model Training Template를 사용합니다.
모델 어댑터 작성 및 모델 훈련을 위한 파이썬 변환 작성 등 다음 단계에 대한 자세한 설명은 Code Repositories에서 모델 훈련하는 방법 문서를 참조하세요.
1. 모델 어댑터 작성하기
먼저, Code Repositories에서 Model Training Template를 사용하여 모델 어댑터를 작성합니다.
아래 예시 로직은 다음 사항을 가정합니다:
- 이 모델 어댑터는 scikit-learn
model로 초기화됩니다. - 이 모델에 제공되는 데이터는 테이블 형태입니다.
- 이 모델의 결과물은
columns,prediction,probability_0,probability_1에서 모든 열을 포함하는 테이블 형태로, 여기서prediction은 0 또는 1이며, 0은 암이 발견되지 않은 것이고, 1은 암이 발견된 것입니다.probability_0은 암이 발견되지 않을 확률입니다.probability_1은 암이 발견될 확률입니다.
- 다음 종속성이 저장소에 추가되었습니다:
python 3.8.18,pandas 1.5.3,scikit-learn 1.3.2,dill 0.3.7
Copied!1 2 3 4 5 6 7 8 9 10 11 12 13 14 15 16 17 18 19 20 21 22 23 24 25 26 27 28 29 30 31 32 33 34 35 36 37 38 39 40 41 42 43 44 45 46 47 48 49 50 51 52 53 54 55 56 57import palantir_models as pm from palantir_models_serializers import * class SklearnClassificationAdapter(pm.ModelAdapter): # SklearnClassificationAdapter는 pm.ModelAdapter의 하위 클래스입니다. @pm.auto_serialize( model=DillSerializer() ) def __init__(self, model): self.model = model # model 매개변수를 받아서 클래스의 인스턴스 변수로 저장합니다. @classmethod def api(cls): # 클래스 메서드 api를 정의합니다. columns = [ 'mean_radius', 'mean_texture', 'mean_perimeter', 'mean_area', 'mean_smoothness', 'mean_compactness', 'mean_concavity', 'mean_concave_points', 'mean_symmetry', 'mean_fractal_dimension', 'radius_error', 'texture_error', 'perimeter_error', 'area_error', 'smoothness_error', 'compactness_error', 'concavity_error', 'concave_points_error', 'symmetry_error', 'fractal_dimension_error', 'worst_radius', 'worst_texture', 'worst_perimeter', 'worst_area', 'worst_smoothness', 'worst_compactness', 'worst_concavity', 'worst_concave_points', 'worst_symmetry', 'worst_fractal_dimension' ] # 데이터 프레임에서 사용할 컬럼들을 정의합니다. inputs = {"df_in": pm.Pandas(columns=columns)} # 입력 데이터를 정의합니다. "df_in"이라는 이름의 pandas 데이터 프레임입니다. outputs = {"df_out": pm.Pandas(columns= columns + [ ("prediction", int), ("probability_0", float), ("probability_1", float) ])} # 출력 데이터를 정의합니다. "df_out"이라는 이름의 pandas 데이터 프레임입니다. return inputs, outputs def predict(self, df_in): # 예측을 수행하는 메서드를 정의합니다. X = df_in.copy() # 입력 데이터를 복사하여 X에 저장합니다. predictions = self.model.predict(X) # 모델을 사용하여 X의 예측값을 계산합니다. probabilities = self.model.predict_proba(X) # 모델을 사용하여 X의 예측 확률을 계산합니다. df_in['prediction'] = predictions # 예측값을 데이터 프레임에 추가합니다. for idx, label in enumerate(self.model.classes_): df_in[f"probability_{label}"] = probabilities[:, idx] # 각 클래스의 확률을 데이터 프레임에 추가합니다. return df_in # 결과 데이터 프레임을 반환합니다.
2. 모델 학습을 위한 파이썬 변환 작성하기
model_training/model_training.py에서 동일한 저장소에 모델 학습 로직을 작성합니다.
이 예제는 scikit-learn 라이브러리에서 제공하는 오픈 소스 UCI ML 유방암 위스콘신(진단) 데이터셋을 사용합니다.
Copied!1 2 3 4 5 6 7 8 9 10 11 12 13 14 15 16 17 18 19 20 21 22 23 24 25 26 27 28 29 30 31 32 33 34 35 36 37 38 39 40 41 42 43 44 45 46 47 48 49# 필요한 라이브러리들을 불러옵니다. from transforms.api import transform from palantir_models.transforms import ModelOutput from main.model_adapters.adapter import SklearnClassificationAdapter from sklearn.datasets import load_breast_cancer from sklearn.compose import make_column_transformer from sklearn.impute import SimpleImputer from sklearn.pipeline import Pipeline from sklearn.preprocessing import StandardScaler from sklearn.ensemble import RandomForestClassifier # 모델 결과물을 저장할 경로를 지정합니다. @transform( model_output=ModelOutput("/path/to/model_asset"), ) def compute(model_output): # 유방암 데이터셋을 불러옵니다. X_train, y_train = load_breast_cancer(as_frame=True, return_X_y=True) # 열 이름의 공백을 _로 대체합니다. X_train.columns = X_train.columns.str.replace(' ', '_') columns = X_train.columns # 수치형 데이터 전처리를 위한 파이프라인을 생성합니다. numeric_transformer = Pipeline( steps=[ ("imputer", SimpleImputer(strategy="median")), # 결측치 처리 ("scaler", StandardScaler()) # 데이터 정규화 ] ) # 전체 전처리 과정을 정의합니다. preprocessor = make_column_transformer( (numeric_transformer, columns), remainder="passthrough" ) # 모델을 생성하고 데이터를 학습합니다. model = Pipeline( steps=[ ("preprocessor", preprocessor), ("classifier", RandomForestClassifier(n_estimators=50, max_depth=3)) # 랜덤 포레스트 분류기 ] ) model.fit(X_train, y_train) # 저장할 모델을 정의합니다. foundry_model = SklearnClassificationAdapter(model) # 모델을 저장합니다. model_output.publish(model_adapter=foundry_model)
3. 모델 사용하기
파이썬 변환에서 추론 실행
모델을 파이썬 변환에서 추론으로 사용할 수 있습니다. 예를 들어 모델이 훈련되었으면, 아래의 추론 로직을 model_training/run_inference.py 파일에 복사하고 빌드를 선택하세요.
Copied!1 2 3 4 5 6 7 8 9 10 11 12 13 14 15 16 17 18 19 20 21 22from transforms.api import transform, Output from palantir_models.transforms import ModelInput from sklearn.datasets import load_breast_cancer # 변환 함수를 정의합니다. # 이 함수는 머신러닝 모델의 추론 결과를 계산하고 저장하는 역할을 합니다. @transform( # 추론 결과를 저장할 데이터셋의 위치를 지정합니다. inference_output=Output("ri.foundry.main.dataset.5dd9907f-79bc-4ae9-a106-1fa87ff021c3"), # 사용할 머신러닝 모델의 위치를 지정합니다. model=ModelInput("ri.models.main.model.cfc11519-28be-4f3e-9176-9afe91ecf3e1"), ) def compute(inference_output, model): # sklearn에서 제공하는 유방암 데이터셋을 불러옵니다. X, y = load_breast_cancer(as_frame=True, return_X_y=True) # 데이터셋의 칼럼 이름에 공백이 있으면 _로 대체합니다. X.columns = X.columns.str.replace(' ', '_') # 머신러닝 모델을 사용해 데이터셋에 대한 추론을 수행합니다. inference_results = model.transform(X) # 추론 결과를 저장합니다. inference_output.write_pandas(inference_results.df_out)
Modelling Objective에서 실시간 추론 수행하기
Palantir 모델은 다음을 위해 Modelling Objective에 제출할 수 있습니다:
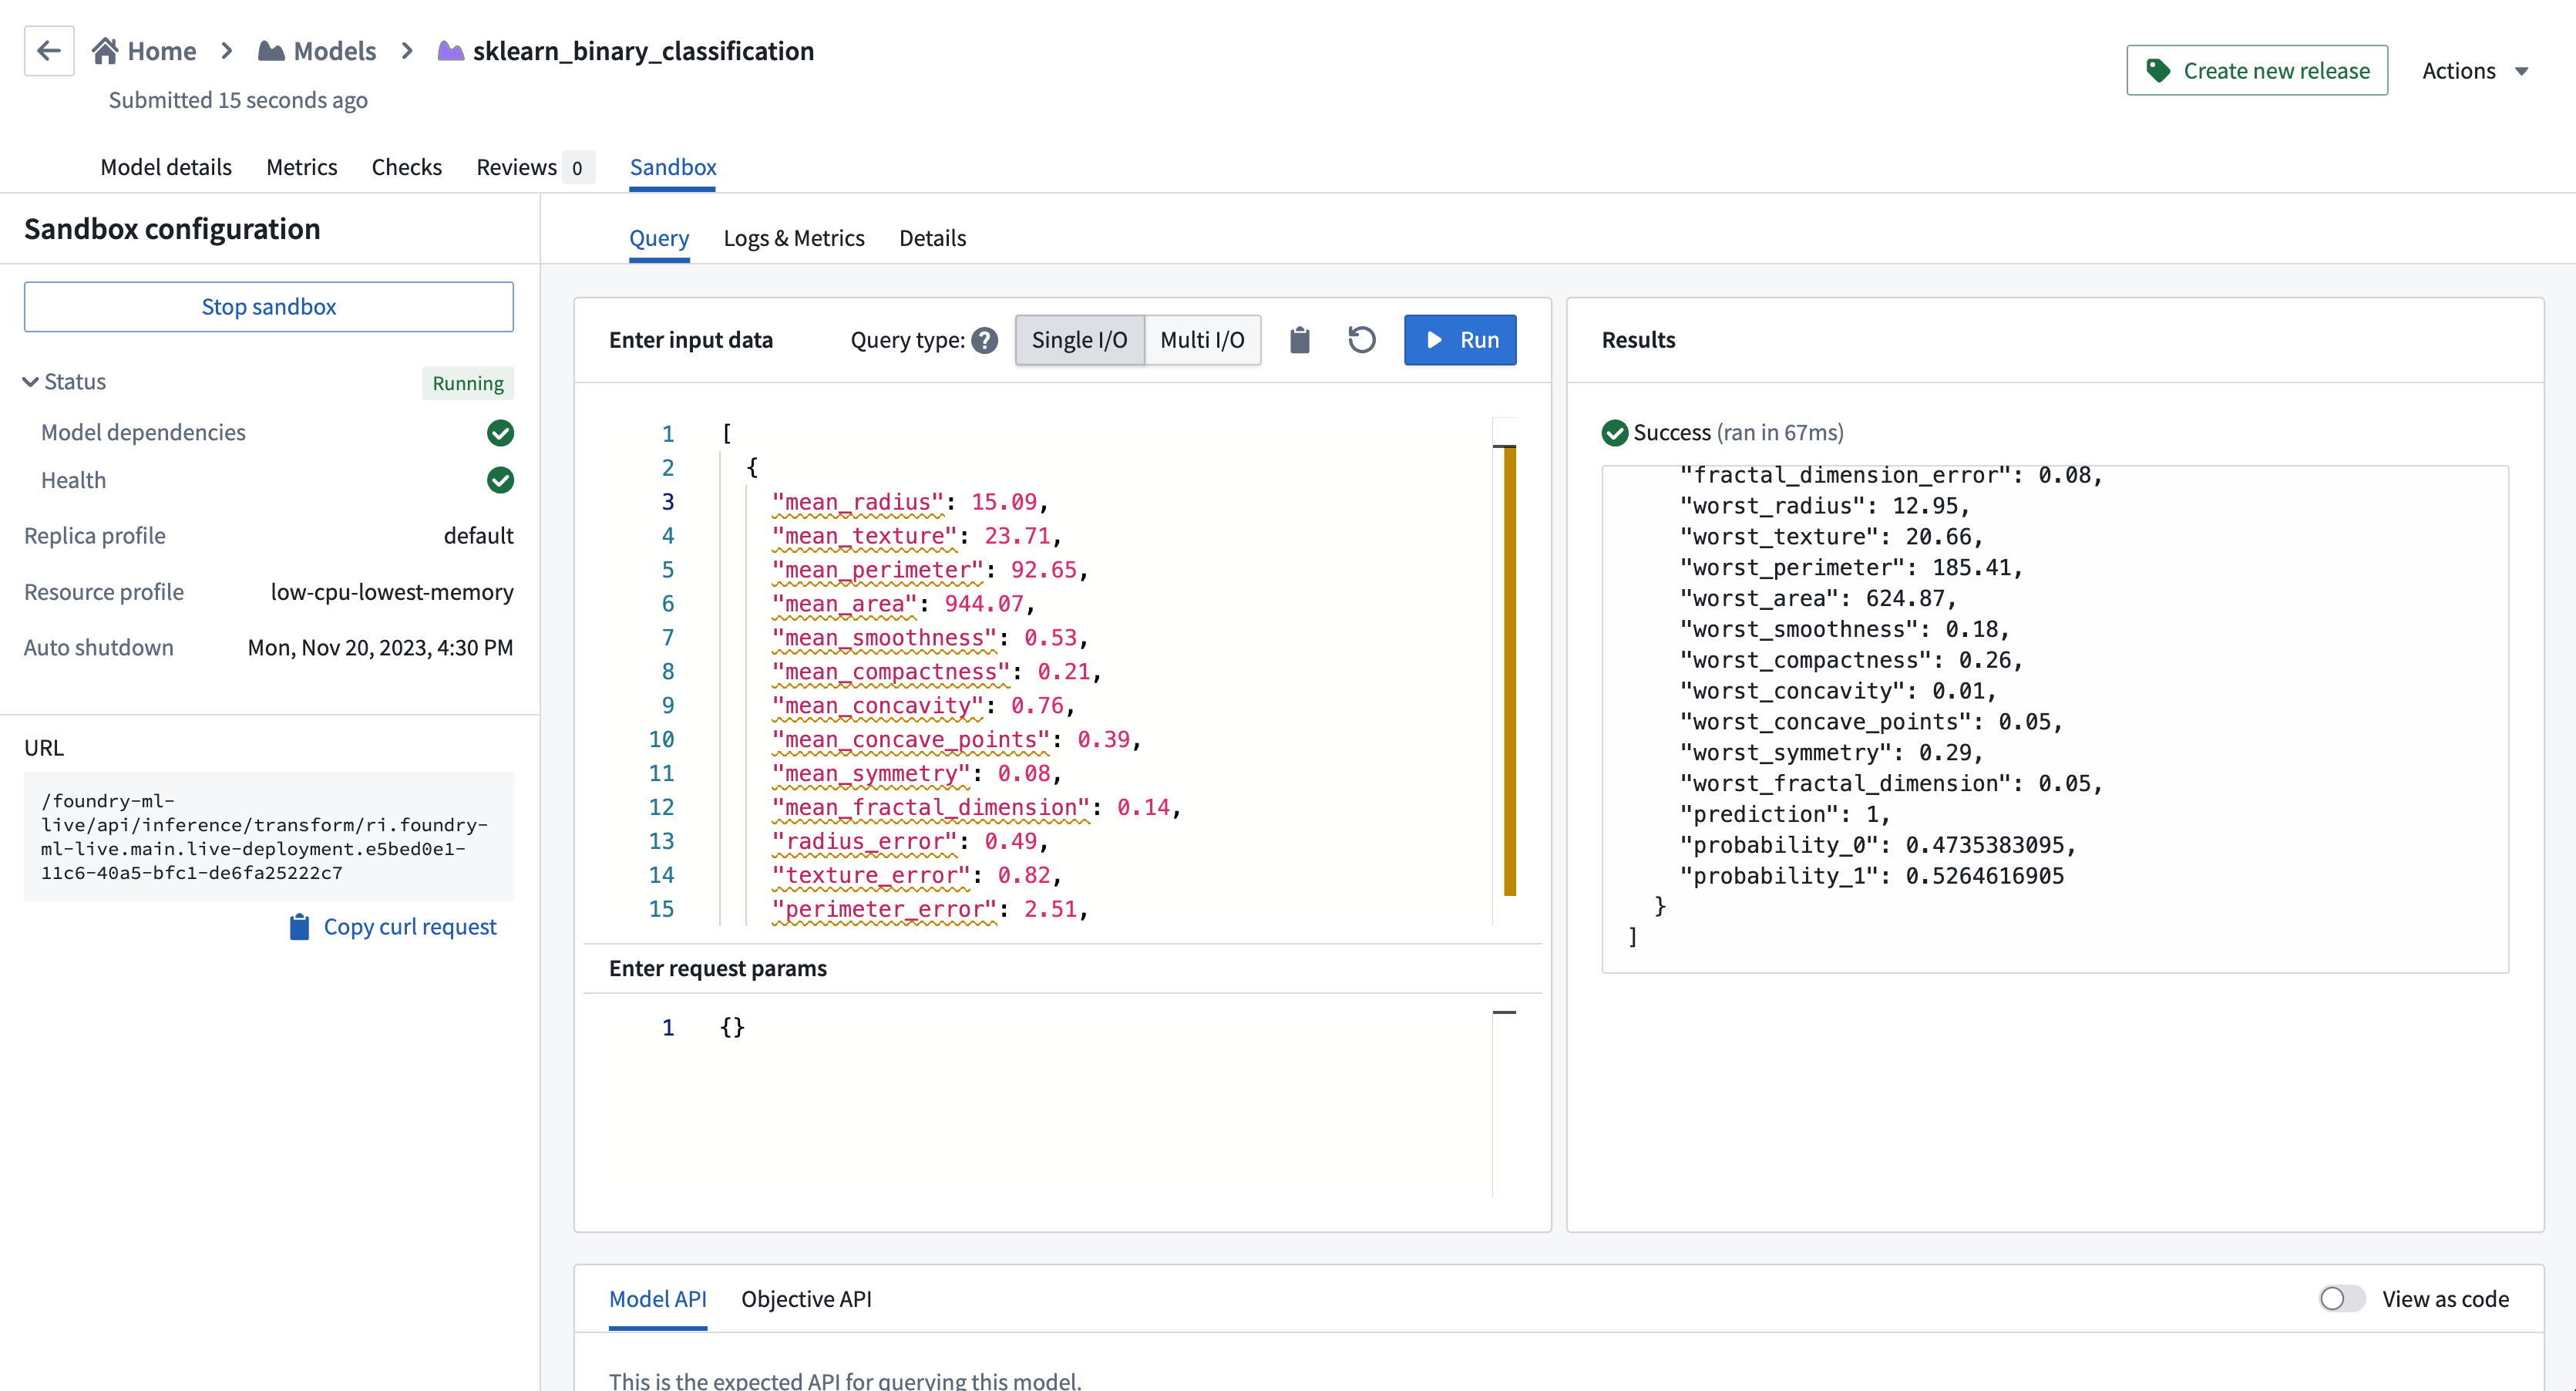
이 모델을 Modelling Objective에 제출한 후에는, 실시간 추론을 위해 이 모델을 호스트하는 샌드박스 배포를 시작할 수 있습니다. 샌드박스가 시작되고 준비되면, 실시간 추론을 수행하고 이 모델을 운영 애플리케이션에 연결할 수 있습니다.
아래 예제는 단일 I/O 엔드포인트를 사용한 이진 분류 모델의 입력을 보여줍니다:
[
  {
    "mean_radius": 15.09,  // 평균 반지름
    "mean_texture": 23.71,  // 평균 질감
    "mean_perimeter": 92.65,  // 평균 둘레
    "mean_area": 944.07,  // 평균 면적
    "mean_smoothness": 0.53,  // 평균 매끄러움
    "mean_compactness": 0.21,  // 평균 조그만함
    "mean_concavity": 0.76,  // 평균 오목함
    "mean_concave_points": 0.39,  // 평균 오목한 점들
    "mean_symmetry": 0.08,  // 평균 대칭
    "mean_fractal_dimension": 0.14,  // 평균 프랙탈 차원
    "radius_error": 0.49,  // 반지름 오차
    "texture_error": 0.82,  // 질감 오차
    "perimeter_error": 2.51,  // 둘레 오차
    "area_error": 17.22,  // 면적 오차
    "smoothness_error": 0.07,  // 매끄러움 오차
    "compactness_error": 0.01,  // 조그만함 오차
    "concavity_error": 0.05,  // 오목함 오차
    "concave_points_error": 0.05,  // 오목한 점들 오차
    "symmetry_error": 0.01,  // 대칭 오차
    "fractal_dimension_error": 0.08,  // 프랙탈 차원 오차
    "worst_radius": 12.95,  // 최악의 반지름
    "worst_texture": 20.66,  // 최악의 질감
    "worst_perimeter": 185.41,  // 최악의 둘레
    "worst_area": 624.87,  // 최악의 면적
    "worst_smoothness": 0.18,  // 최악의 매끄러움
    "worst_compactness": 0.26,  // 최악의 조그만함
    "worst_concavity": 0.01,  // 최악의 오목함
    "worst_concave_points": 0.05,  // 최악의 오목한 점들
    "worst_symmetry": 0.29,  // 최악의 대칭
    "worst_fractal_dimension": 0.05  // 최악의 프랙탈 차원
  }
]
