Entity labels
Labels allow you to tag Entities with relevant information, such as the Entity's component in your application. For example, you can create a label with the ID module and the possible values control-plane, observability, storage, and more.
Apply labels to Entities
To apply a label to an Entity, navigate to the Entity's overview page. Then select Edit labels... from the Actions dropdown menu.
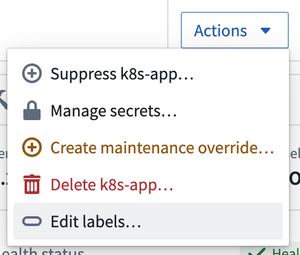
This will open a dialog where you can apply and edit labels for Entities.
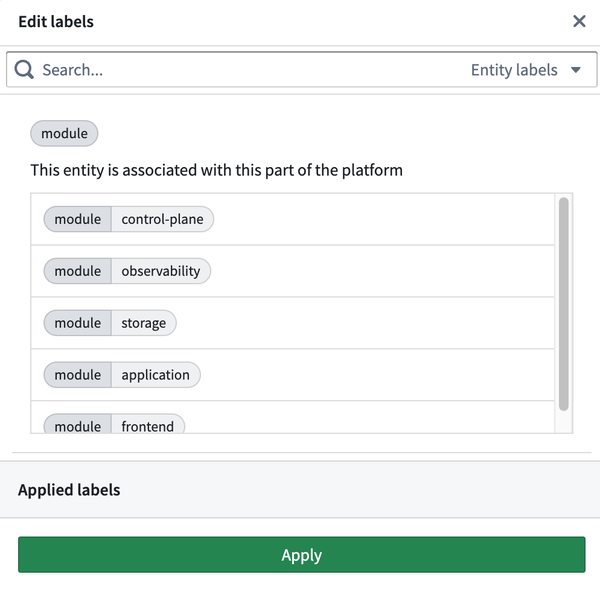
To apply a label to an Entity, select the label ID and value that you want to apply. You can also enter a label ID in the search bar.
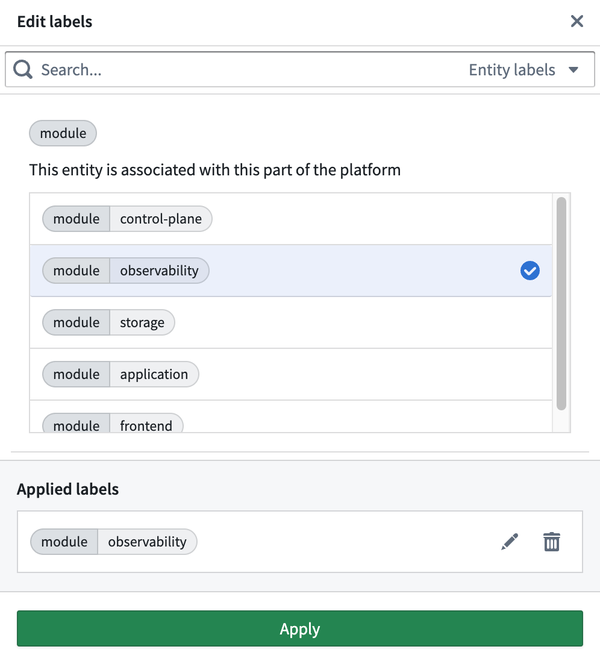
Under the Applied labels section of the Edit labels dialog, you can view the labels that have been applied to an Entity. To edit labels, select the pencil icon on the right of a label. You can then choose another value to apply that corresponds with the same label ID. To remove labels, select the trash can icon on the right of a label.
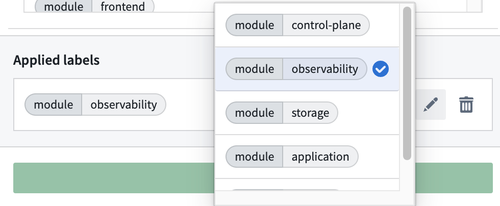
When you are finished, select Apply to save your changes.
Bulk apply labels to Entities
You can apply labels to multiple Entities at once from the Entities tab of the Environment overview page. For each Entity that you want to apply labels to, select the check box on the left of the Entity's name. Then select Apply labels from the Actions dropdown on the top of the Entity list.
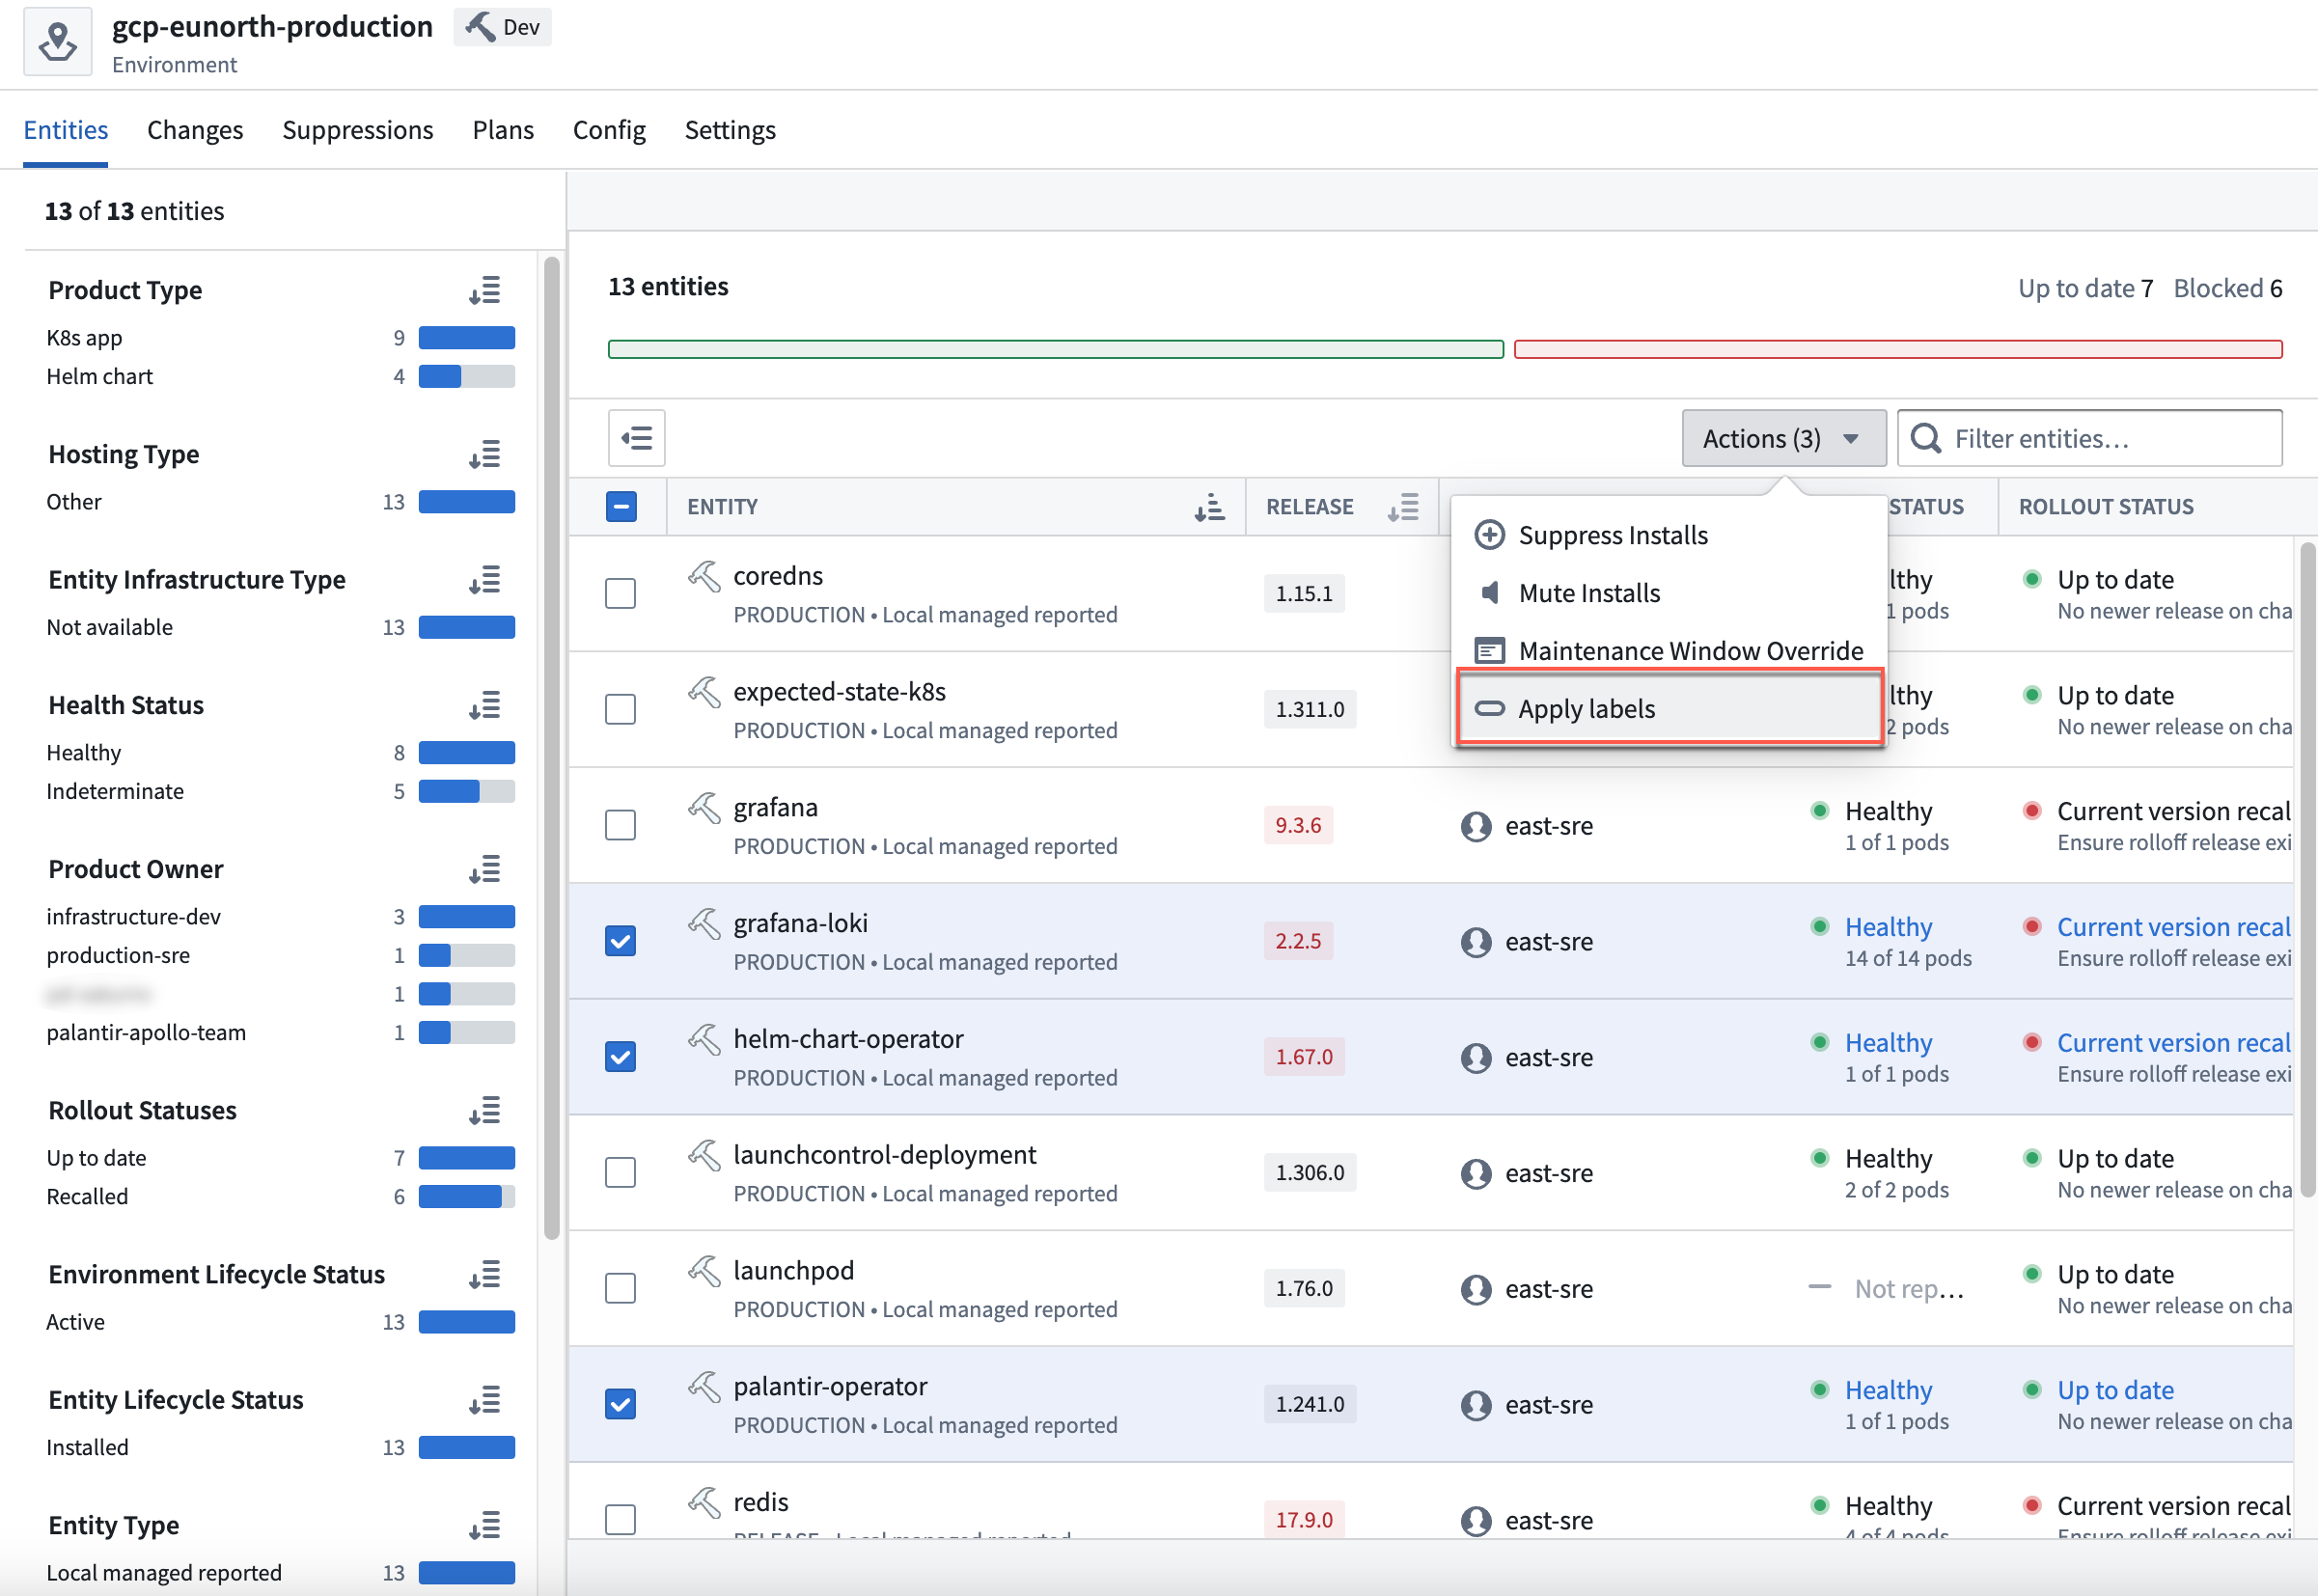
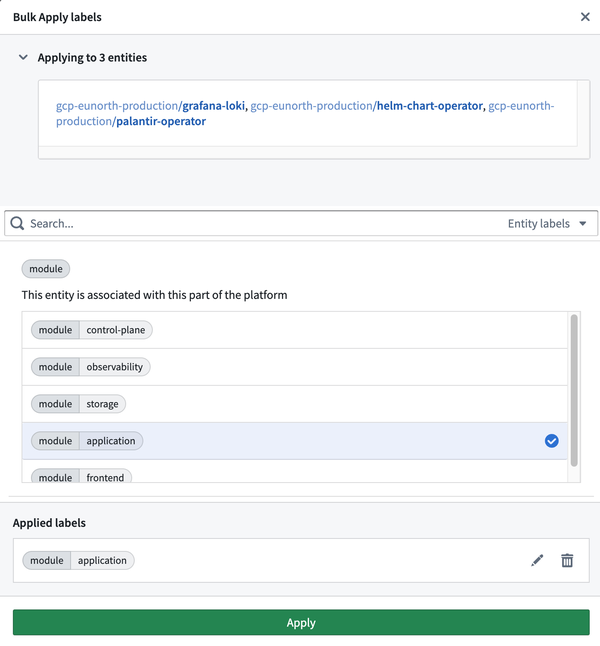
This will open a dialog for bulk applying labels. Choose the label you want to apply to the selected Entities, then select Apply.
Filter Entities using labels
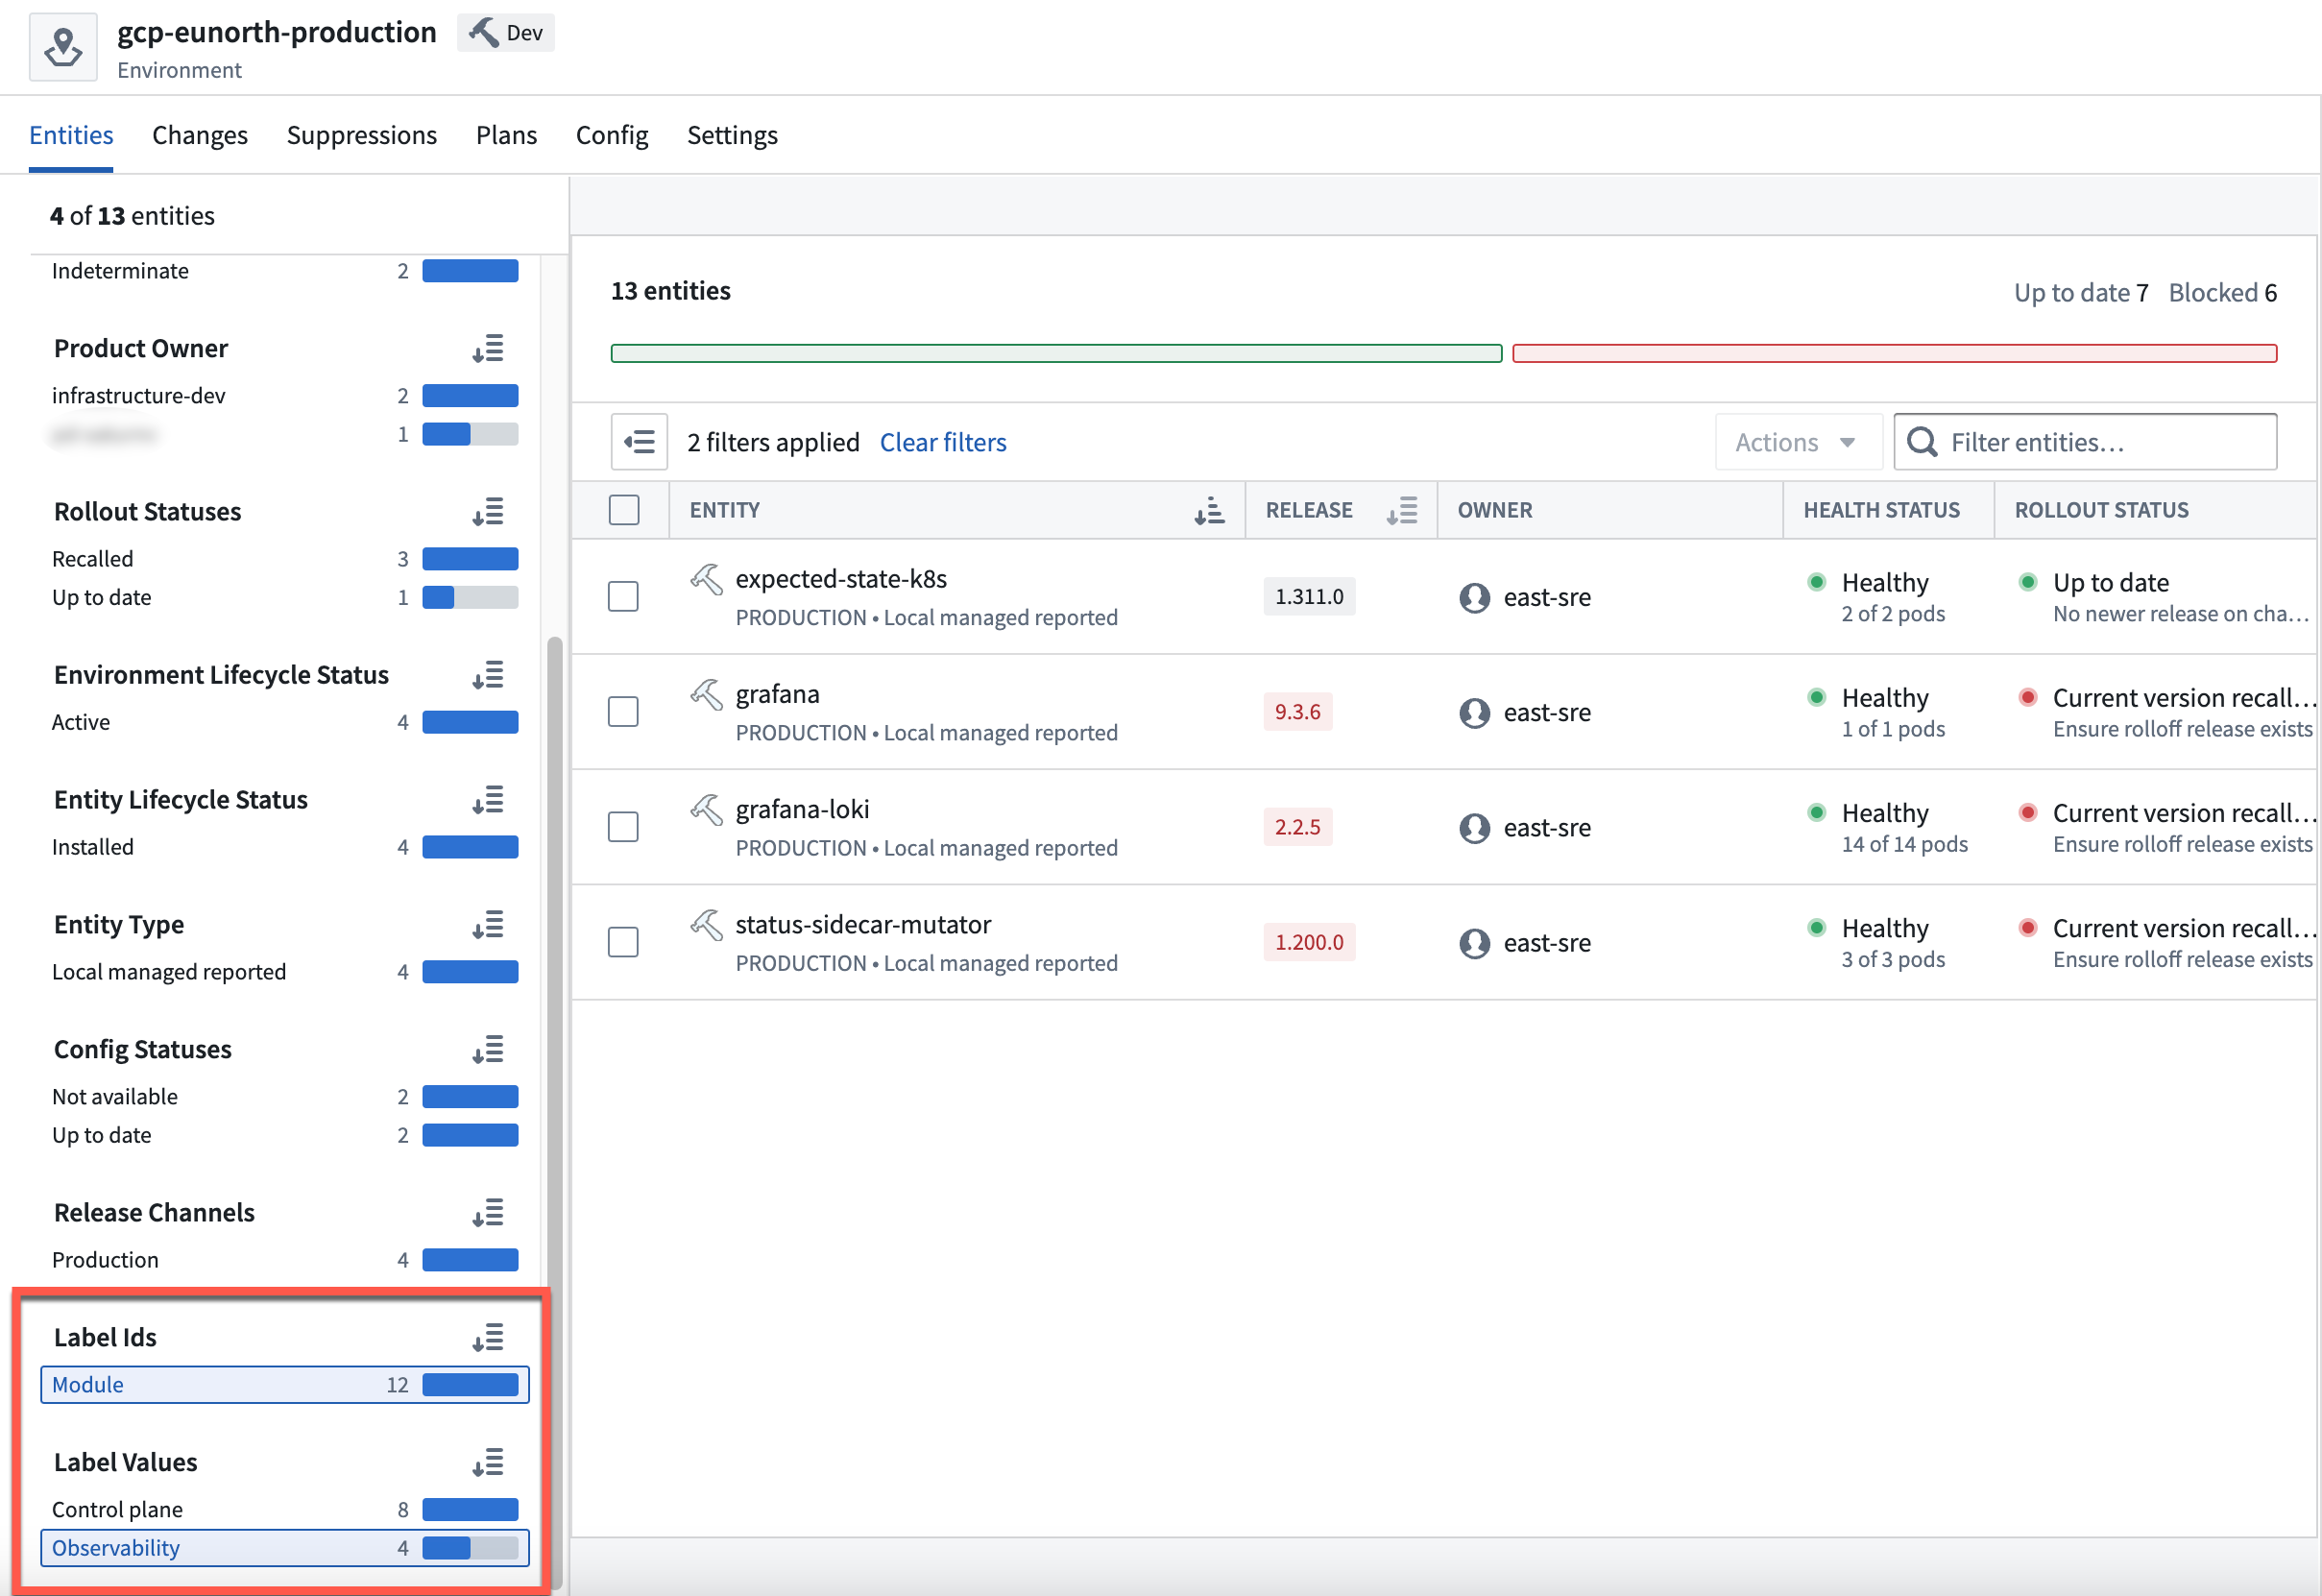
You can use Entity labels to filter the list of Entities to only show those with specific properties. First, select the label ID from the Label Ids section of the left sidebar. The Label Values section will appear in the sidebar and contains the values that correspond with the selected label ID. Choose a label value to view Entities that have the selected key-value pair.
For example, to view Entities that are associated with observability, you can select the module label ID, then choose the observability label value.
