Create and connect a new Apollo Environment
An Environment in Apollo is a Kubernetes cluster. This guide will walk through how to create an Environment in Apollo, and then connect your Kubernetes cluster to that Environment, so it can be managed by Apollo.
Prerequisites
Before creating a new Environment in Apollo, you should confirm that your Kubernetes cluster meets the Spoke Environment prerequisites. If you are testing or getting started with Apollo, you can set up a local Kubernetes cluster.
Create a new Environment
To create an Environment, navigate to the Environment home page by selecting Environments in the left menu panel. Select New environment... in the top right corner, then select Create environment. You must have the Environment creator role to create new Environments.
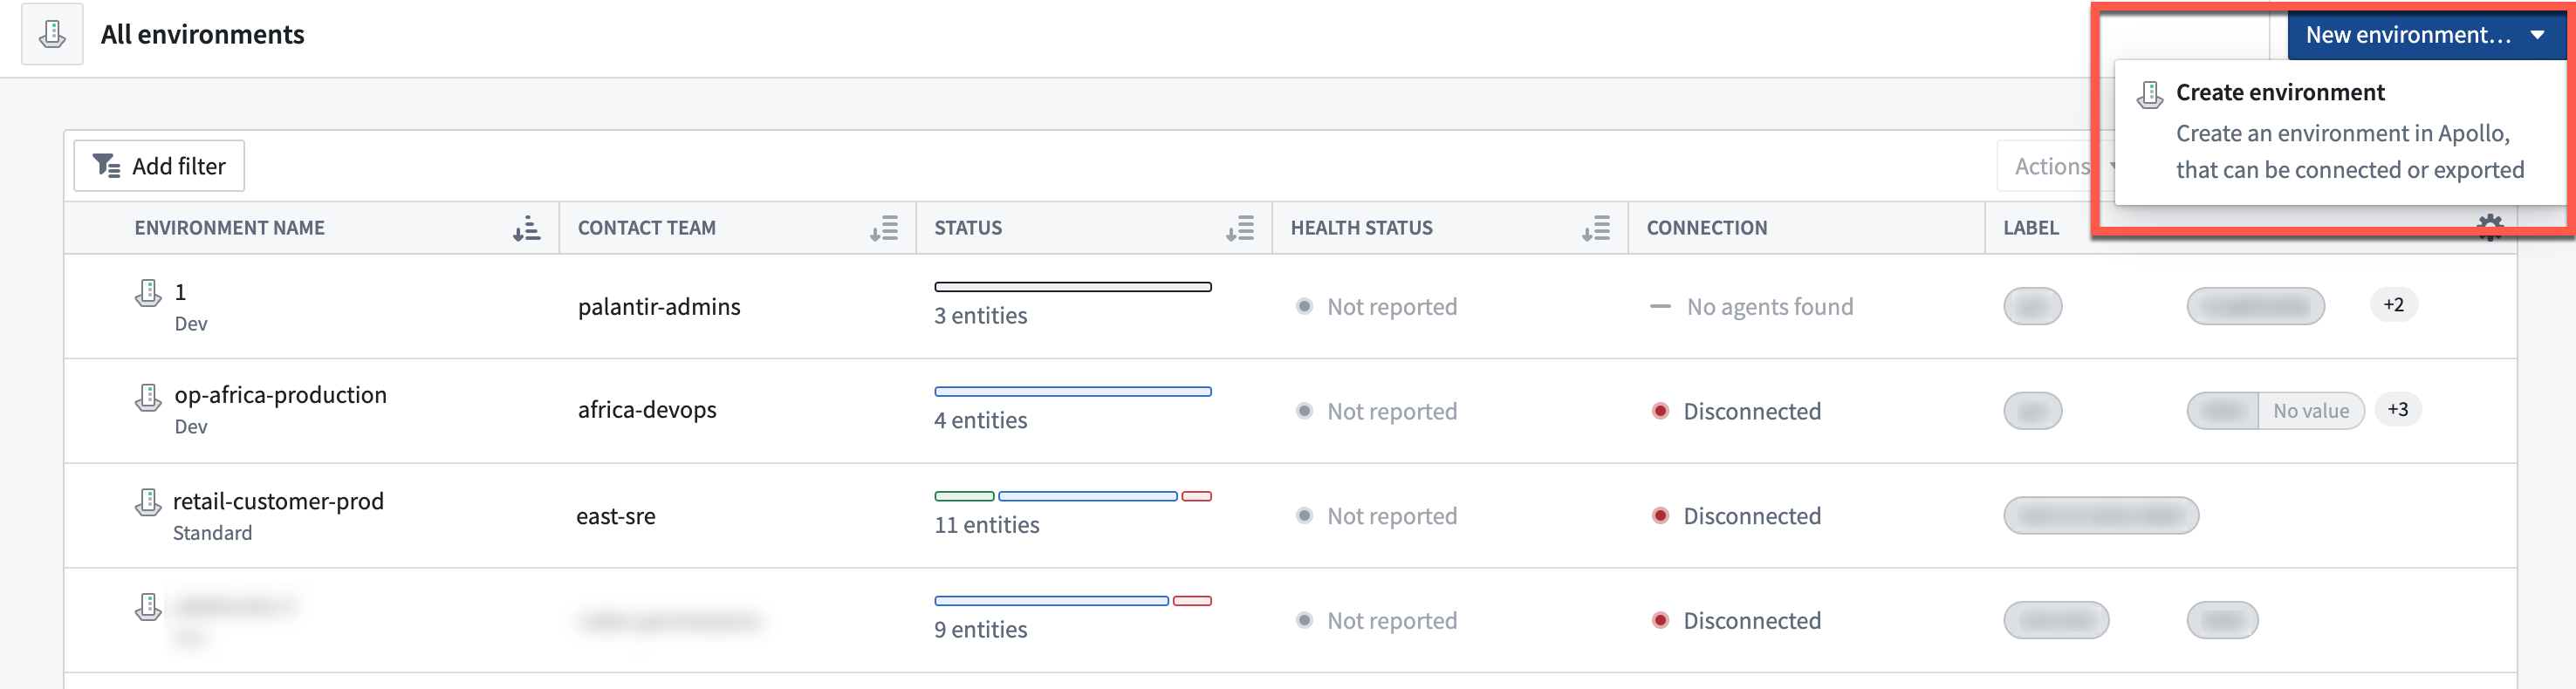
You will be redirected to a new page with a walkthrough to create and connect the Environment.
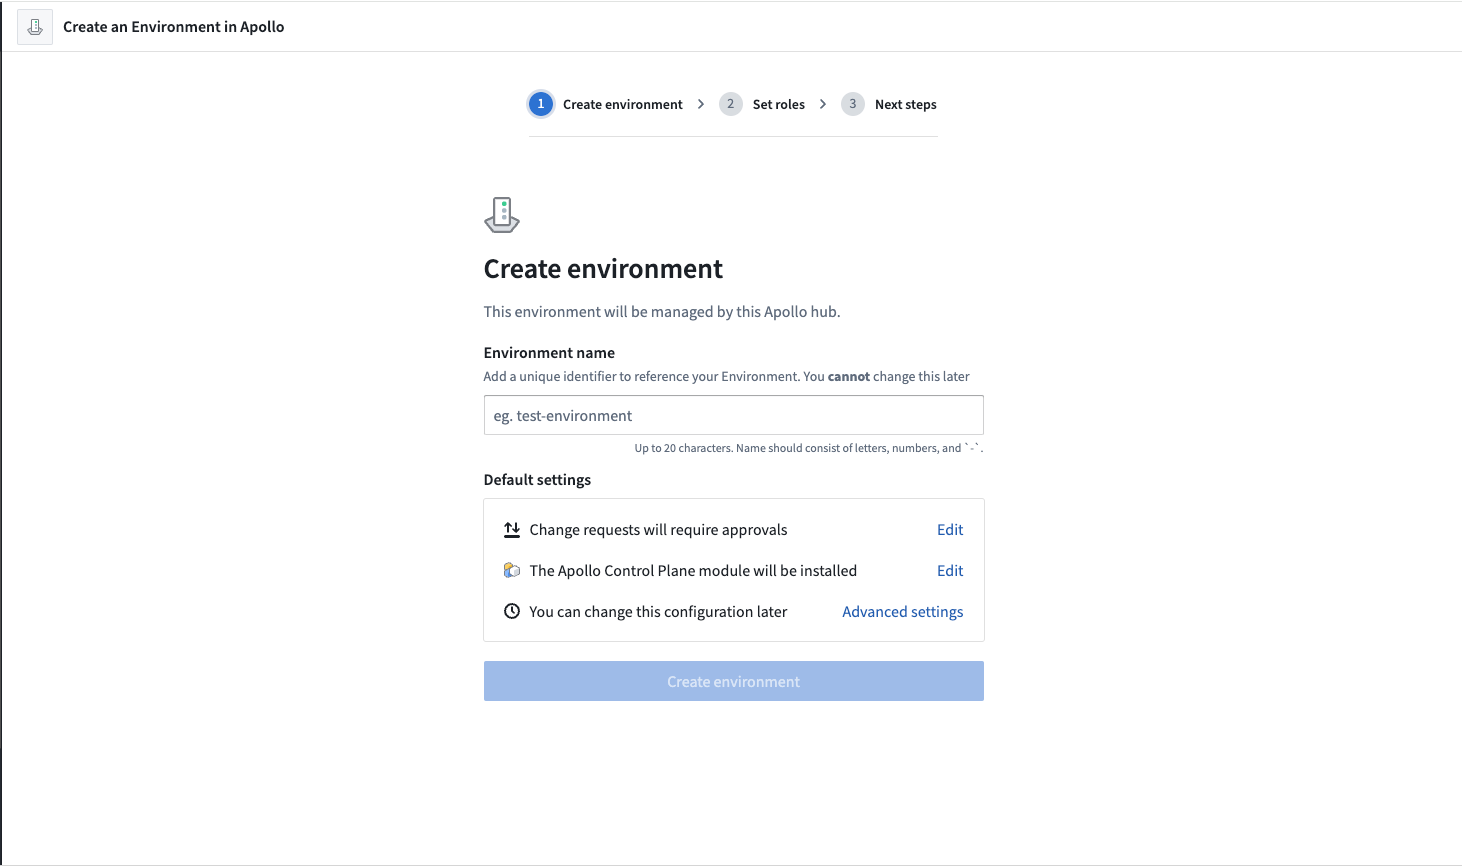
Next, you will complete the Environment management settings form.
- Start by entering a name for your Environment.
- Select the connection settings for your Environment. The connection settings determine how Apollo handles agent connectivity for the Environment. See Configure Environment connection settings for more information about the different connection settings.
- Select your accreditation scheme. If this is your first time creating an Environment, we recommend that you select the
Devaccreditation, which means any change request made for your Environment will be auto-approved. Production Environments should use theStandardaccreditation or higher based on your compliance requirements. - Select a Spoke Control Plane Module for your new Environment. Each Module defines the initial services that will run in the Environment. The options are:
- Apollo Control Plane: A Module that consists of just the Apollo Agents that run in the Spoke Control Plane. This option is useful for testing the deployment of your services in Apollo, including installation and upgrading, without all the Spoke Control Plane requirements.
- Blank environment: No initial Module will be installed. This option can be useful if you are creating the Environment in Apollo before its backing infrastructure is fully available. For the Environment to be managed by Apollo, you will need to install an Apollo Agent.
- In the Advanced settings, you can configure the team you want to be the contact team of the Environment. The contact team is the primary point of contact for the Environment. By default, no team will be assigned as a contact team for the Environment. If you do not add a contact team when creating an Environment, you can add one later.
Select Next when you are finished configuring the settings.
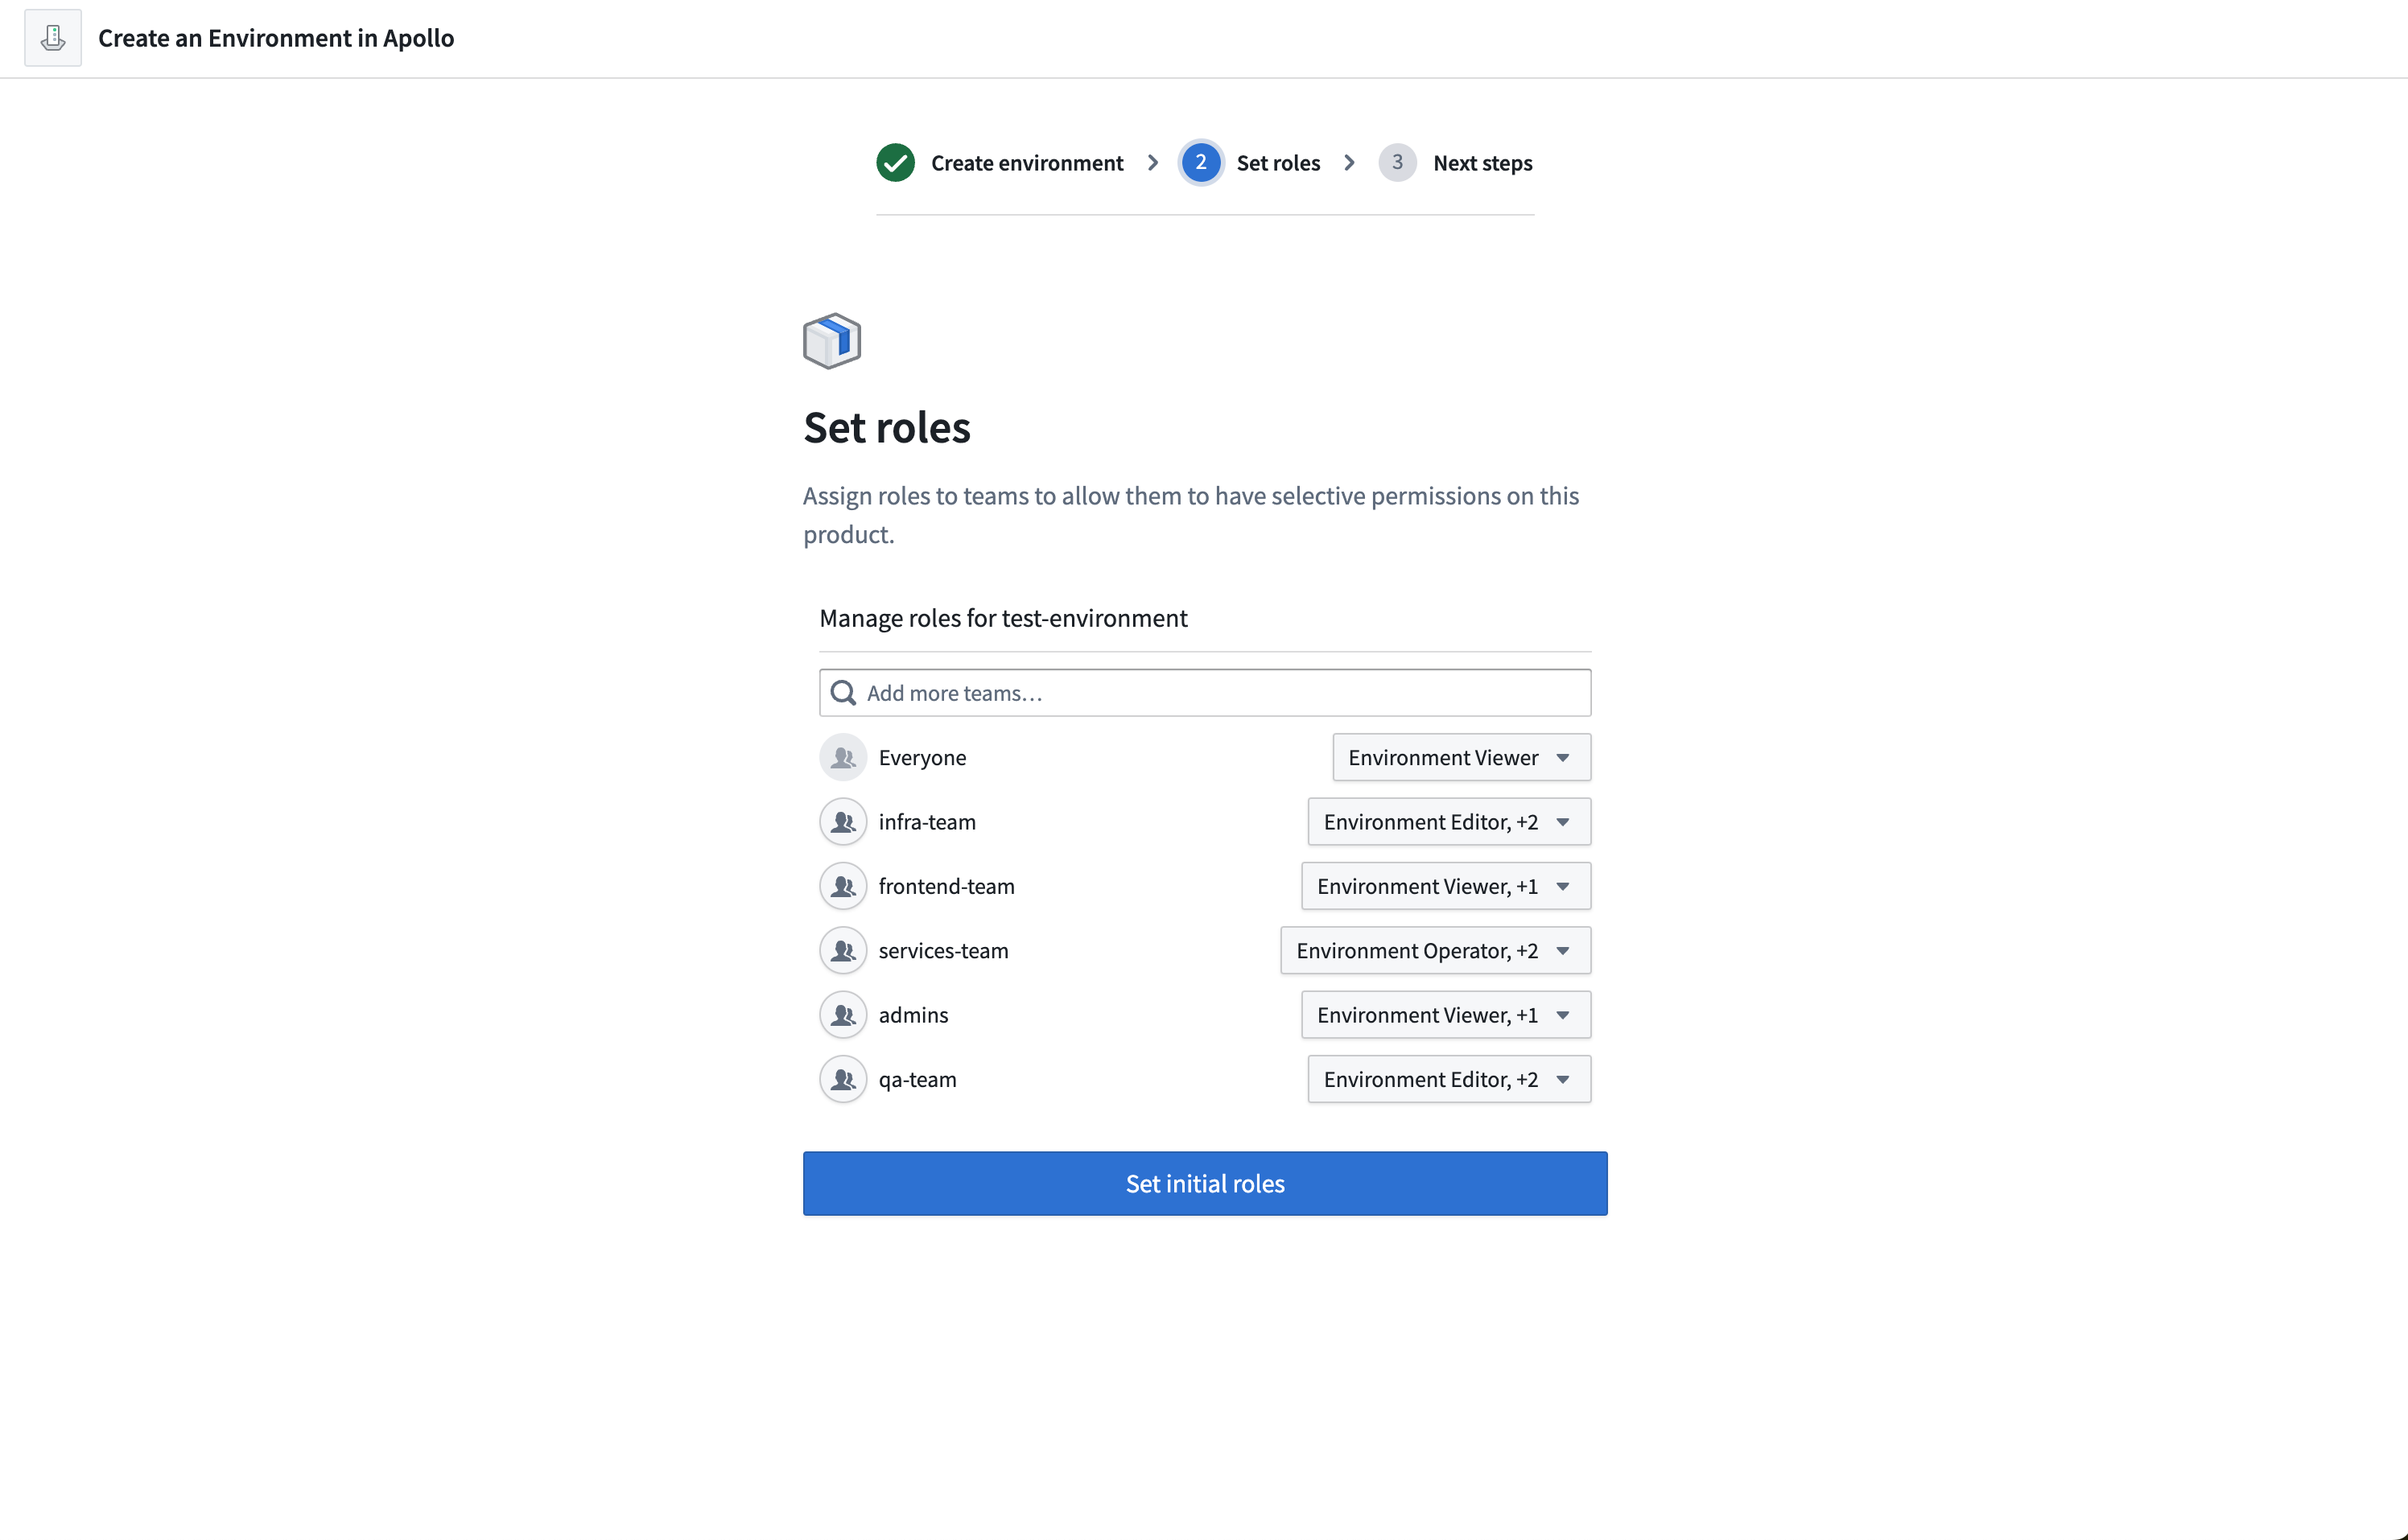
Next you will set the roles for the Environment. These roles define the permissions other Teams will have in the Environment. You can change these roles and permissions later. When you are finished, select Set initial roles.
Next, you will determine which Artifact Registries to assign to the environment. If you are deploying Products that require access to your own OCI registry, you should assign it to the Environment. See Artifact Registries for more information. When you are finished, select Add Artifact Registries. This will create a change request that needs to be approved before it will be assigned to the Environment.
Finally, you can access your newly created Environment. Select Go to your environment to view the Environment.
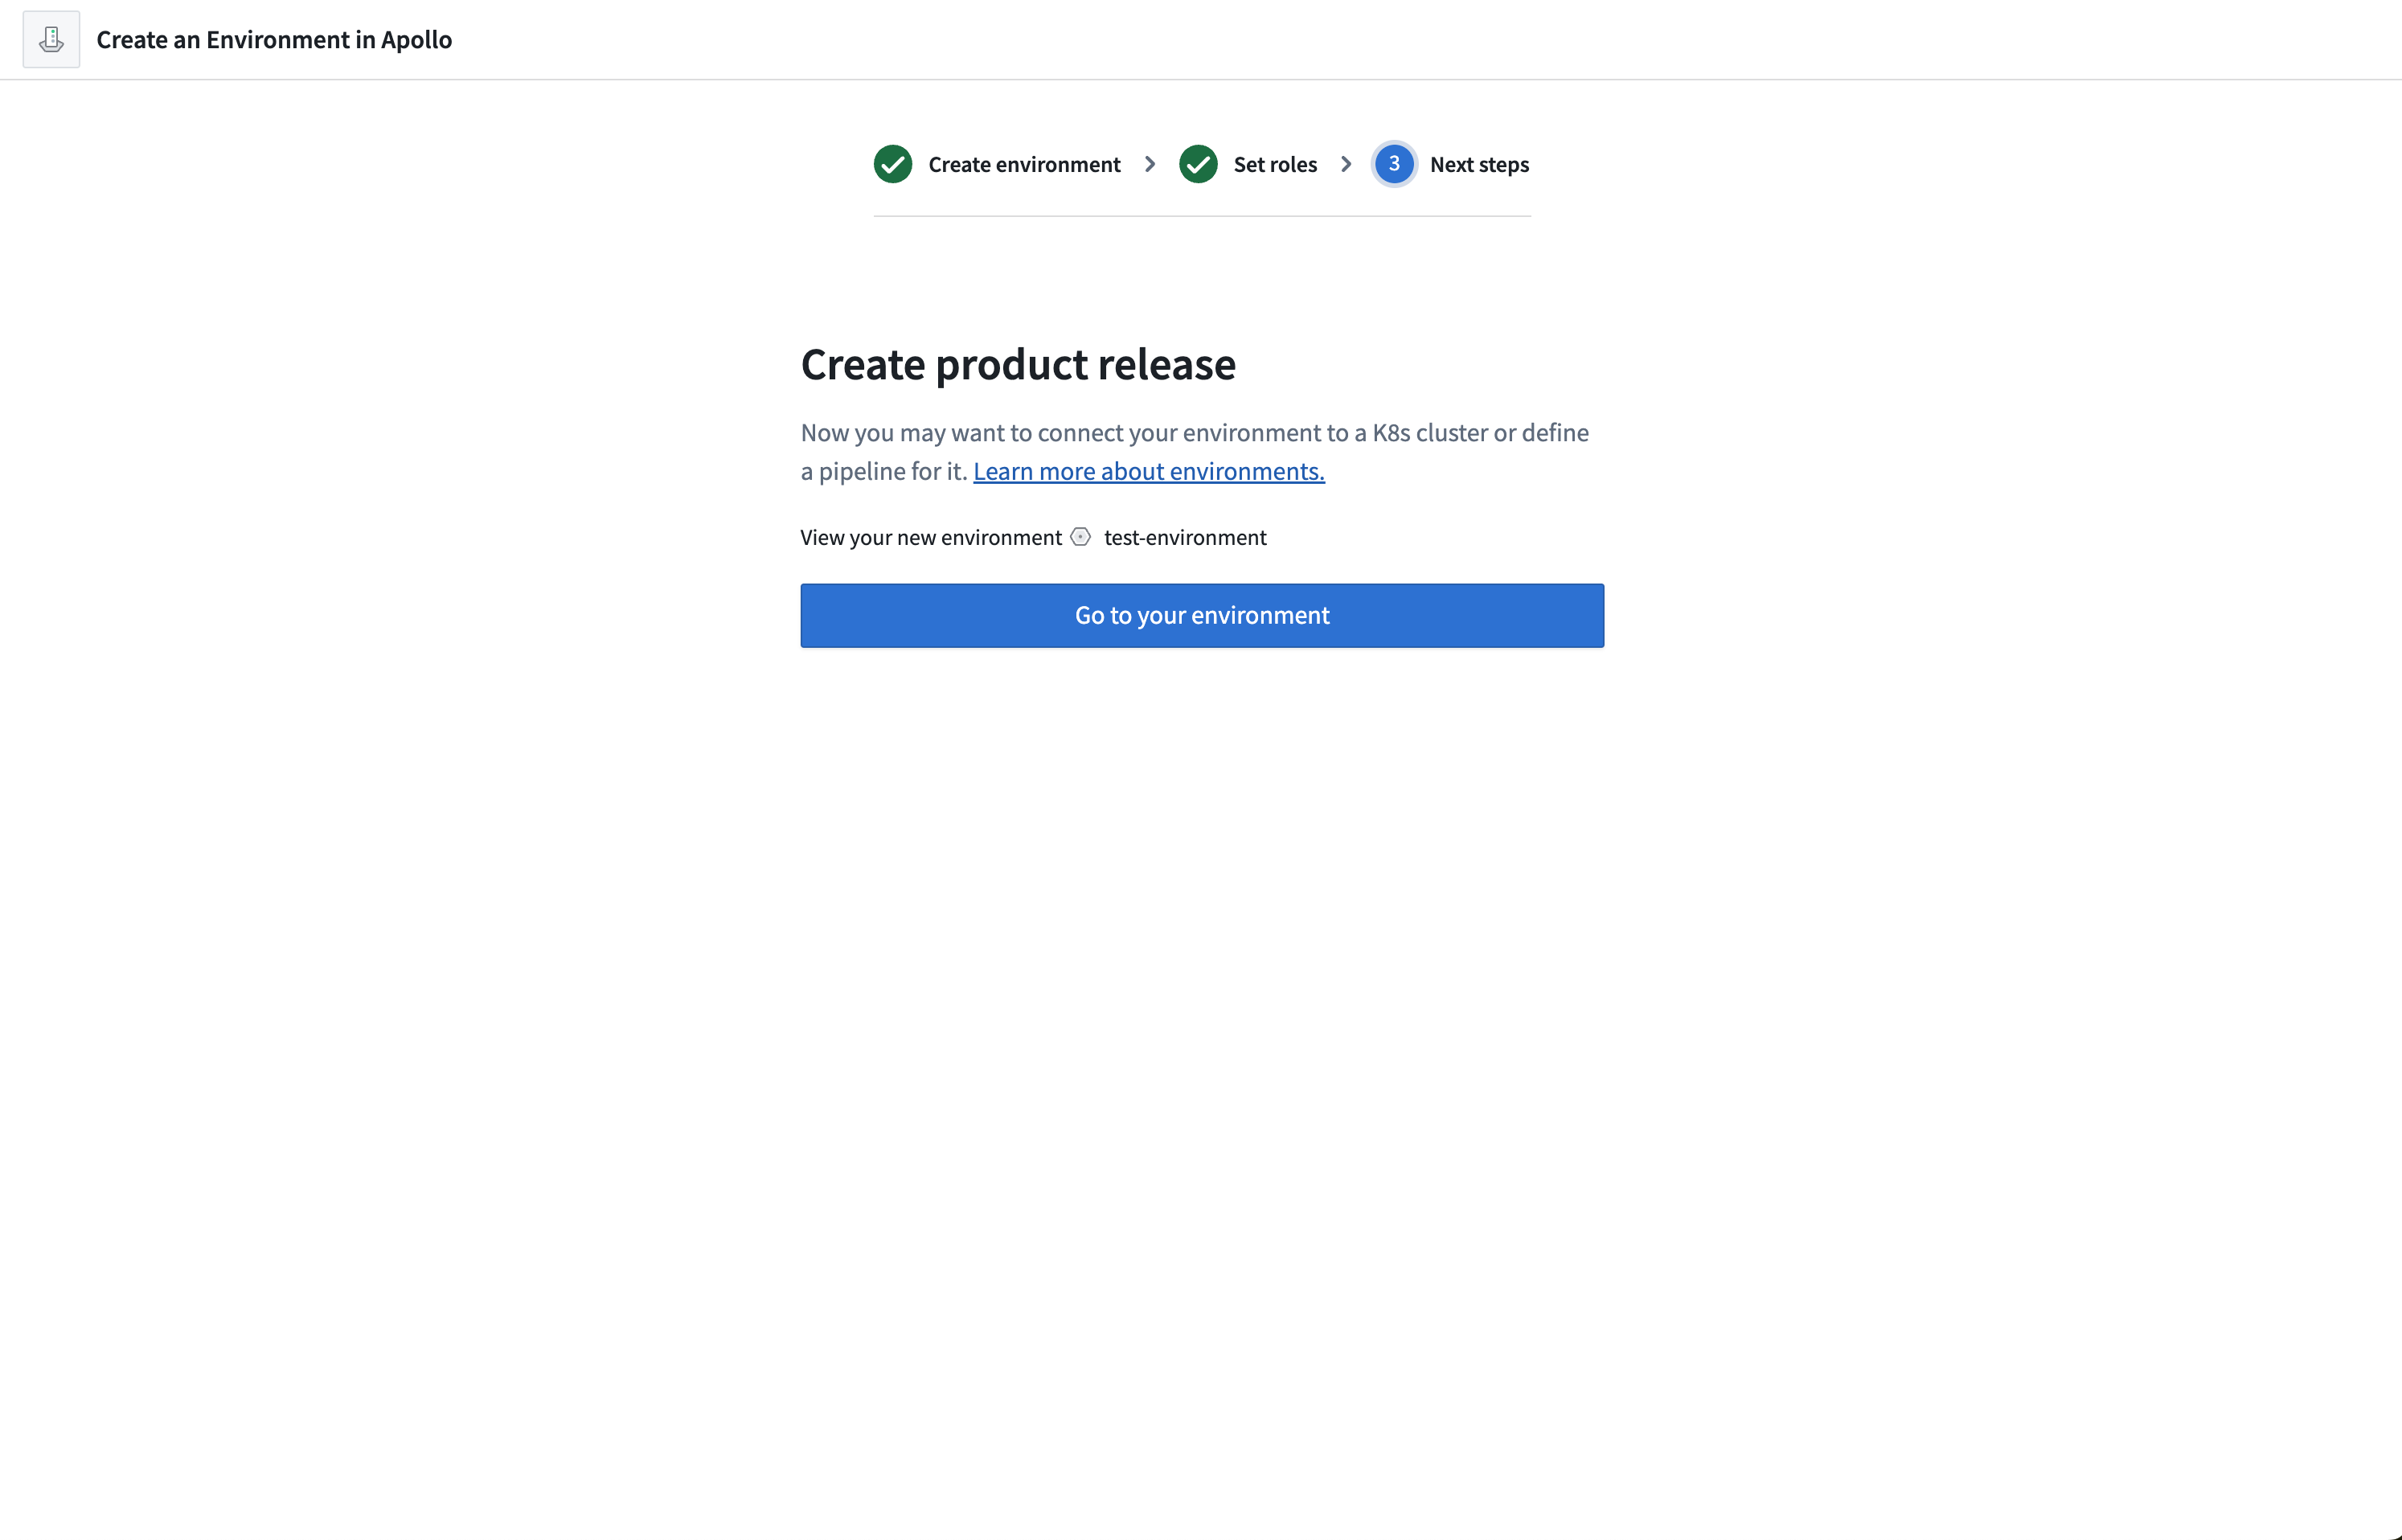
You can now connect your Kubernetes cluster to your Environment.
Connect Environment to Apollo
Deploy Apollo Agent to cluster
Before connecting your Kubernetes cluster to the created Environment, you must install some basic Apollo services in your Environment. If you chose to install the "Apollo Control Plane" Module, Apollo will automatically install the necessary services in your Environment. If you chose the "Blank environment" Module, you should install an Apollo Agent yourself. We recommend installing either the "Apollo Control Plane" Module to have everything set up for you.
If you chose the Dev accreditation, the required services will be installed automatically, and you can continue to the next step. Otherwise, Apollo will create a change request to install the services in your Environment.
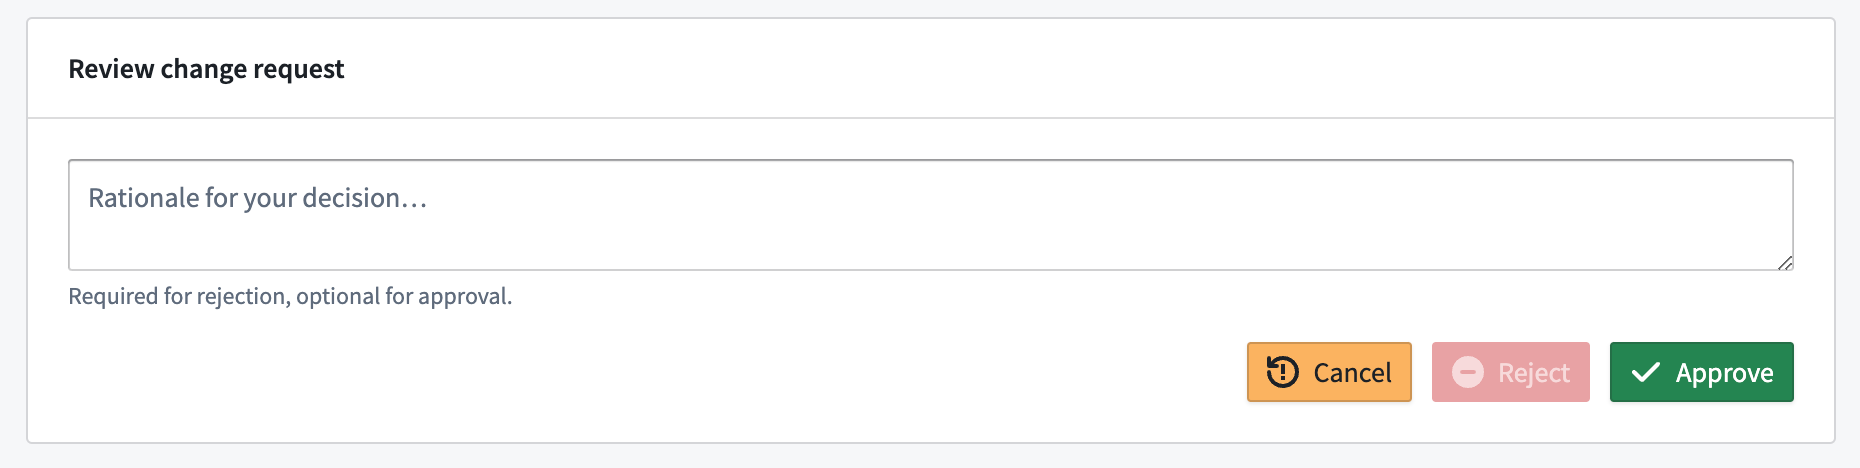
You will not be able to approve your own change request, so you will need someone else from your team to approve it.
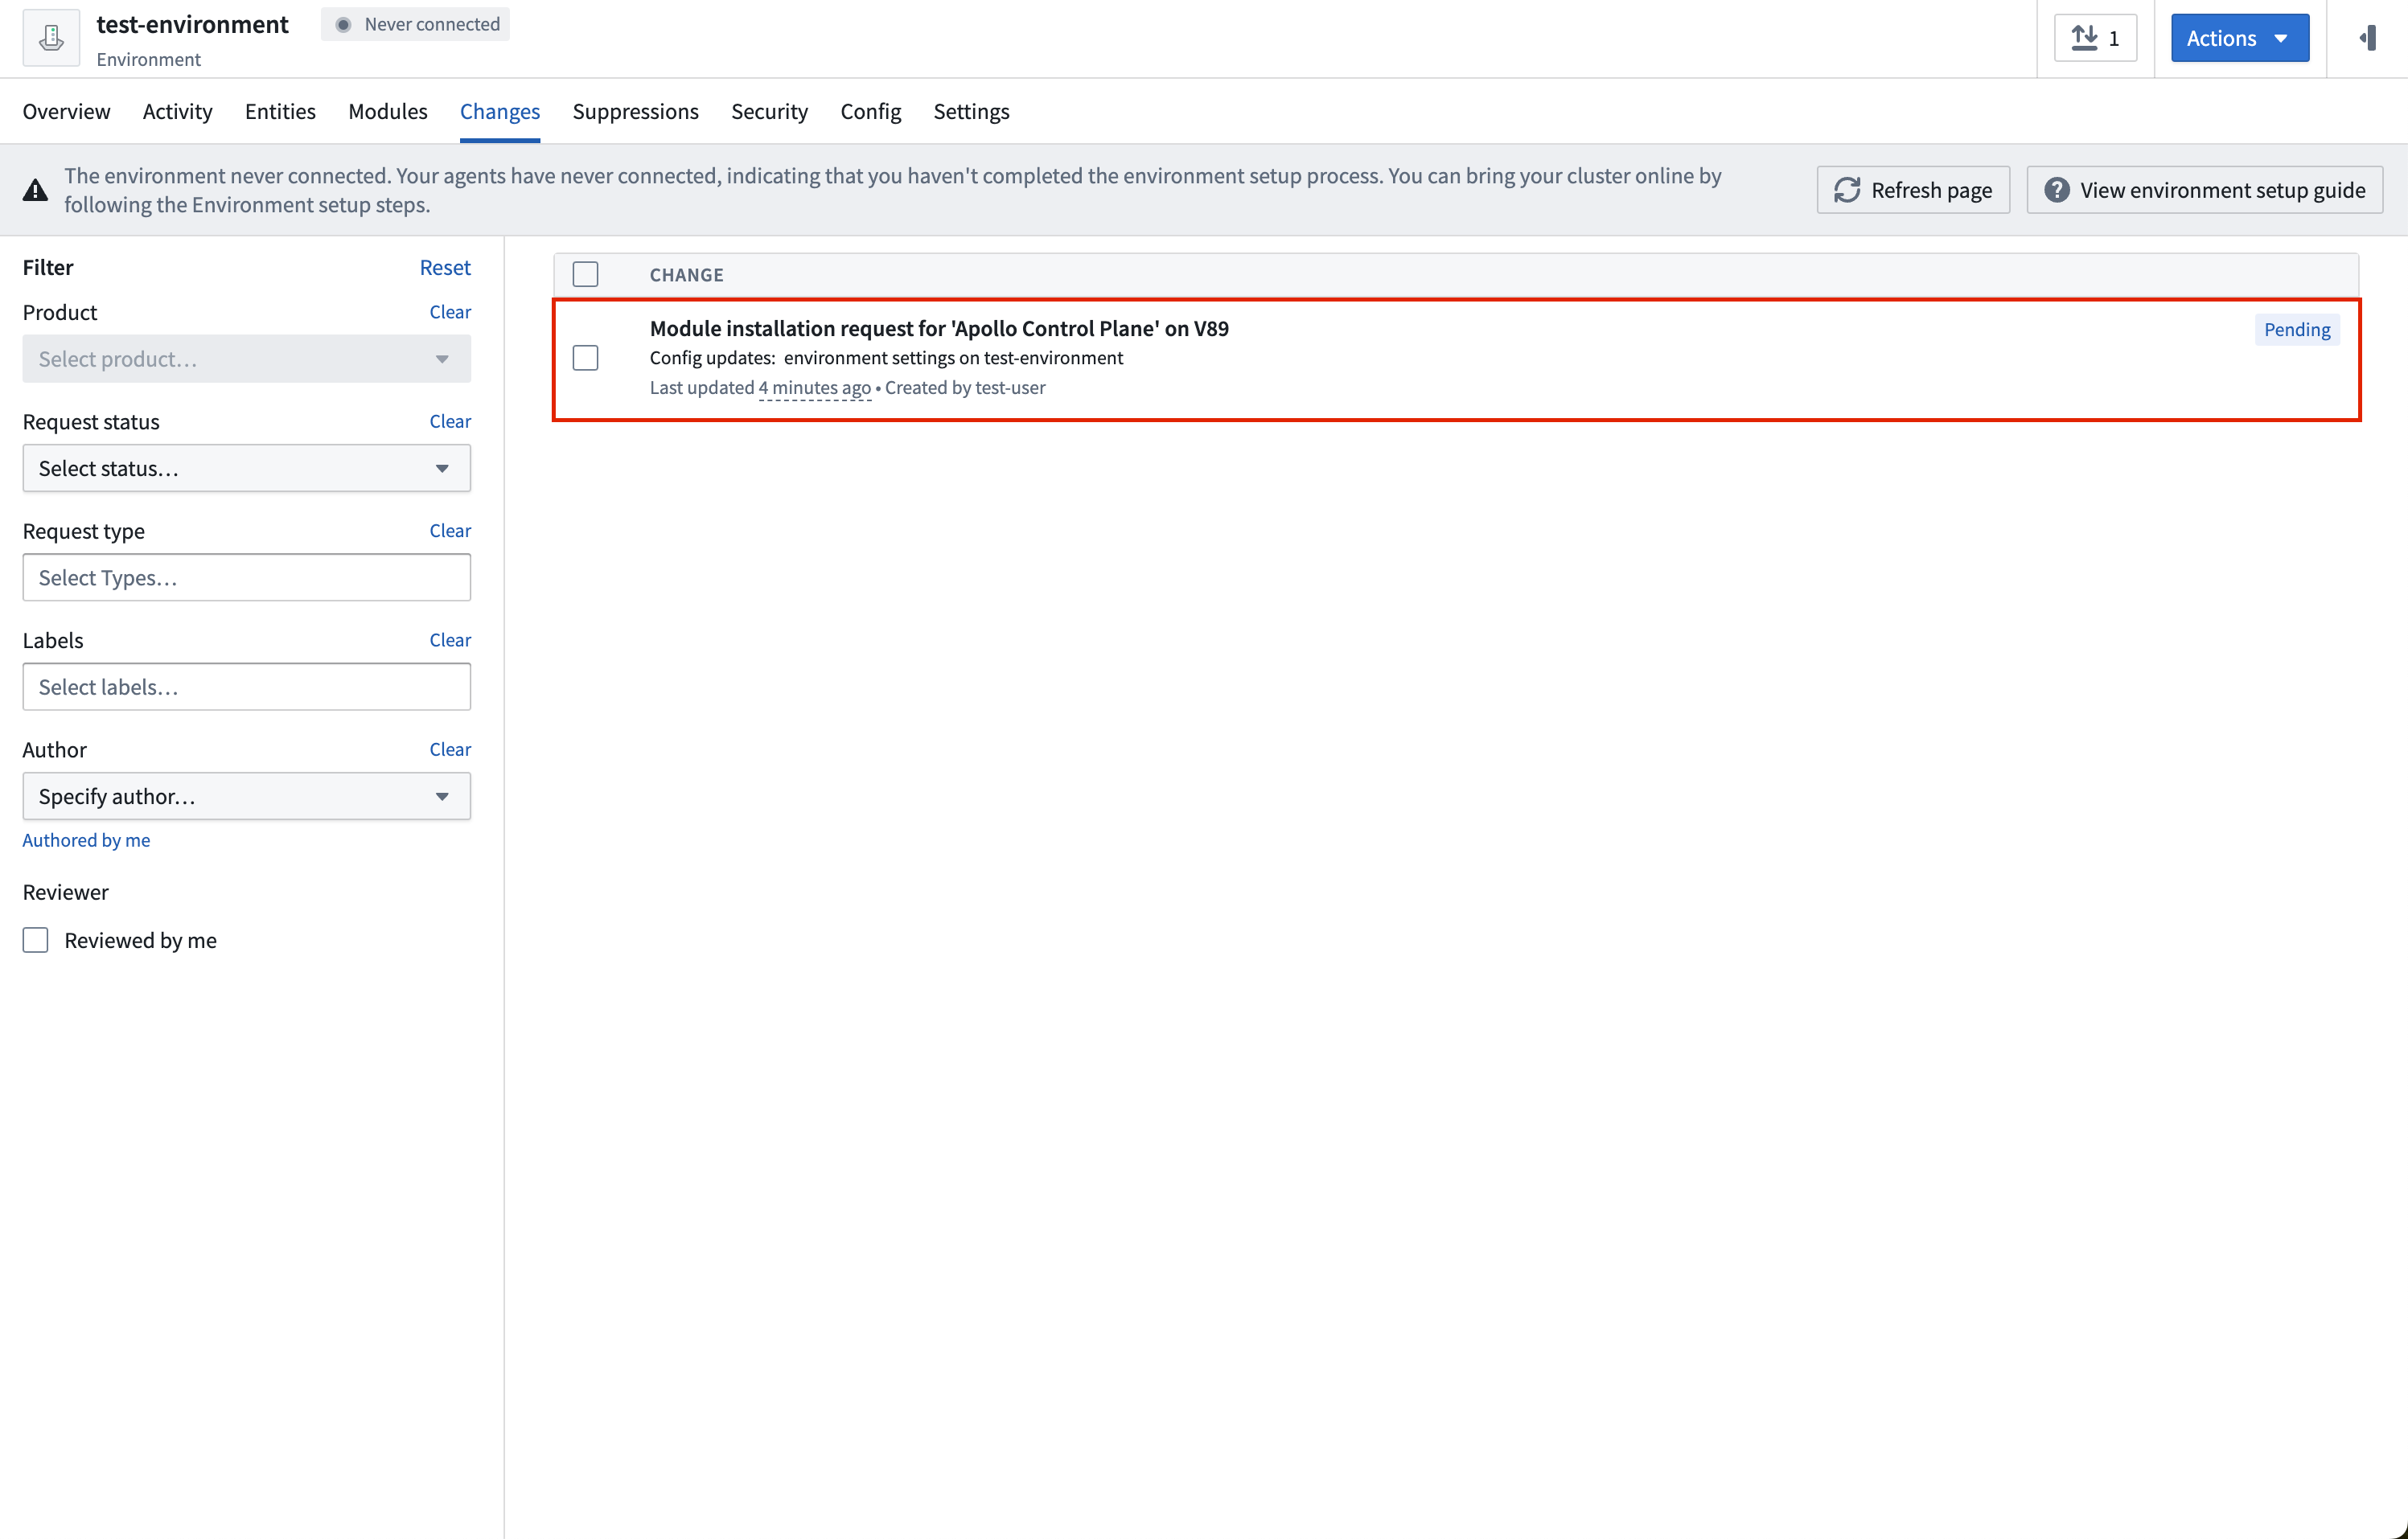
To approve the change request, navigate to the Changes tab in the Environment.
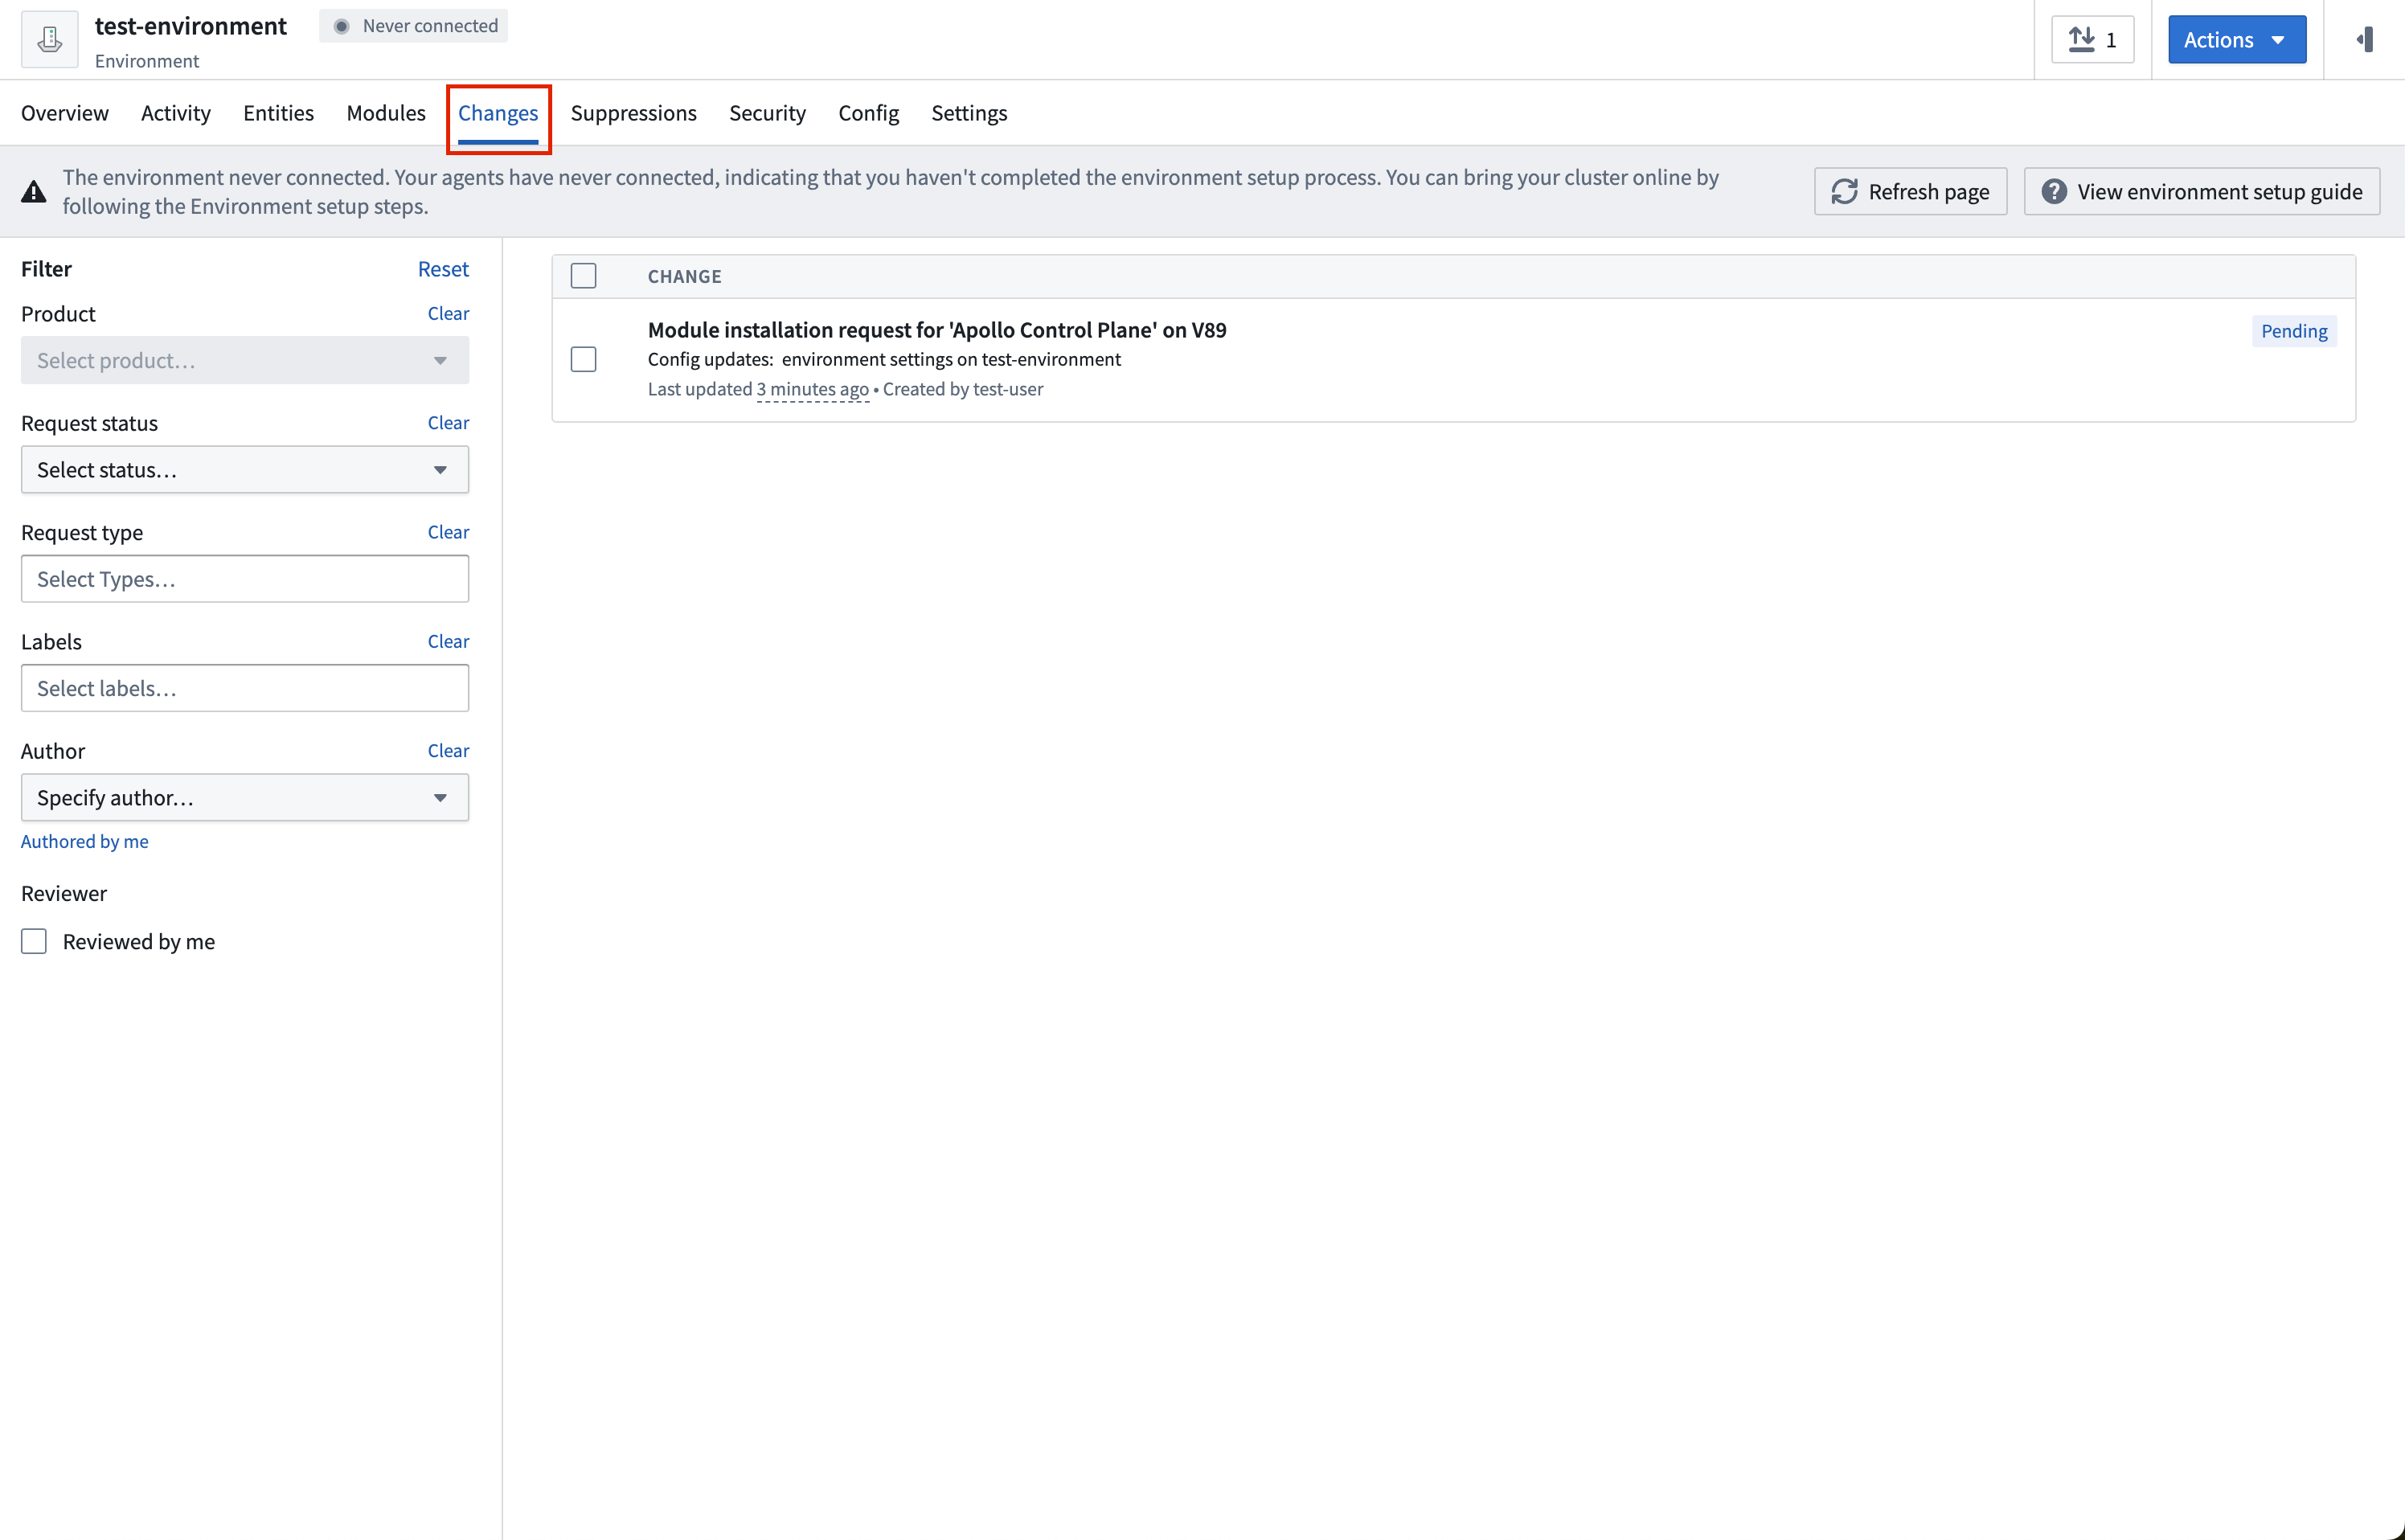
Select the change request to approve it:
Once the change request is approved, you can connect your Environment.
Connect Environment to Kubernetes cluster
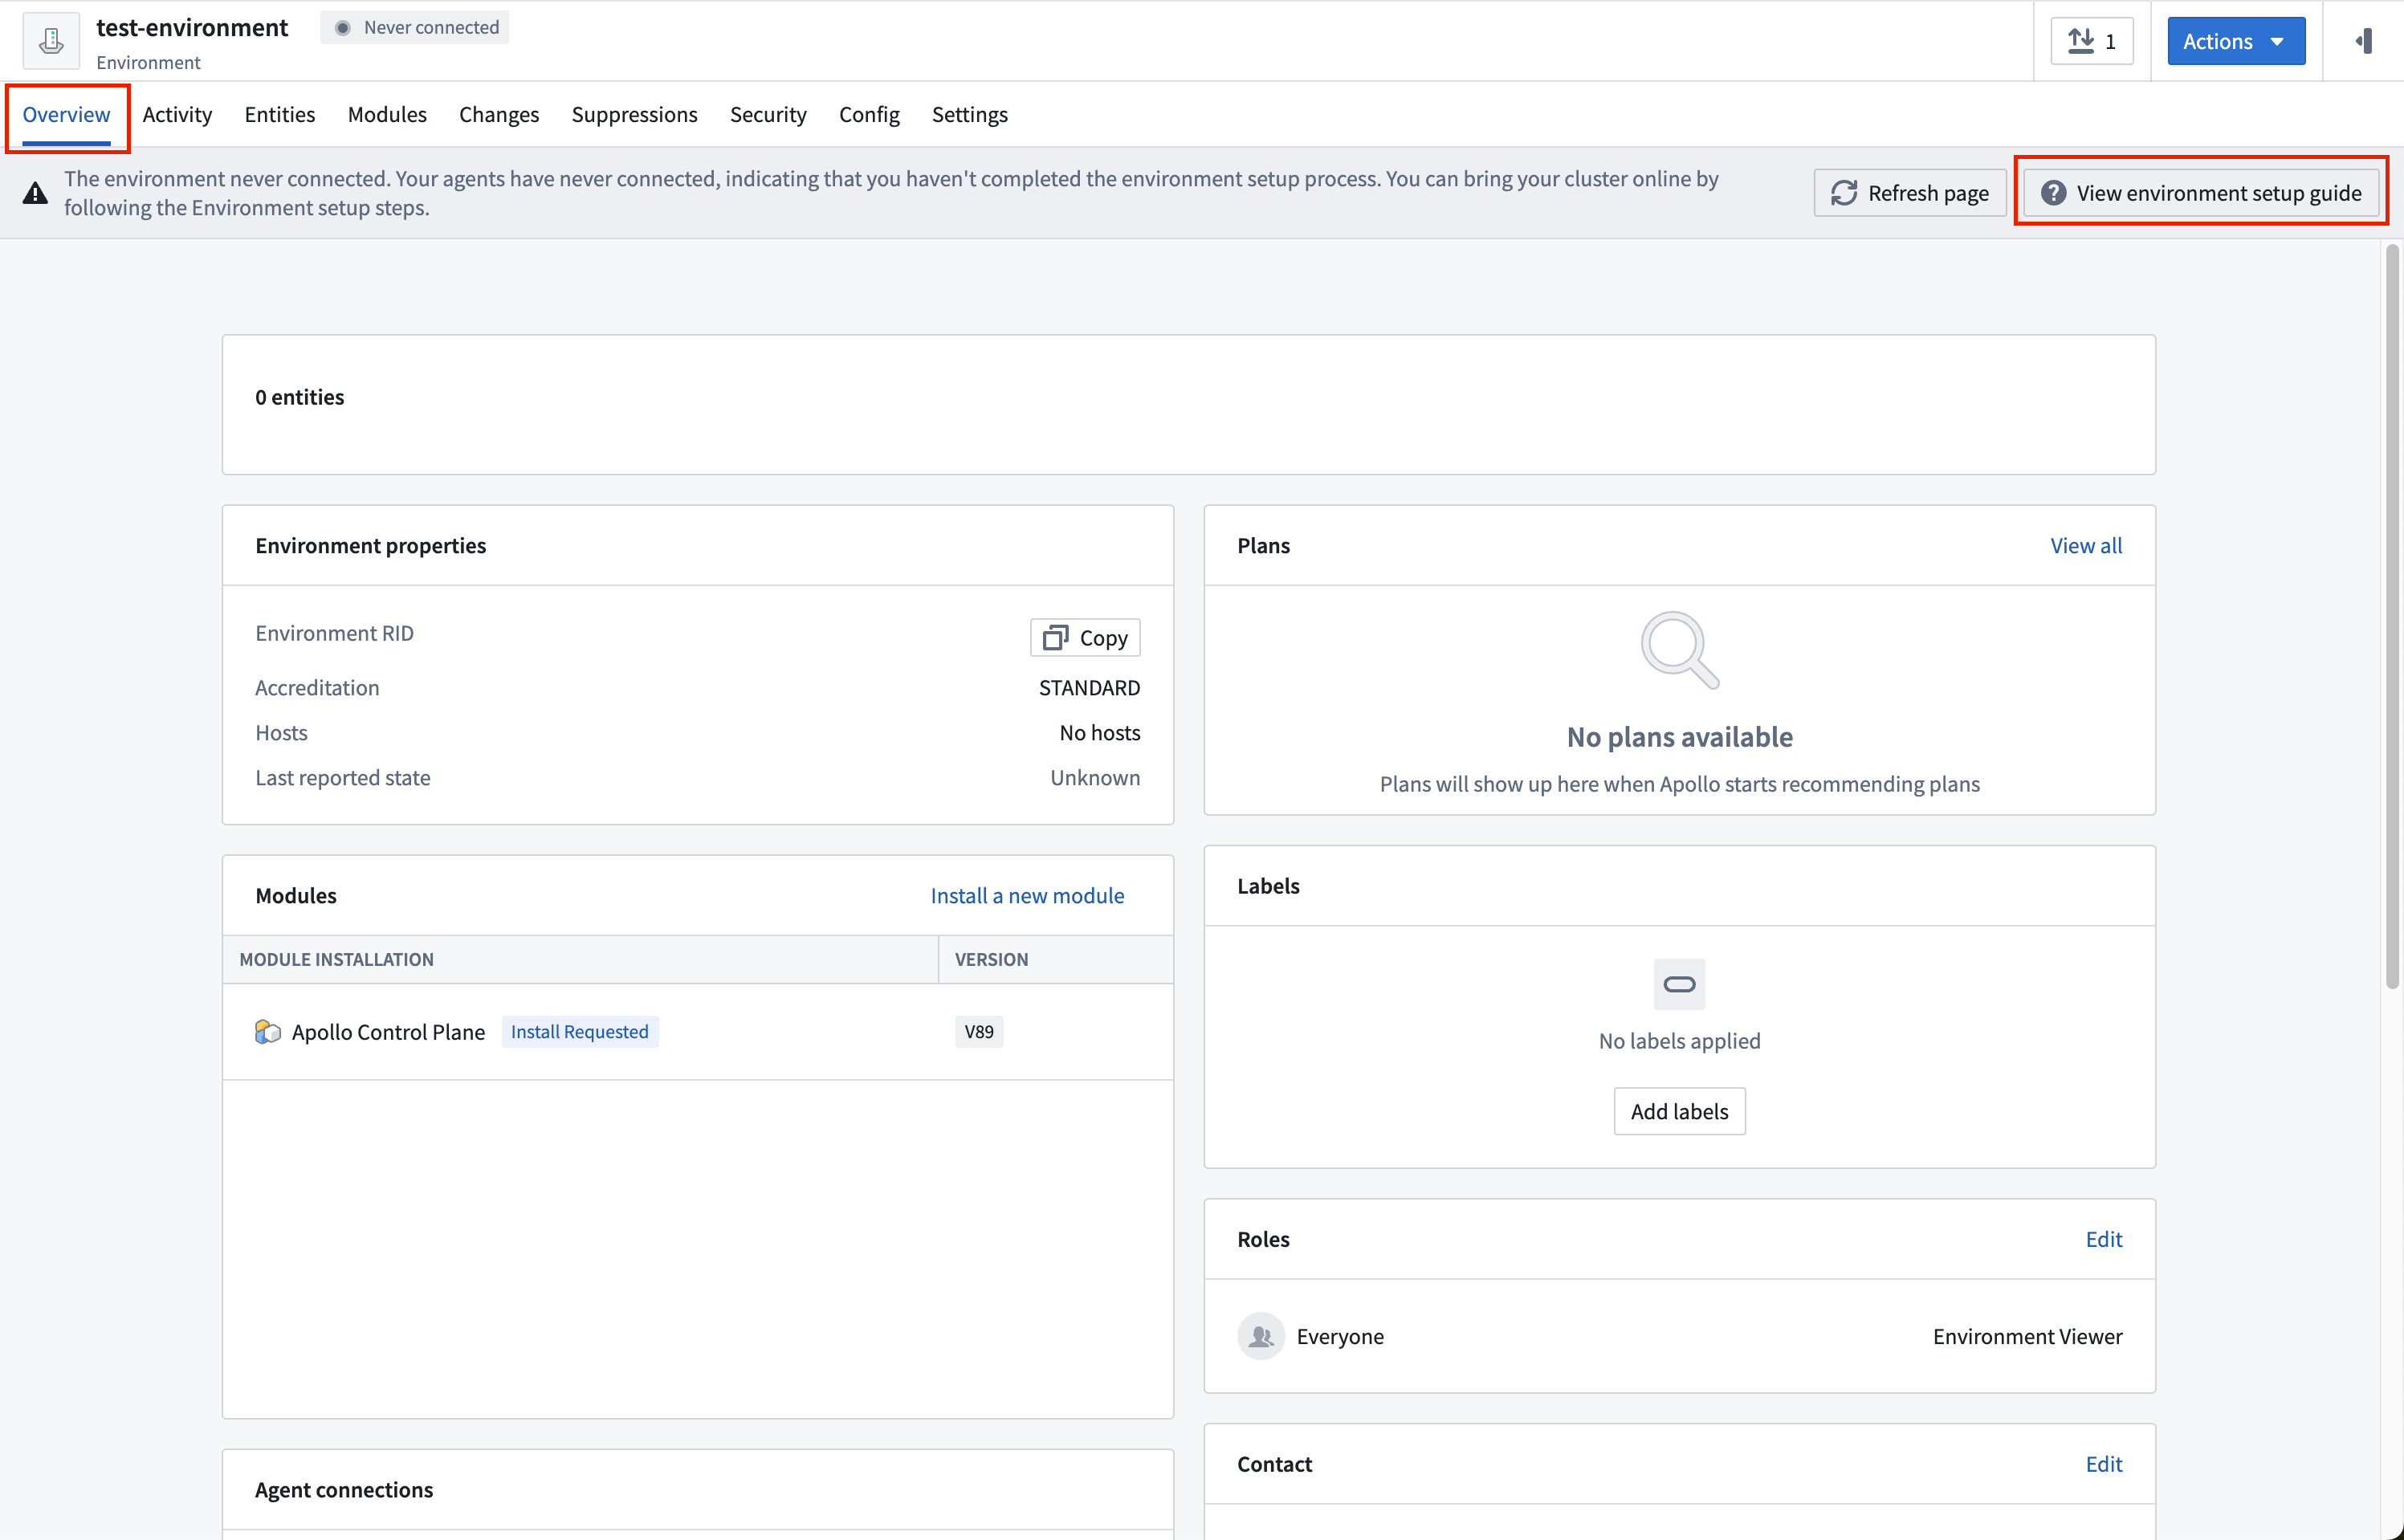
Navigate to the Overview tab of your Environment. Below the tabs, Apollo will display a banner stating that the Environment never connected. On the far right, select Environment setup guide. This can also be accessed in the Actions dropdown under Environment setup steps.
Follow the steps in the Environment setup instructions to connect your new Apollo Environment to your Kubernetes cluster.
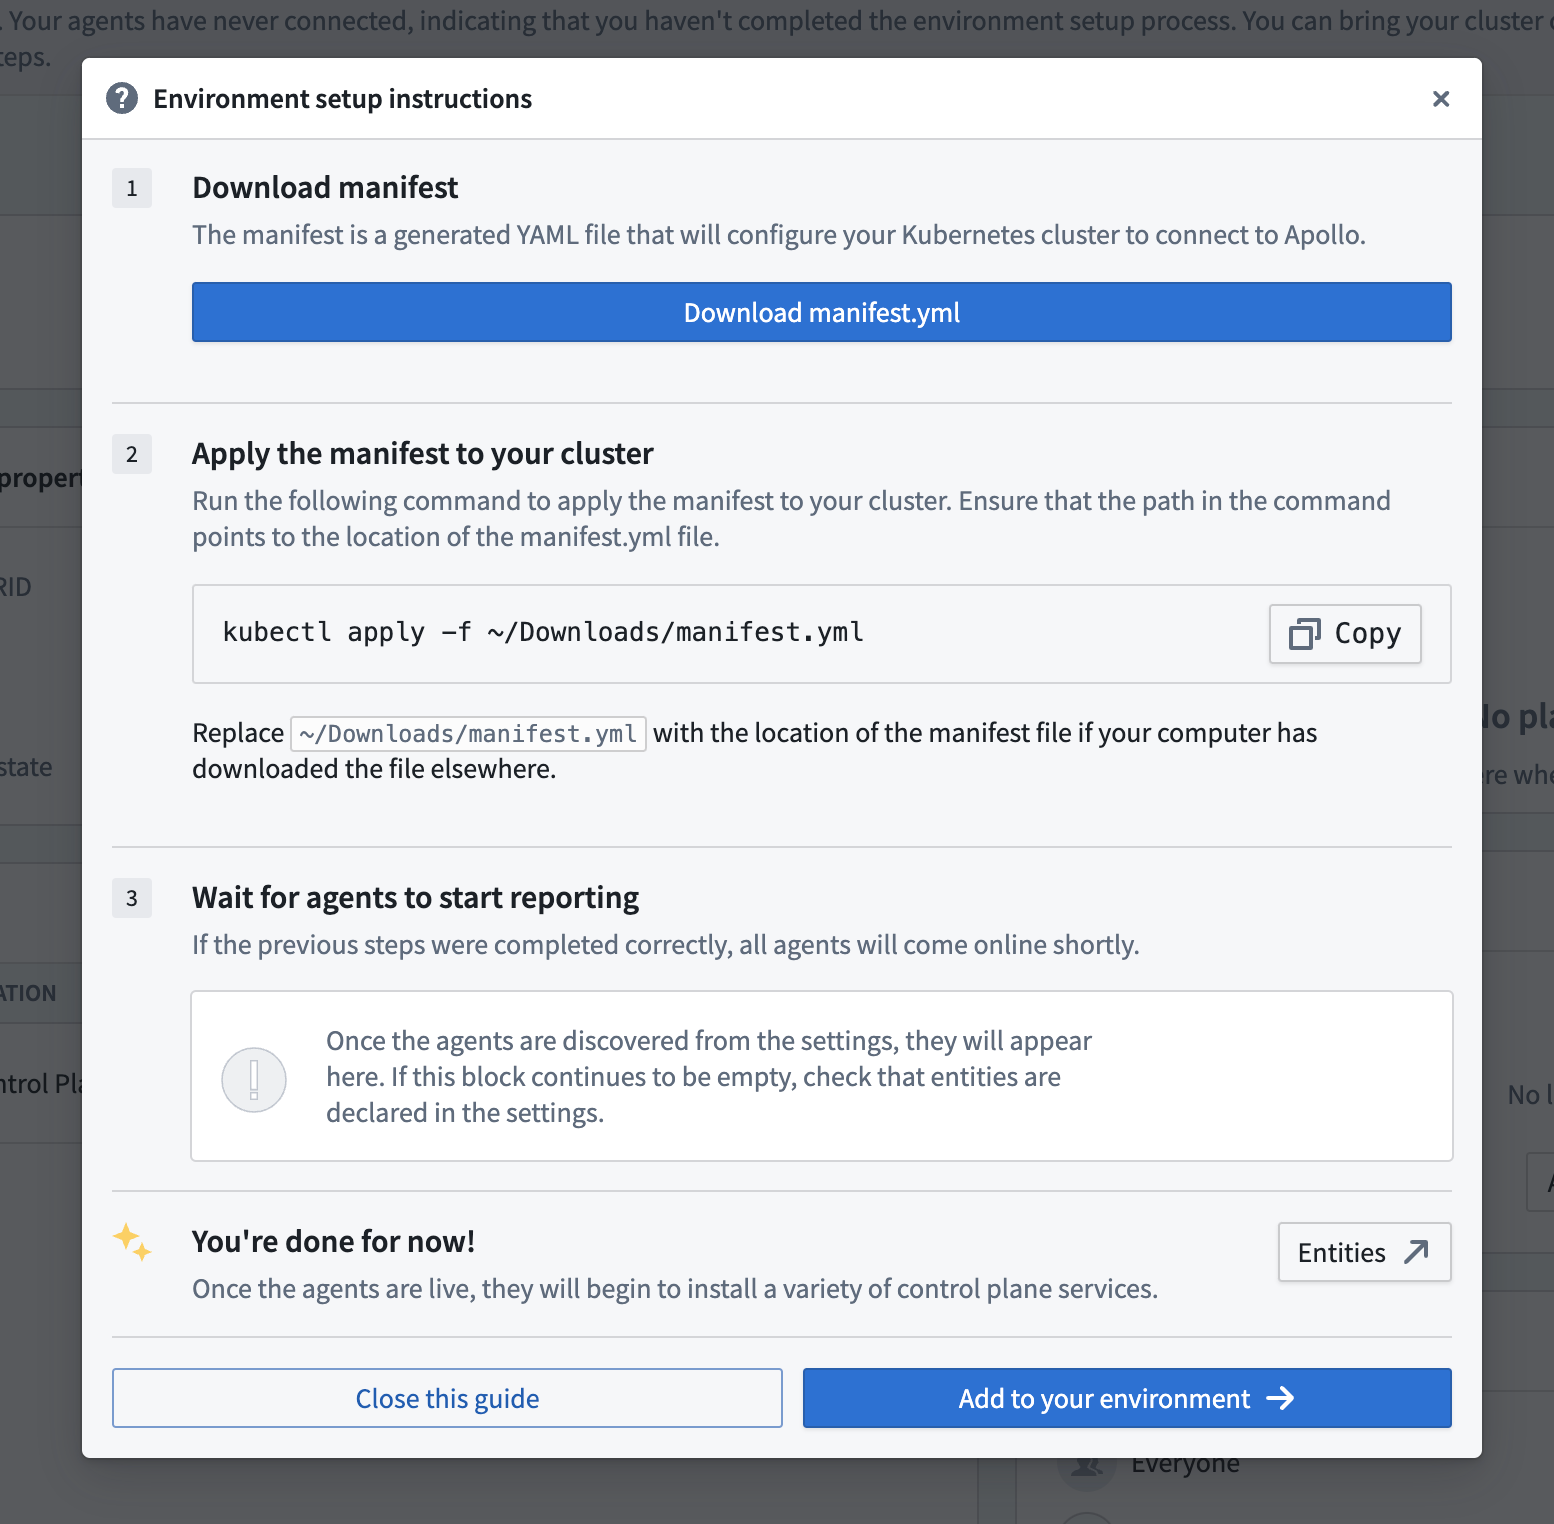
Download the initial Kubernetes manifest and apply it to your Kubernetes cluster to install helm-chart-operator. You can run the following command to ensure that Spoke Control Plane services are now running in your cluster:
Copied!1$ kubectl get pods --all-namespaces -o wide
A green check mark will appear next to each Apollo Agent once it is running, which means your Environment is now fully Apollo managed.
Once setup is completed, you can then install your first Product.
More information about Environment management settings can be found in Editing Environment management settings.